So the parts are taking their time to get to me so I took the opportunity to do some work on some of the bits that I can’t normally get to. Now this isn’t going to be a concourse bike this for now is just to slow the deterioration and to tidy a few bits up.
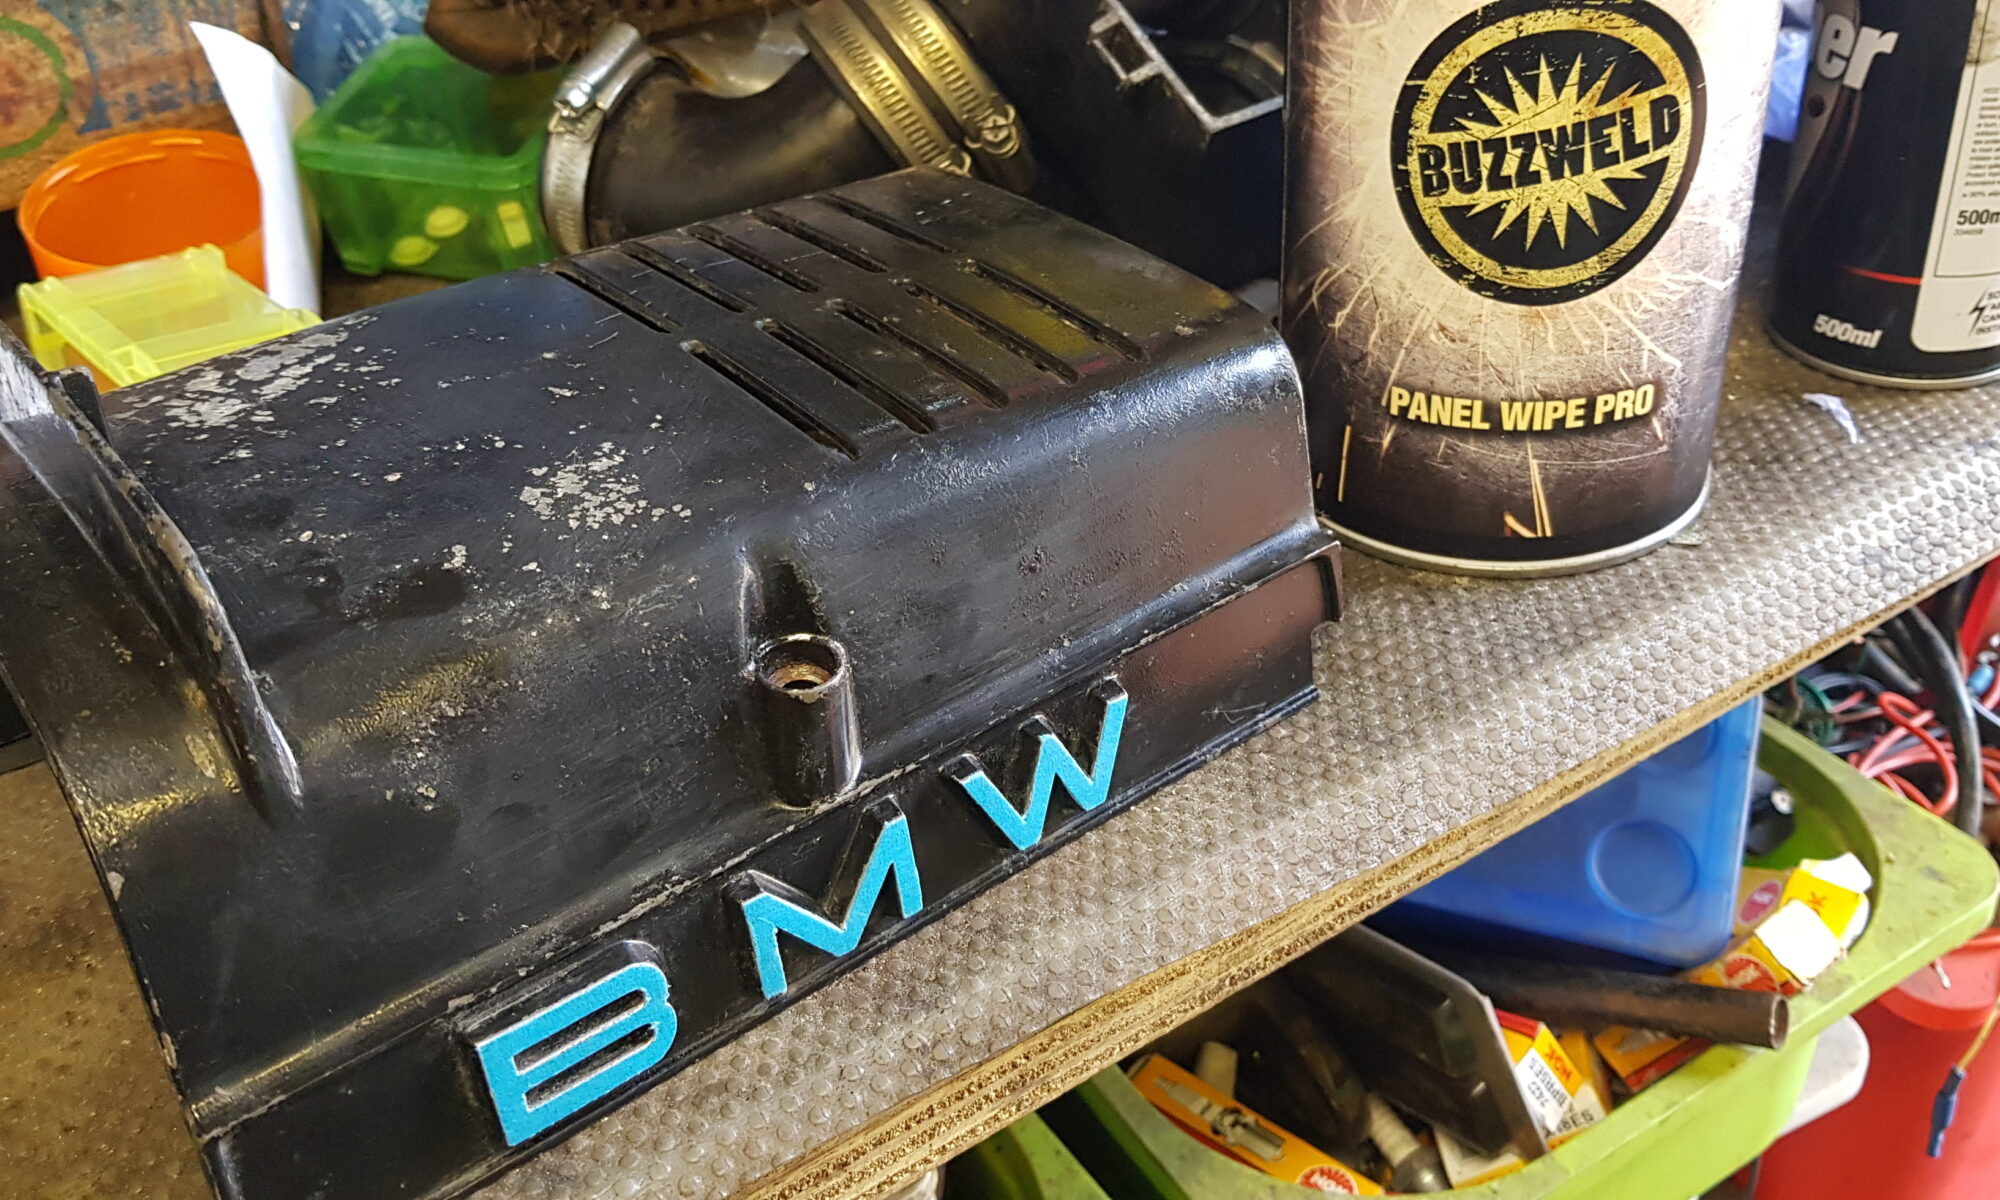
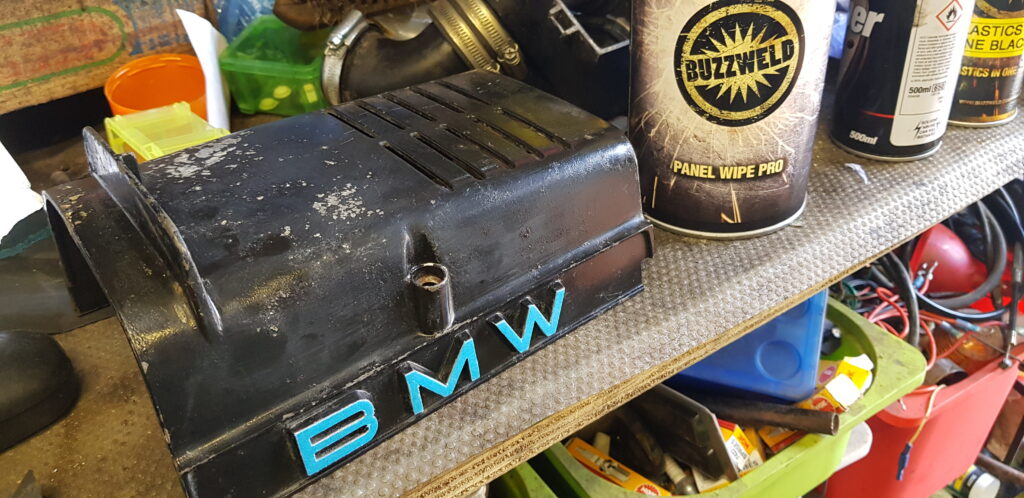
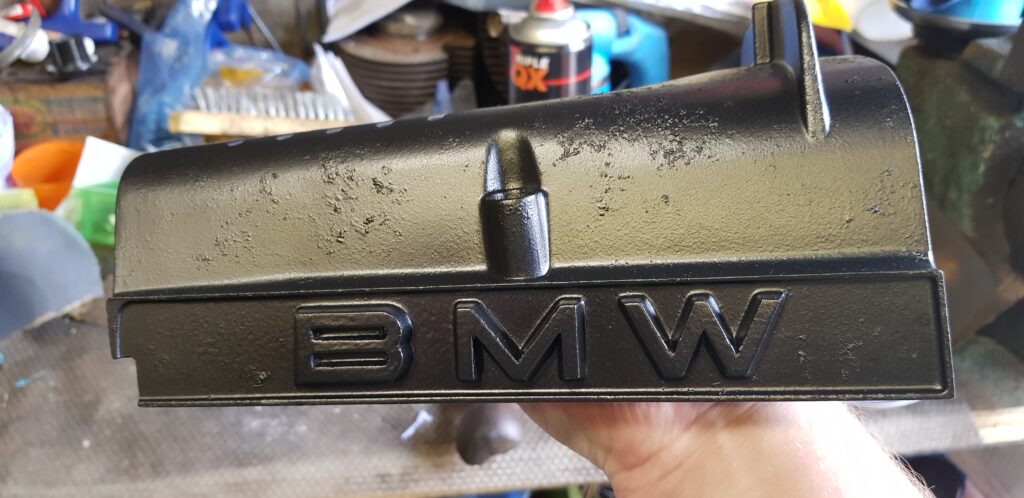
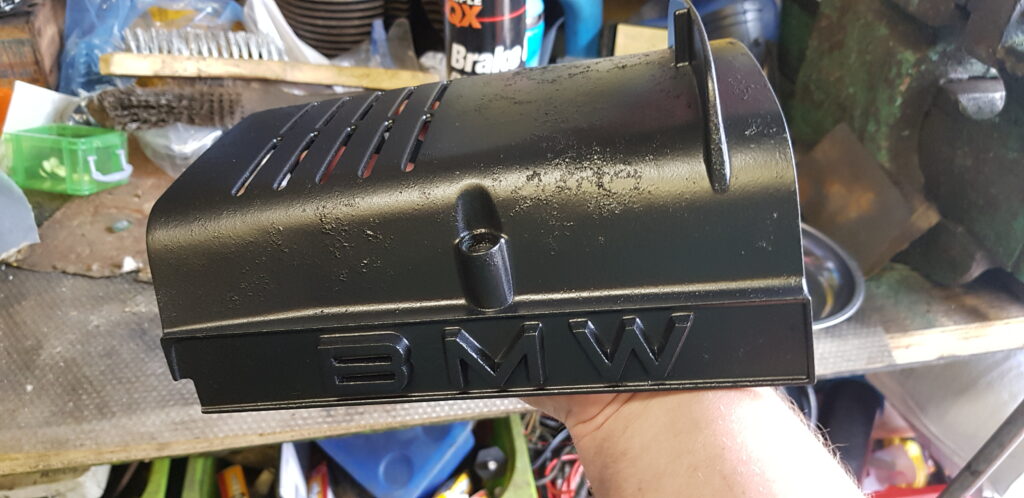
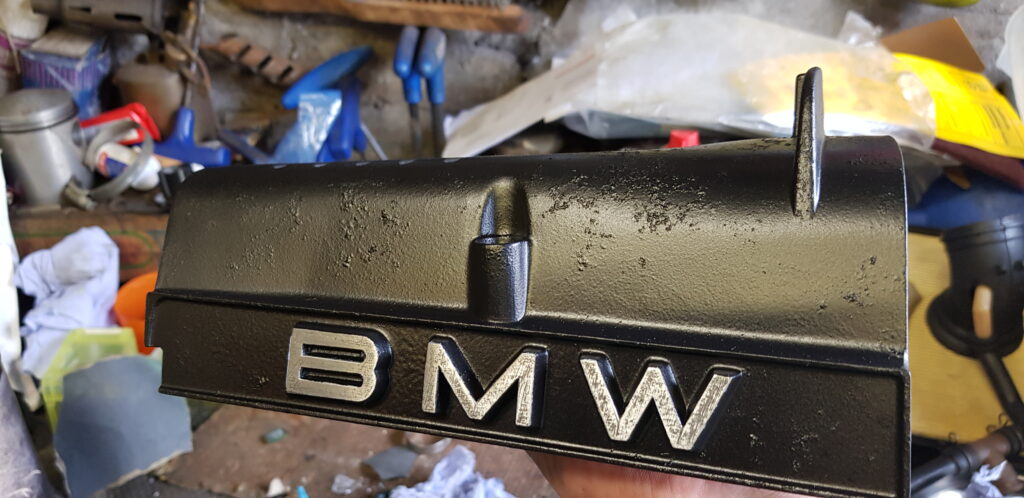
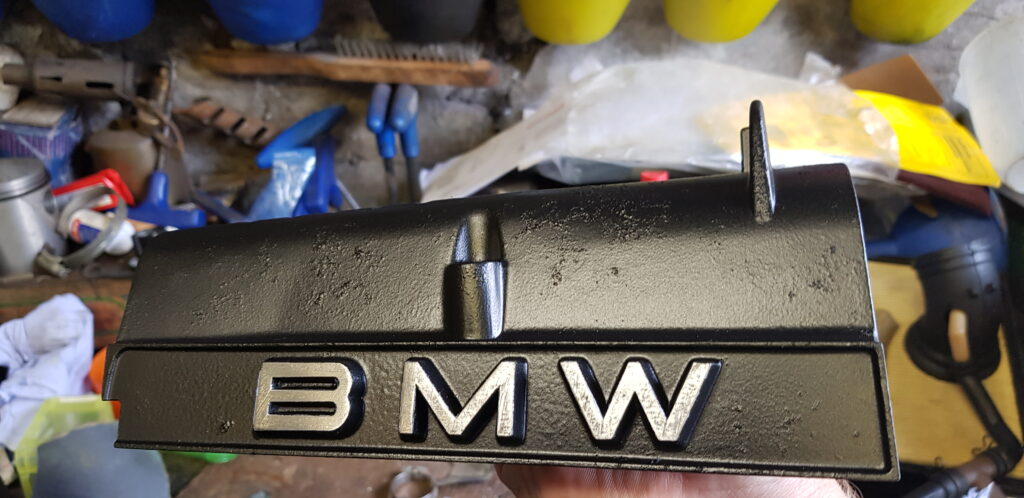
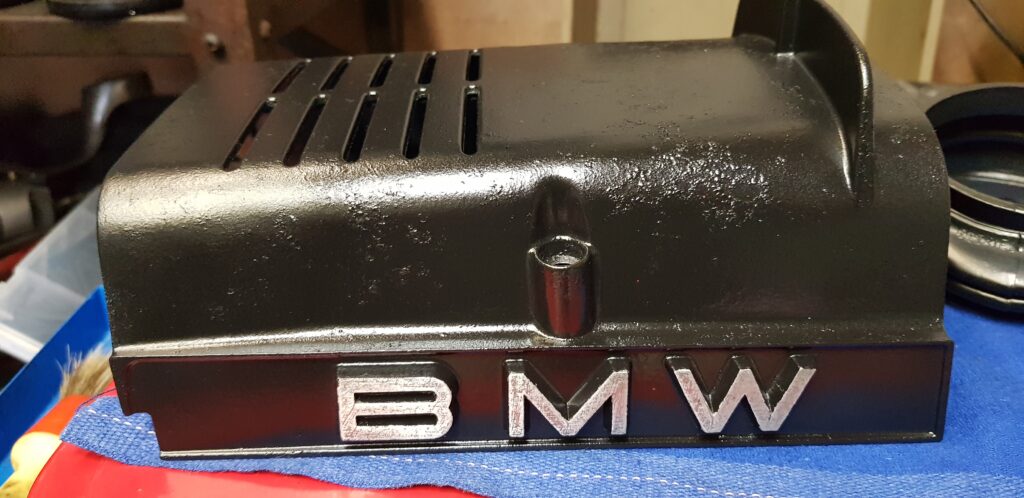
Just a coat of primer, black paint and a self-etching lacquer to finish it off. This is mostly hidden, I just wanted it to sparkle a little. I also painted the airbox and the airbox cover while I was at it.
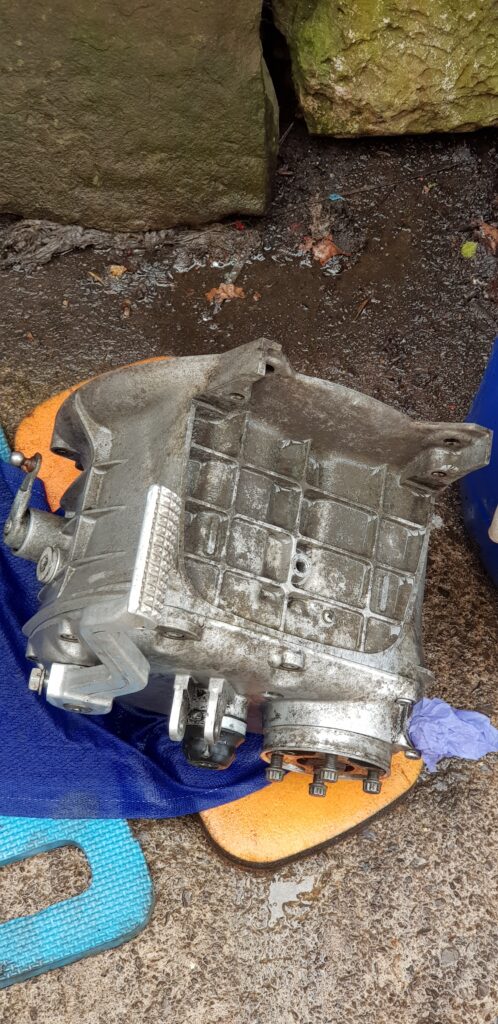
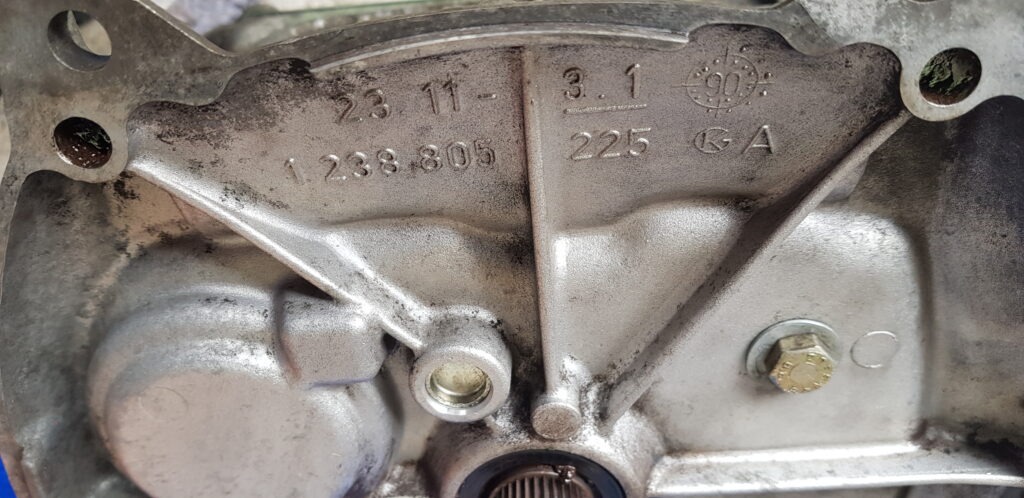
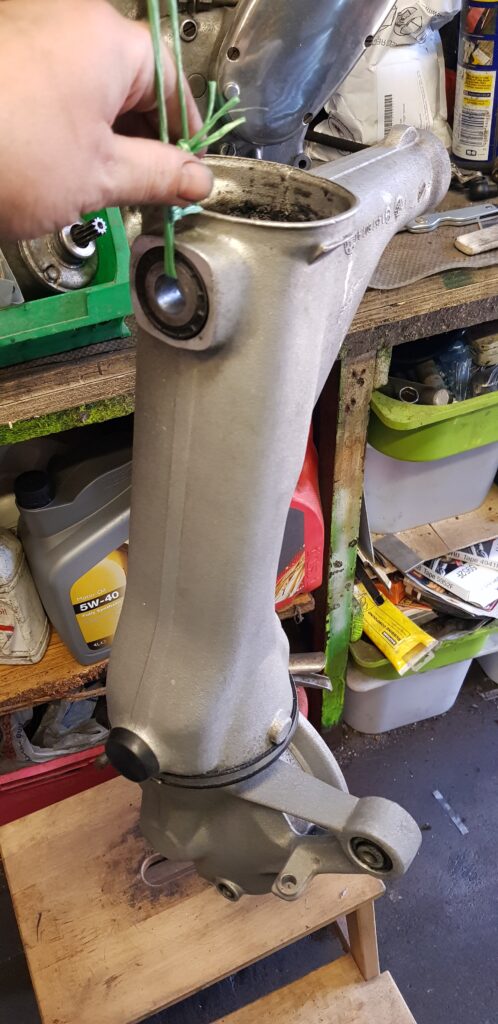
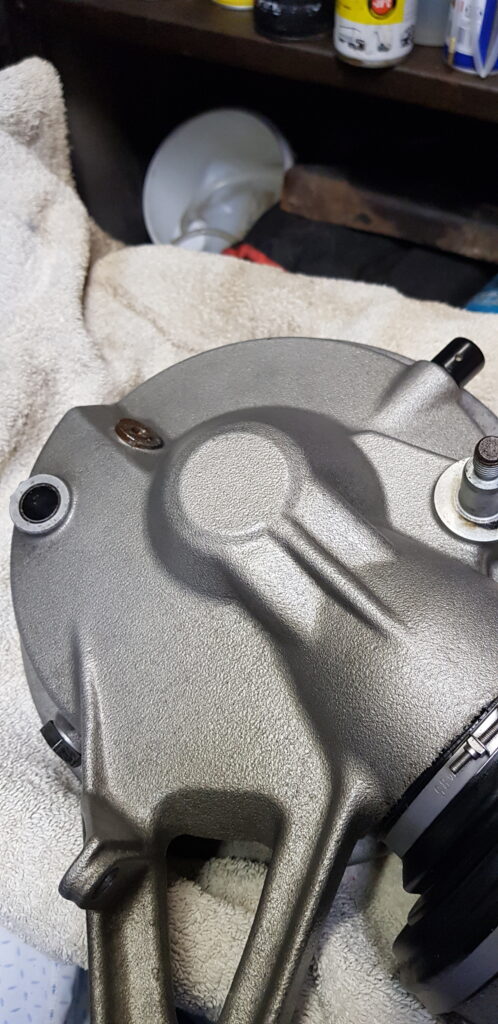
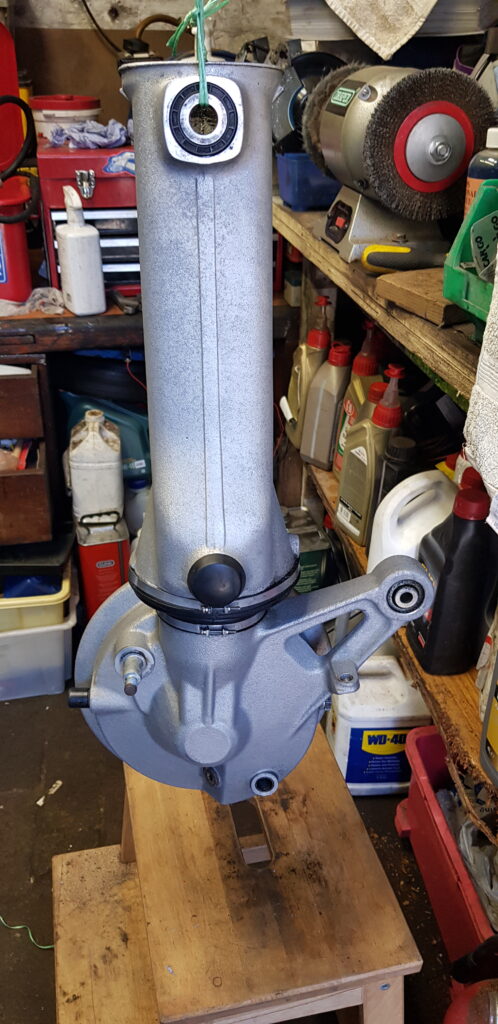
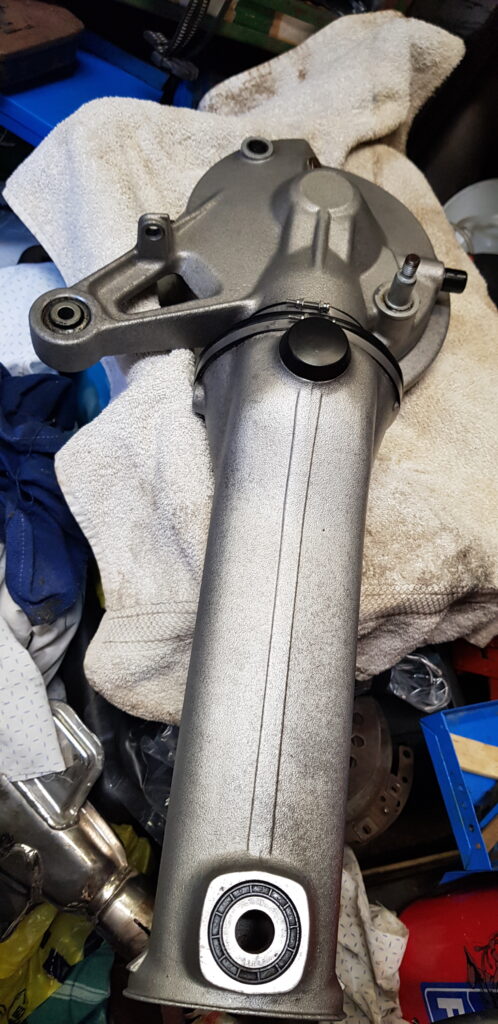
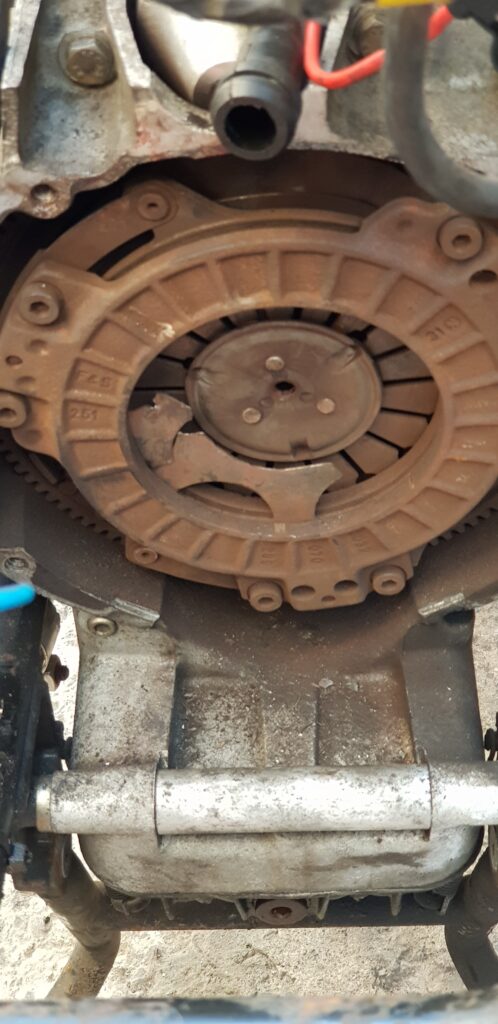
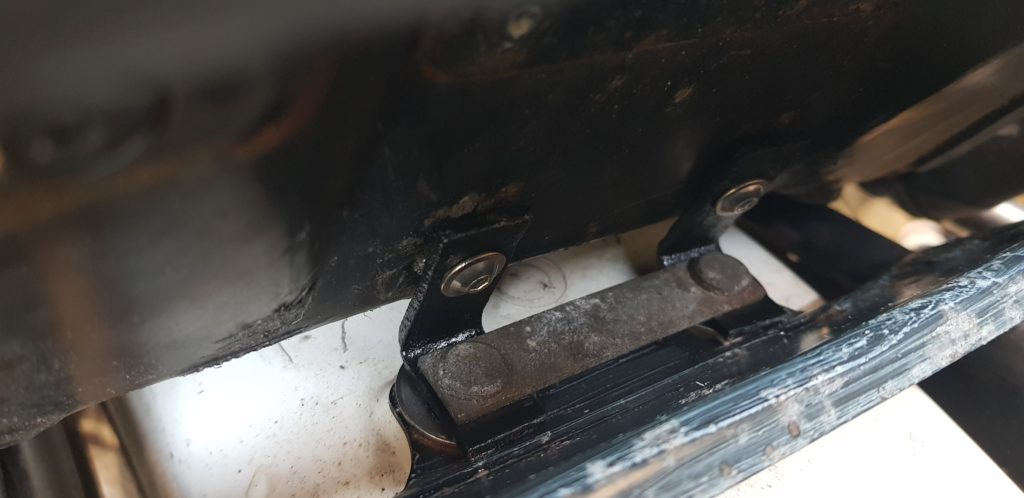
Another job was to clean the gearbox and the clutch housing. It took quite a bit of time to get it this tidy. Next stage would to get it vapour blasted but I just don’t want to spend that kind of money yet.
While I have the rear shaft assembly out I gave that a damned good clean and then sealed with some more self-etching lacquer from the people at Buzzweld.
Now to await the parts so I can get this thing back together.
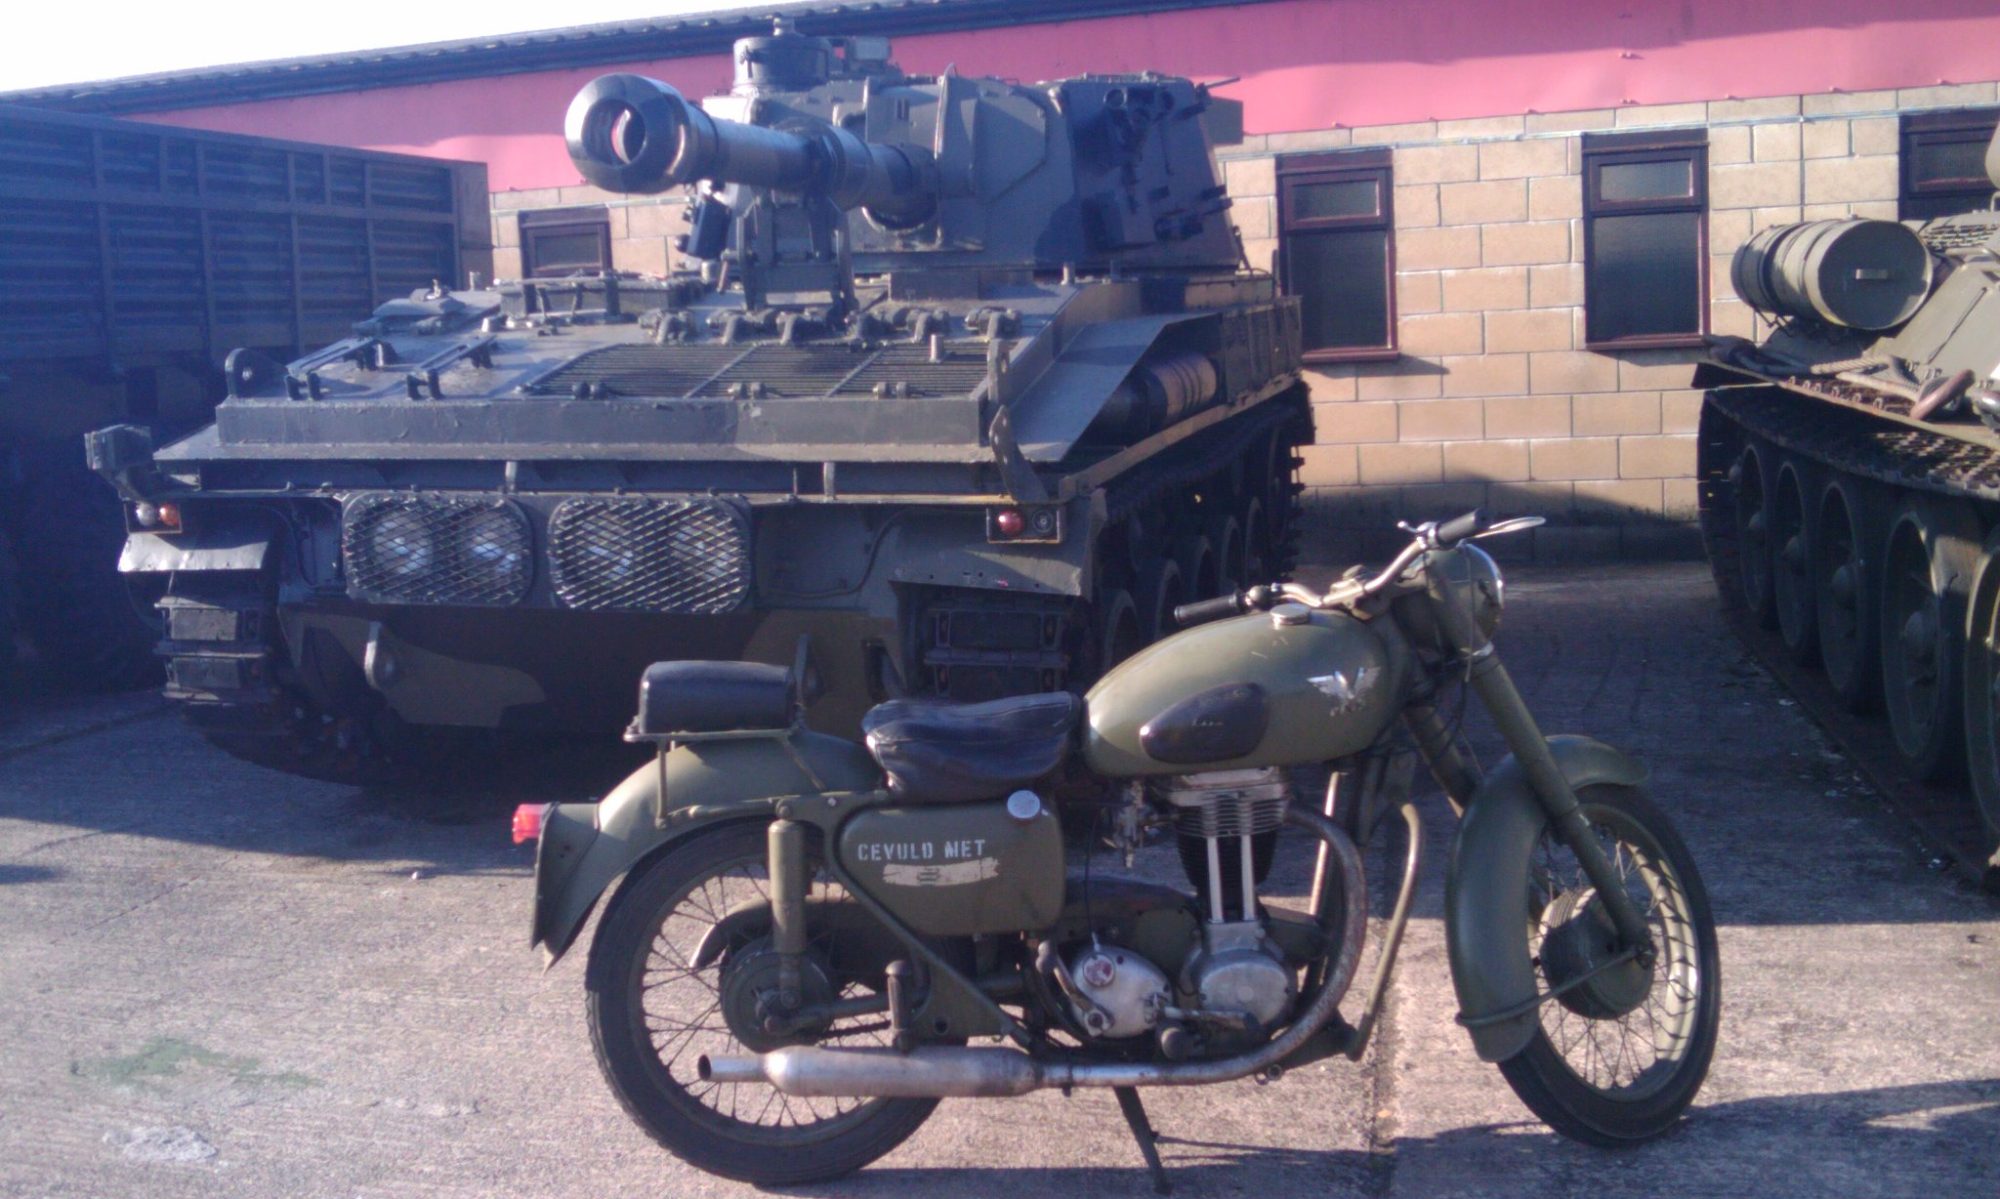
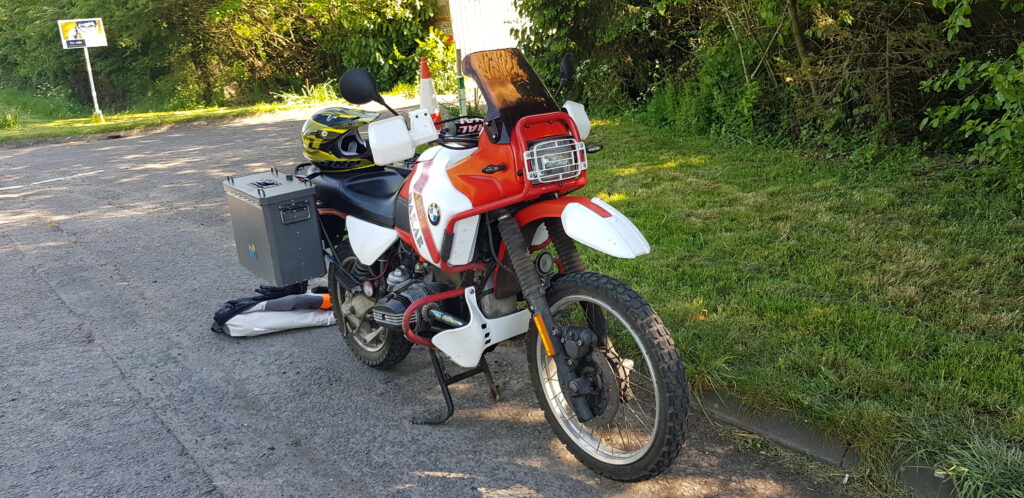
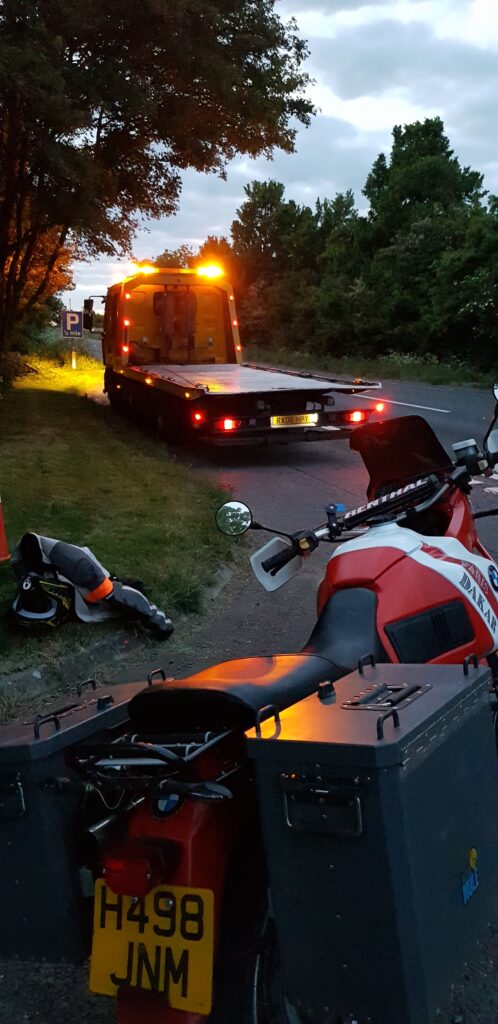
As lockdown is easing a little I had to drop some stuff off at my sisters in Wiltshire so I took the bike. That went well, the bike was going well so I thought I might as well take the shortcut home and wave at a friend that keeps offering me money for the bike.
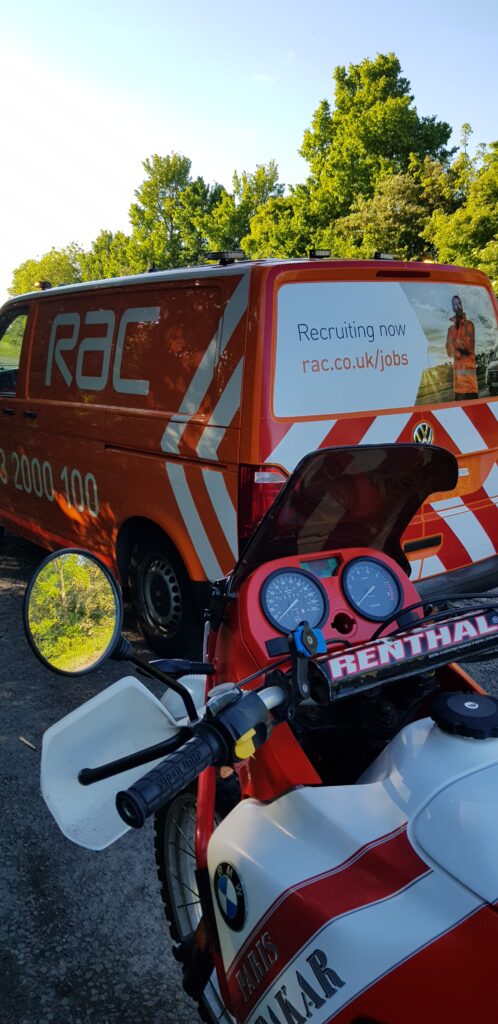
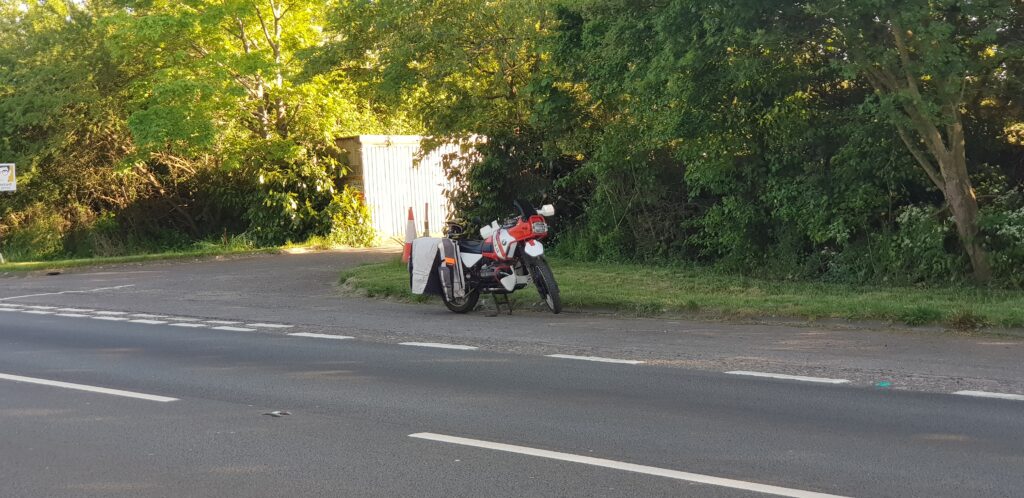
Just outside of Cirencester while in the outside lane doing 70mph on a dual cabbageway I lost drive, but I could rev. The first thought was oh dear the chain has snapped but being a BMW shaft-driven bike I wasn’t so lucky. I pulled over and there was little or no drive. I noticed a sign ahead for parking so with some luck I was able to ease the bike to a safe place under the trees. I rang home to say what had happened and Dad though happy to come to get me wasn’t going to be able to make it for a quite a few hours. This is when I made a mistake, I thought I would just get the RAC out. They have been good to me in the past.
I rang, told them what was wrong and I needed recovery. They said they would send a van. The van driver rang, he agreed that he doubts he could repair it at the road side so called the office to get them to recover it.
So 45mins later, he turned up. Looked at the bike and listed to the clanking etc. Said “yup, its broken alright”. So told the office and a recovery lorry would come out soon. I rang at 5pm, it was now 6pm. I waited, I crossed the road to keep in the sun as I had a feeling I might get cold.
Had a call at 8 from a chap in Frome saying he would be 1.5hrs, oh someone else local has the job now, they will call you shortly. Just after 9pm a chap turns up.
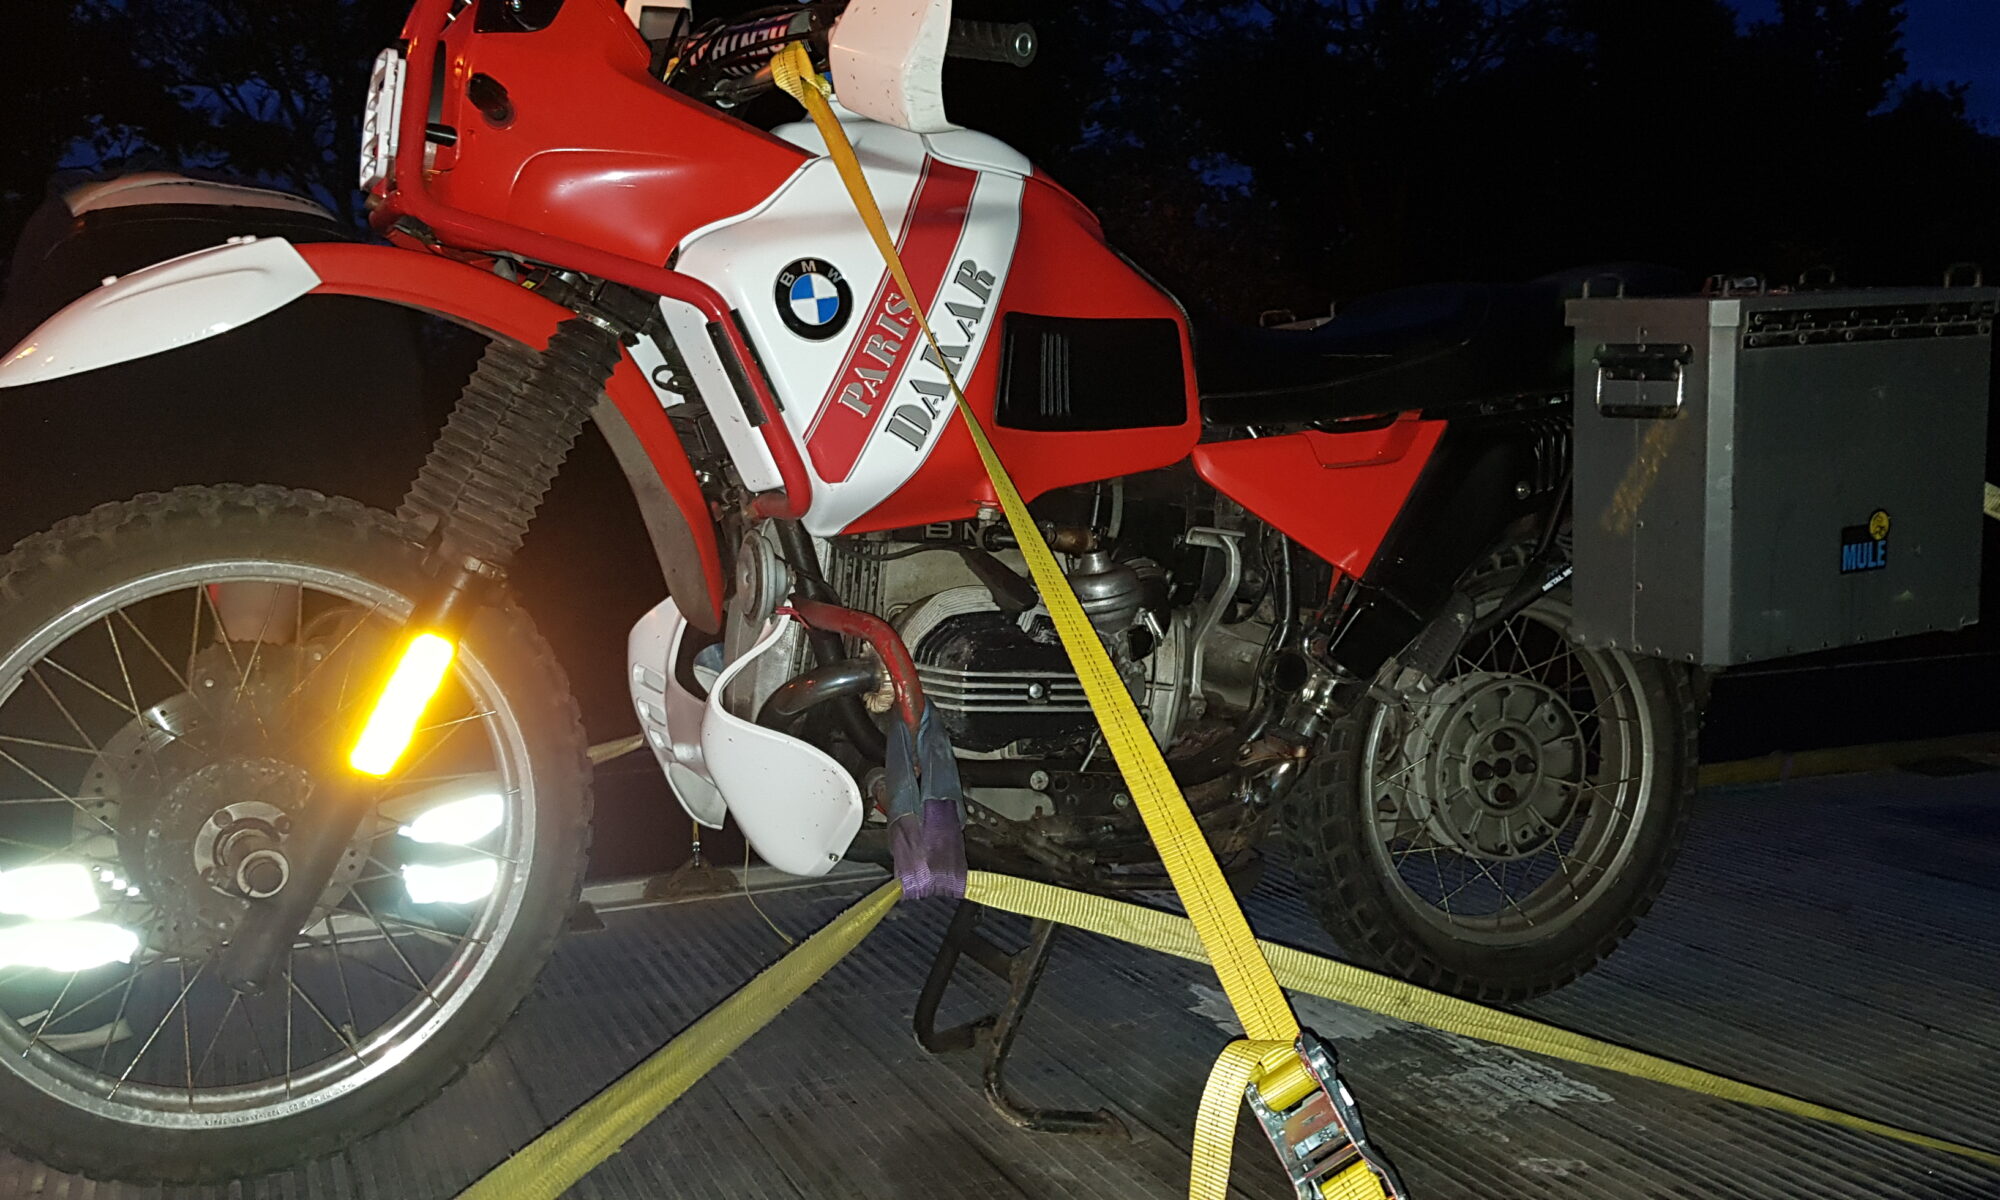
The bike is strapped down, I never like the way bikes get strapped down to flatbeds. On the centre stand, straps to pull it forwards and down. Straps on the rear to pull it down. Just the centre stand keeping it on the ground. At one point both front and rear wheels touched the deck…I whelped and we changed the straps about. Eventually home for midnight. It was a long day.
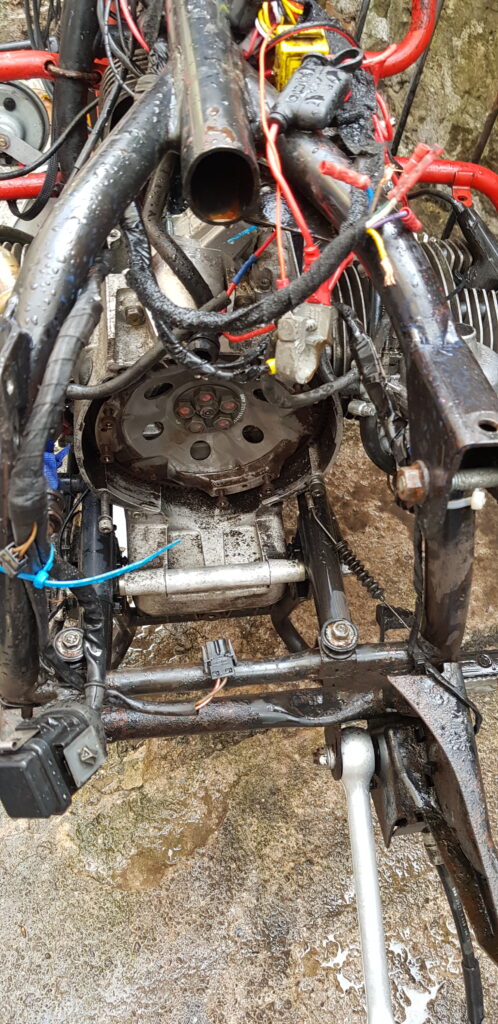
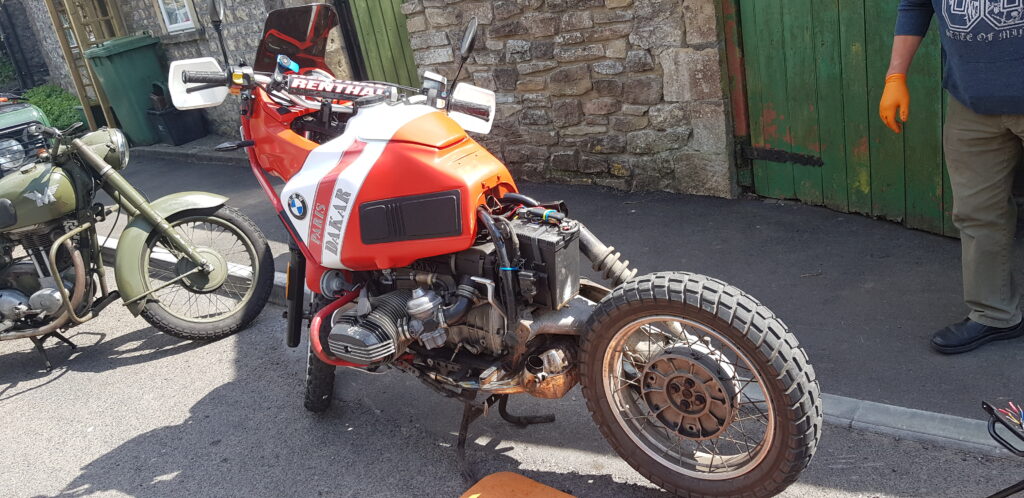
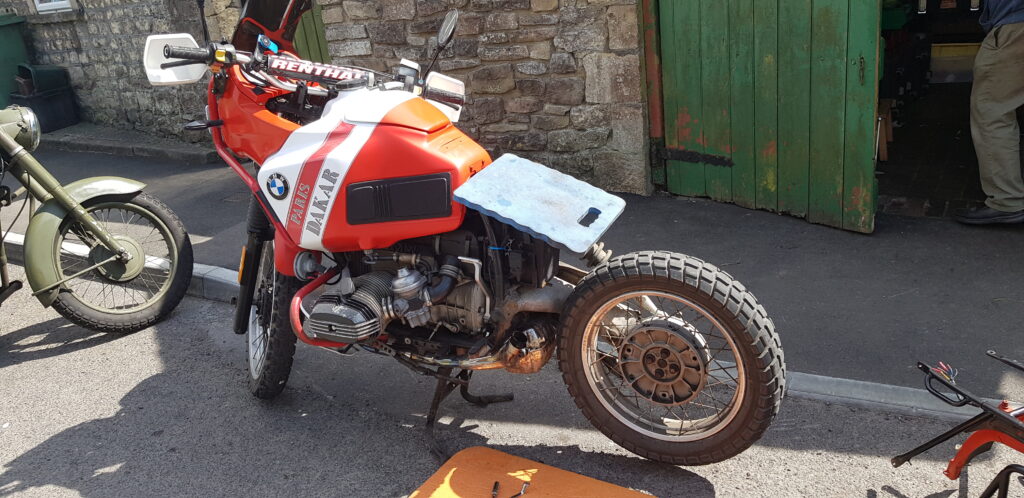
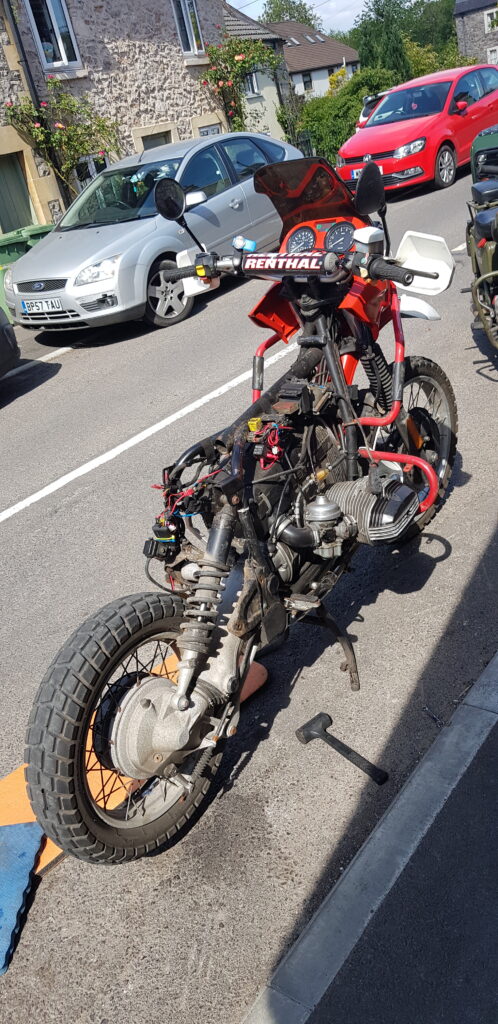
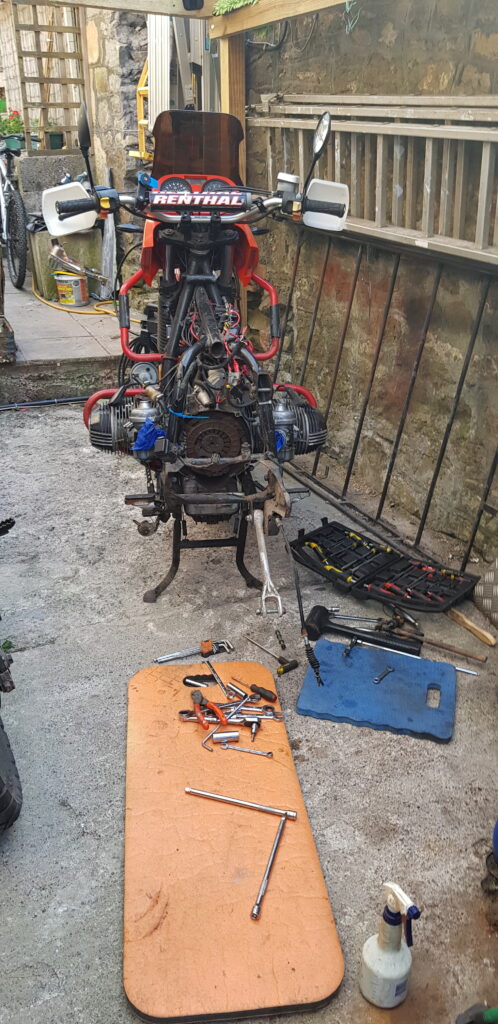
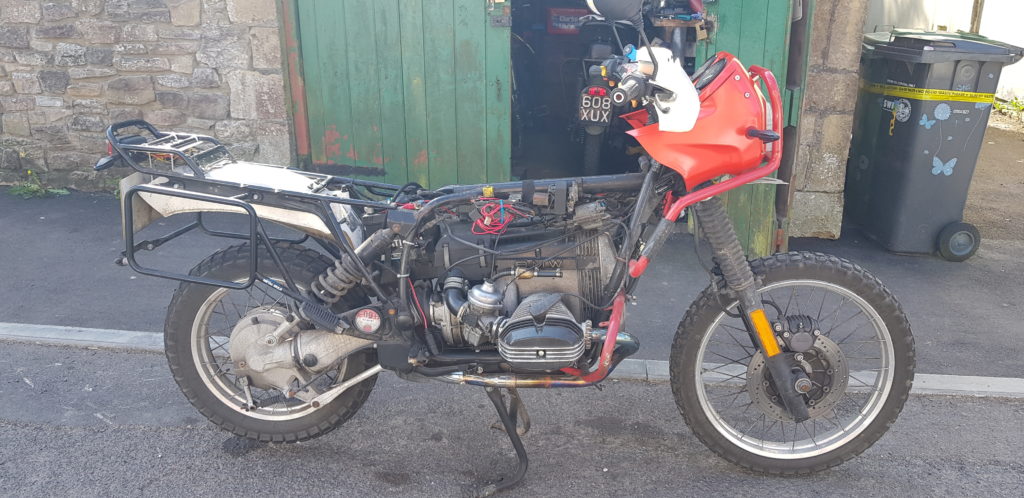
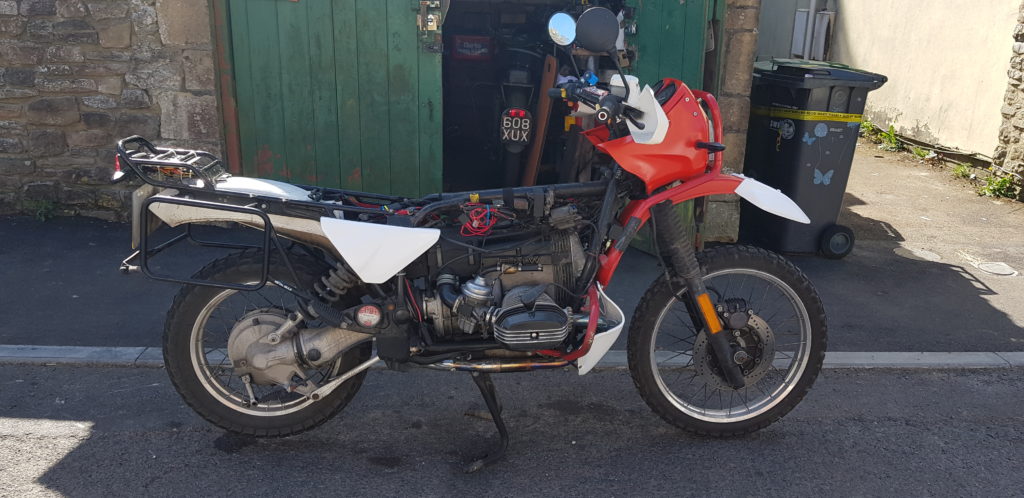
The next day filled with ideas of what had failed we started to strip the bike down. Its amazing how quickly these things go from big bike to half a bike.
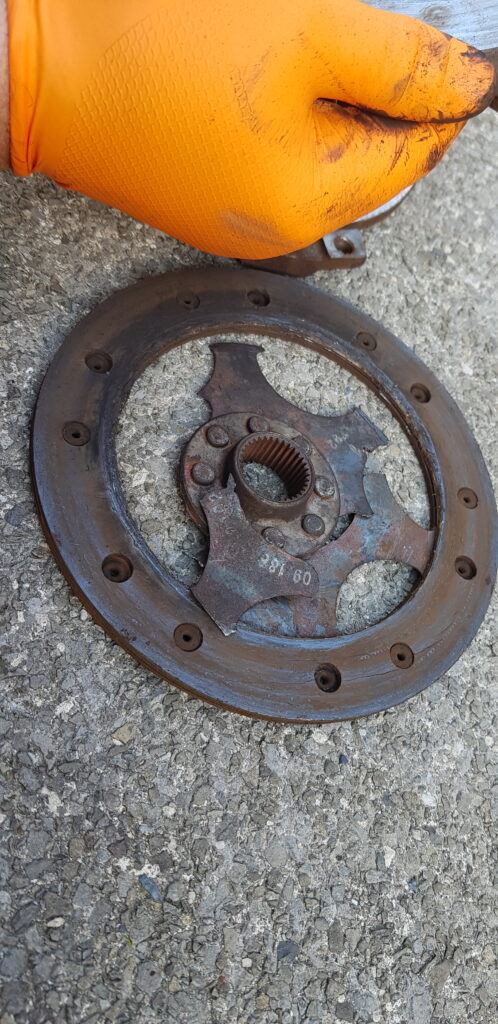
As you can see we were tempted to make it into a some sort of BikeExif custom thing, but as I don’t own any exhaust wrap we didn’t bother. After the removal of the gearbox it was easy to see what the problem was.
That would be a rather broken clutch. So a new one has been ordered. I decided to go for a nice Sachs one as that is what BMW fitted. I was tempted to go for a Heavy Duty one that is happy to get oily etc but I wanted to go with tested an proven.
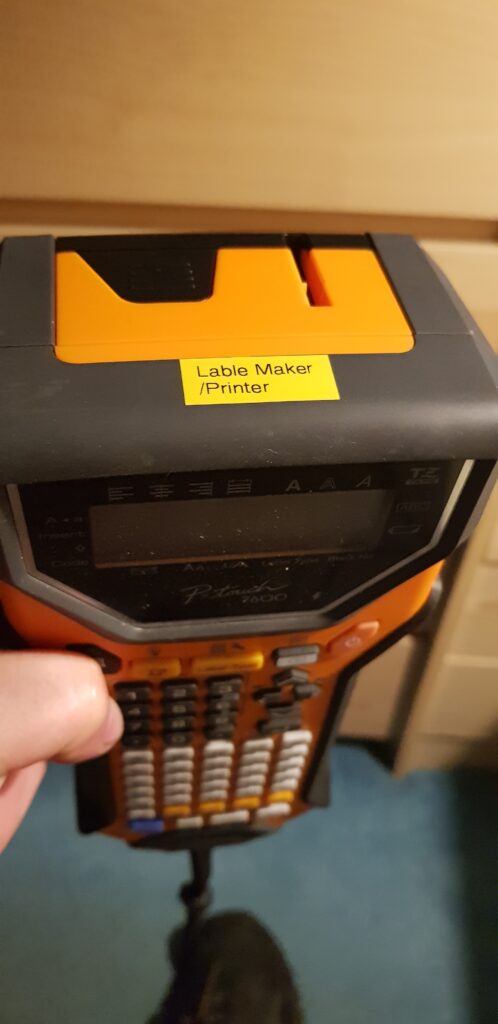
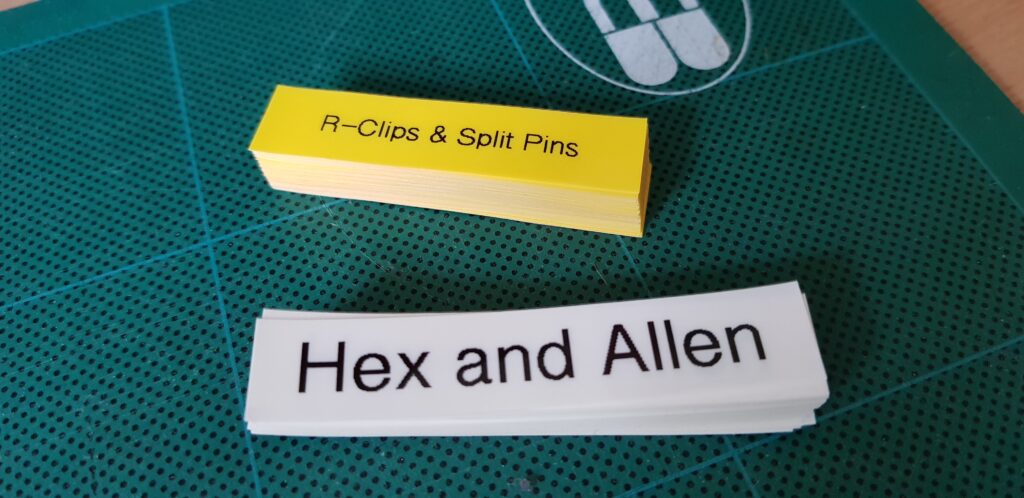
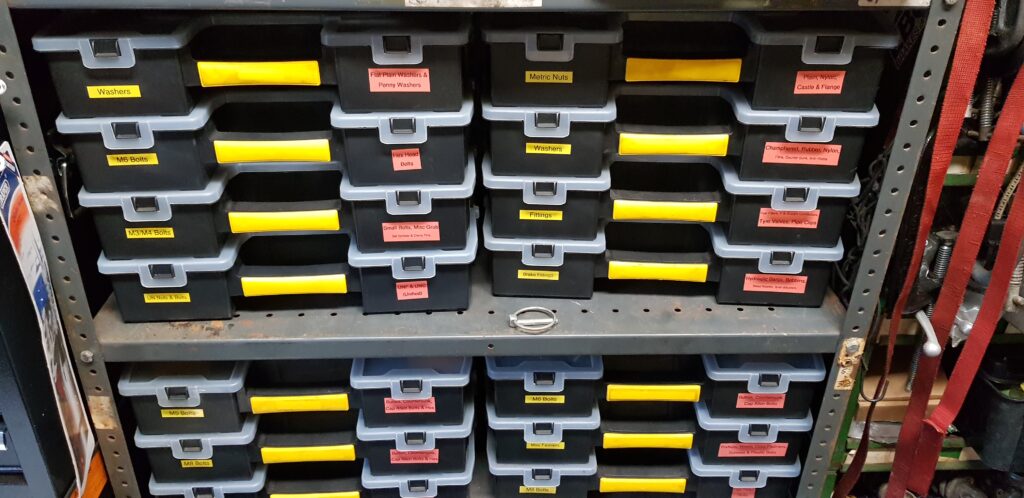
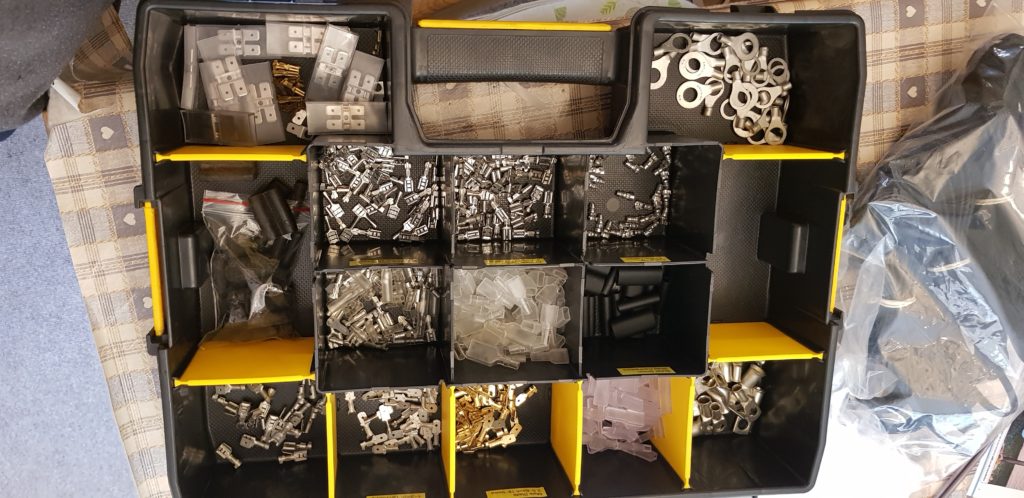
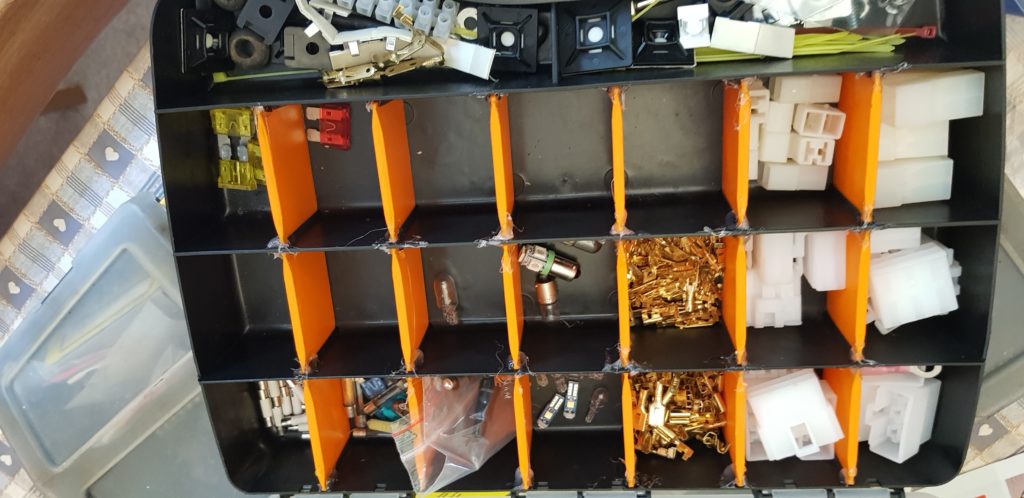
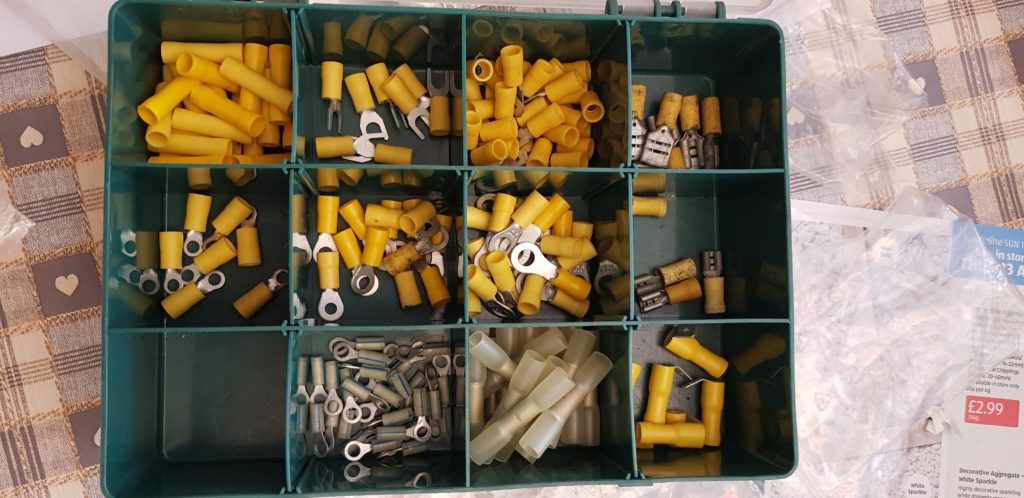
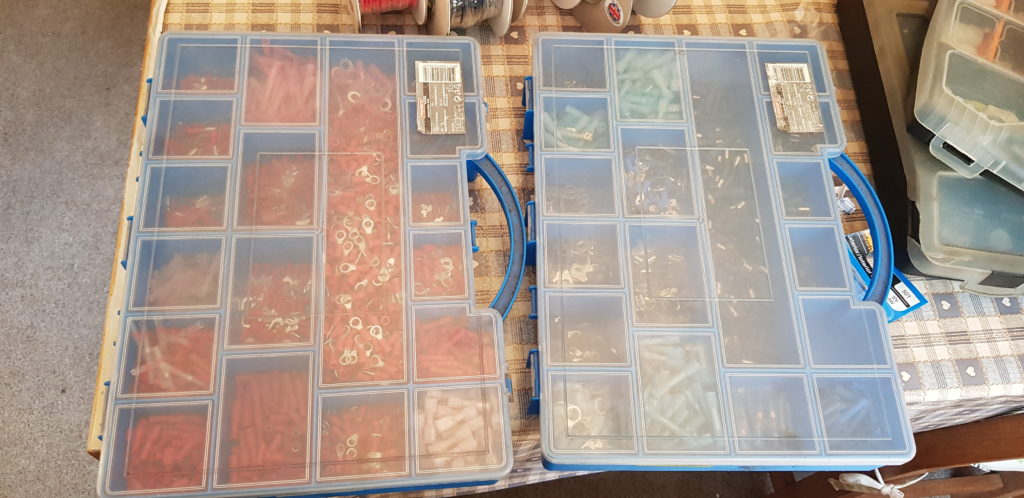
So some of you may already know but I do like collecting a sorting parts. Mostly nuts a bolts. The reason, I dislike taking time to search and hunt for bolts. Many times have I gone looking for a bolt only to find 3 of the right size but not a 4th. Then there is the “we have some, but not sure where” thing. So I like to sort and label the boxes, yes even the label maker have a label on it saying label printer.
Yes, spelling isn’t my strong suit.
During my last sort out a lot of the boxes got new labels. Lots of labels. I spent a good afternoon messing with the software for Brother Label printers as you can do stuff with spreadsheets etc and I use that at work often enough but this printer isn’t as smart and OMG the software is a nightmare to work with. So I resorted to hand typing lots of it out.
The boxes look rather smart as well. I ended up buying more tape and then reprinted a lot of the labels at a larger size as I may well end up like my Dad and needing glasses.
Then I faced this,
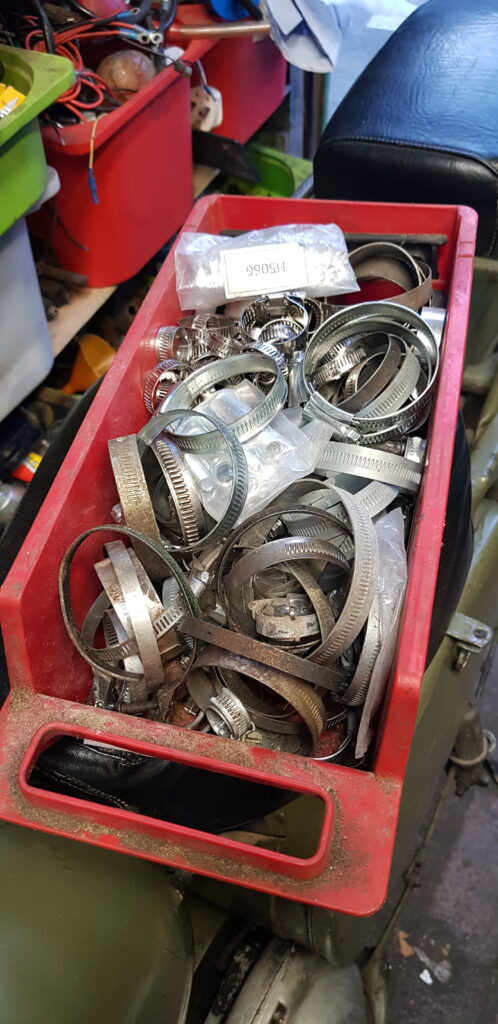
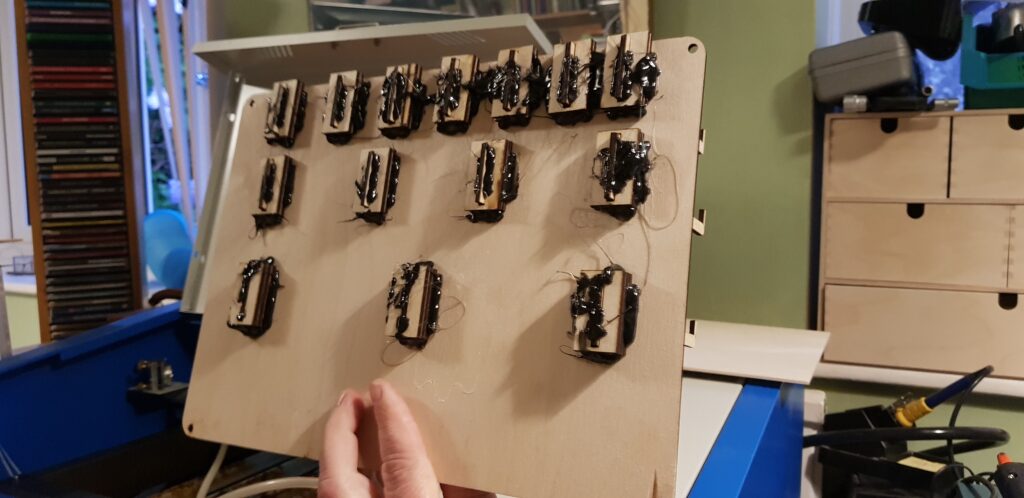
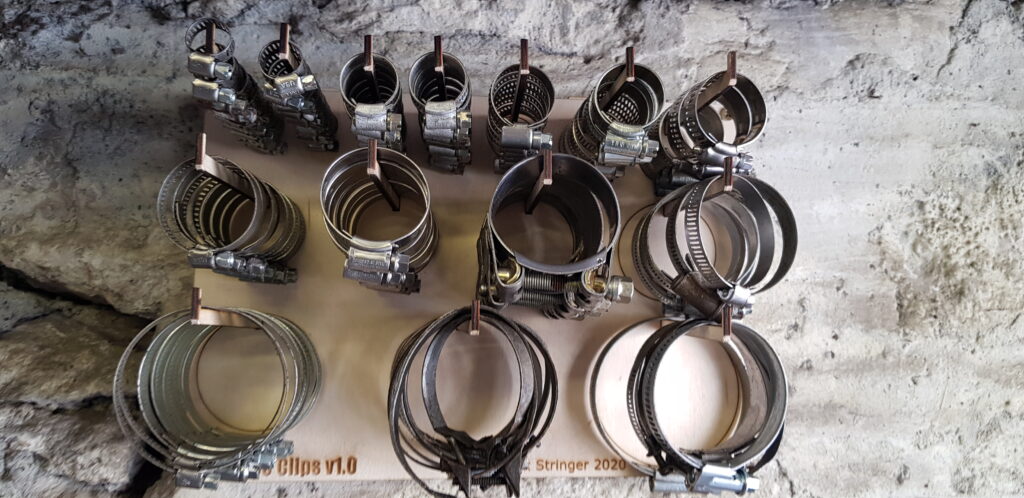
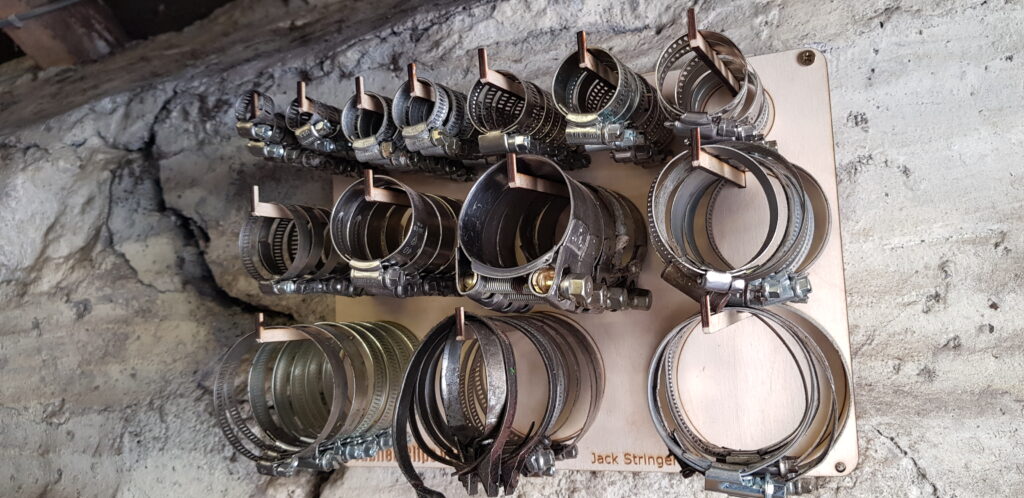
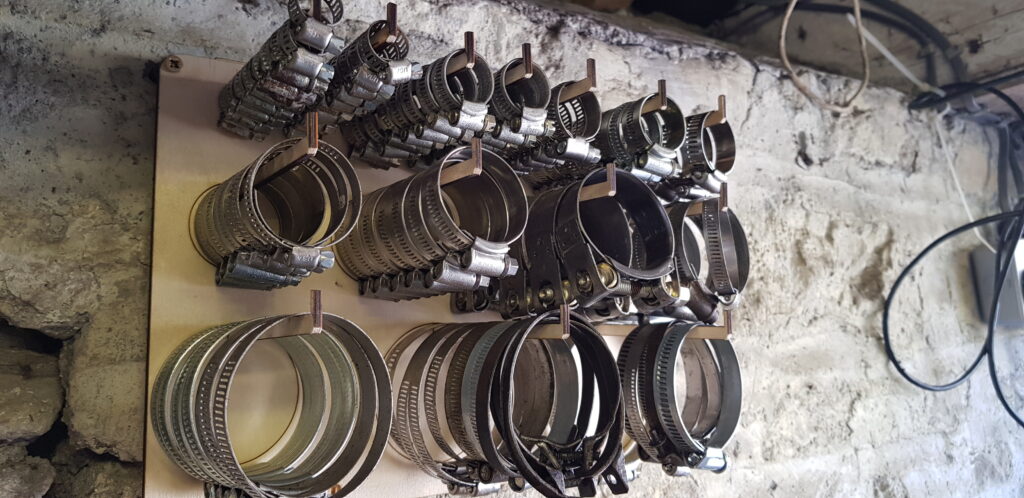
It is just a mess and drives me up the wall whenever I look for one the right size, not helped by the container also ending up with a good amount of oil in it. I was thinking of a neat way to sort these, then I remembered someone I know had got fed up of not having the jubilee clips he needed so he bought some but he went the extra mile and just bought a shop display unit of them.
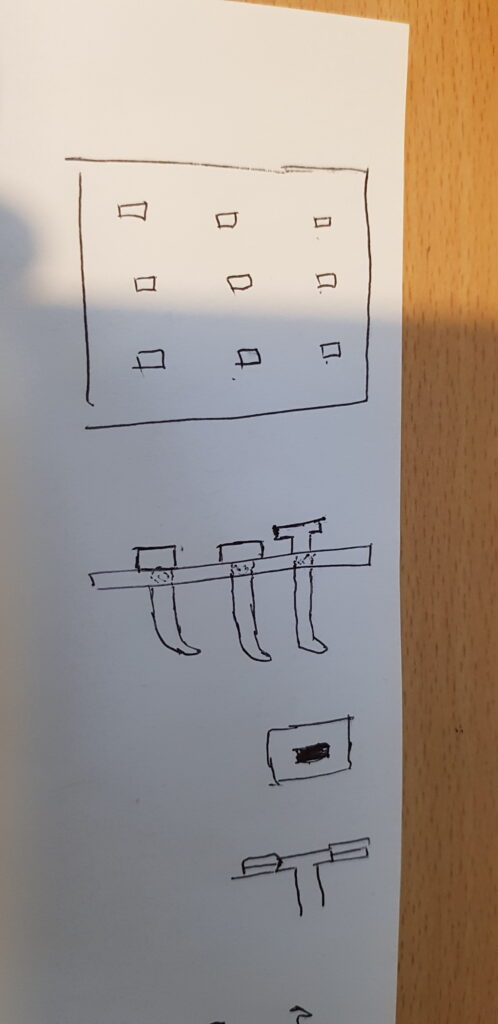
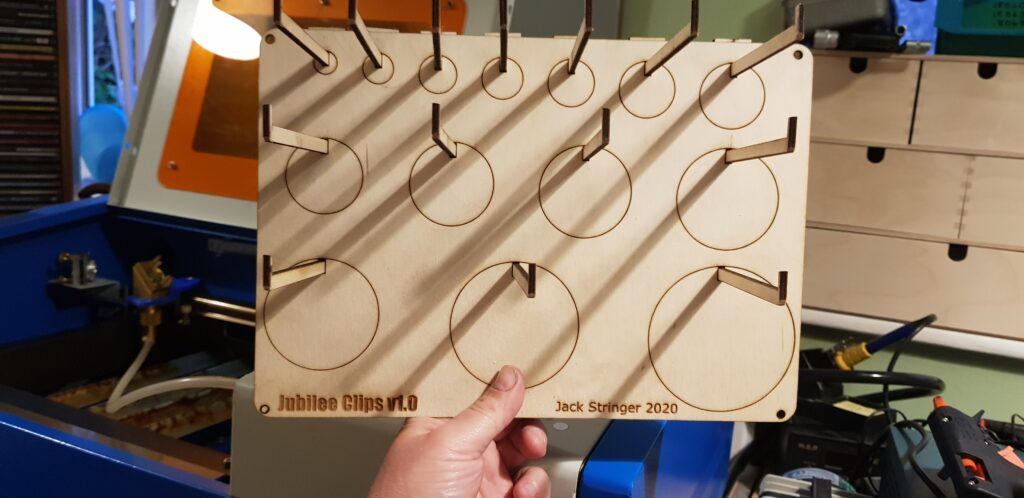
I thought about this, as it is just so shiny and neat and oh shiny. But then I looked at the cost and though hmm I have plenty I just need a rack. Time to fire up the laser we have sharks to fry….erm OK. A quick bit of skilled drawing and I had an idea.
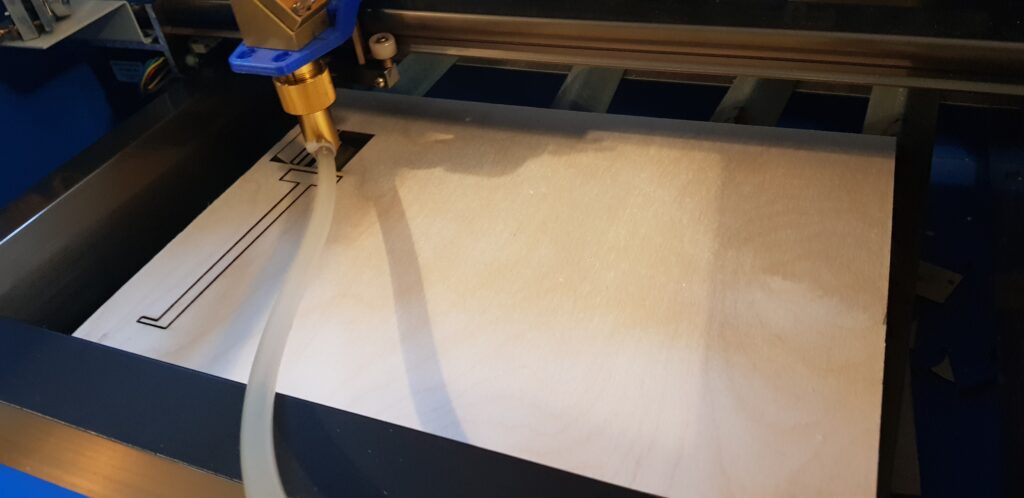
It made sense to me and I went and started drawing in Illastrator and Inkscape to get the design just the way I liked it. Then it came to cutting with the laser.
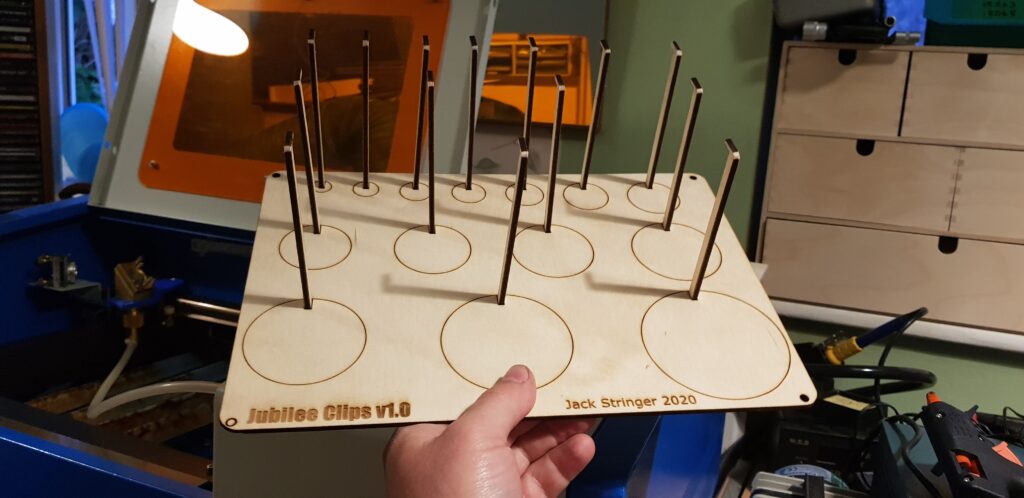
A bit of jiggering about and I had it assembled, I didn’t have any PVA glue to had therefore I used some hot glue.
Its not perfect, but it does what I wanted to do.
If you want to make your own based on my design then head over to thingverse where I have uploaded a slightly modified version as I made a few slight design changes.
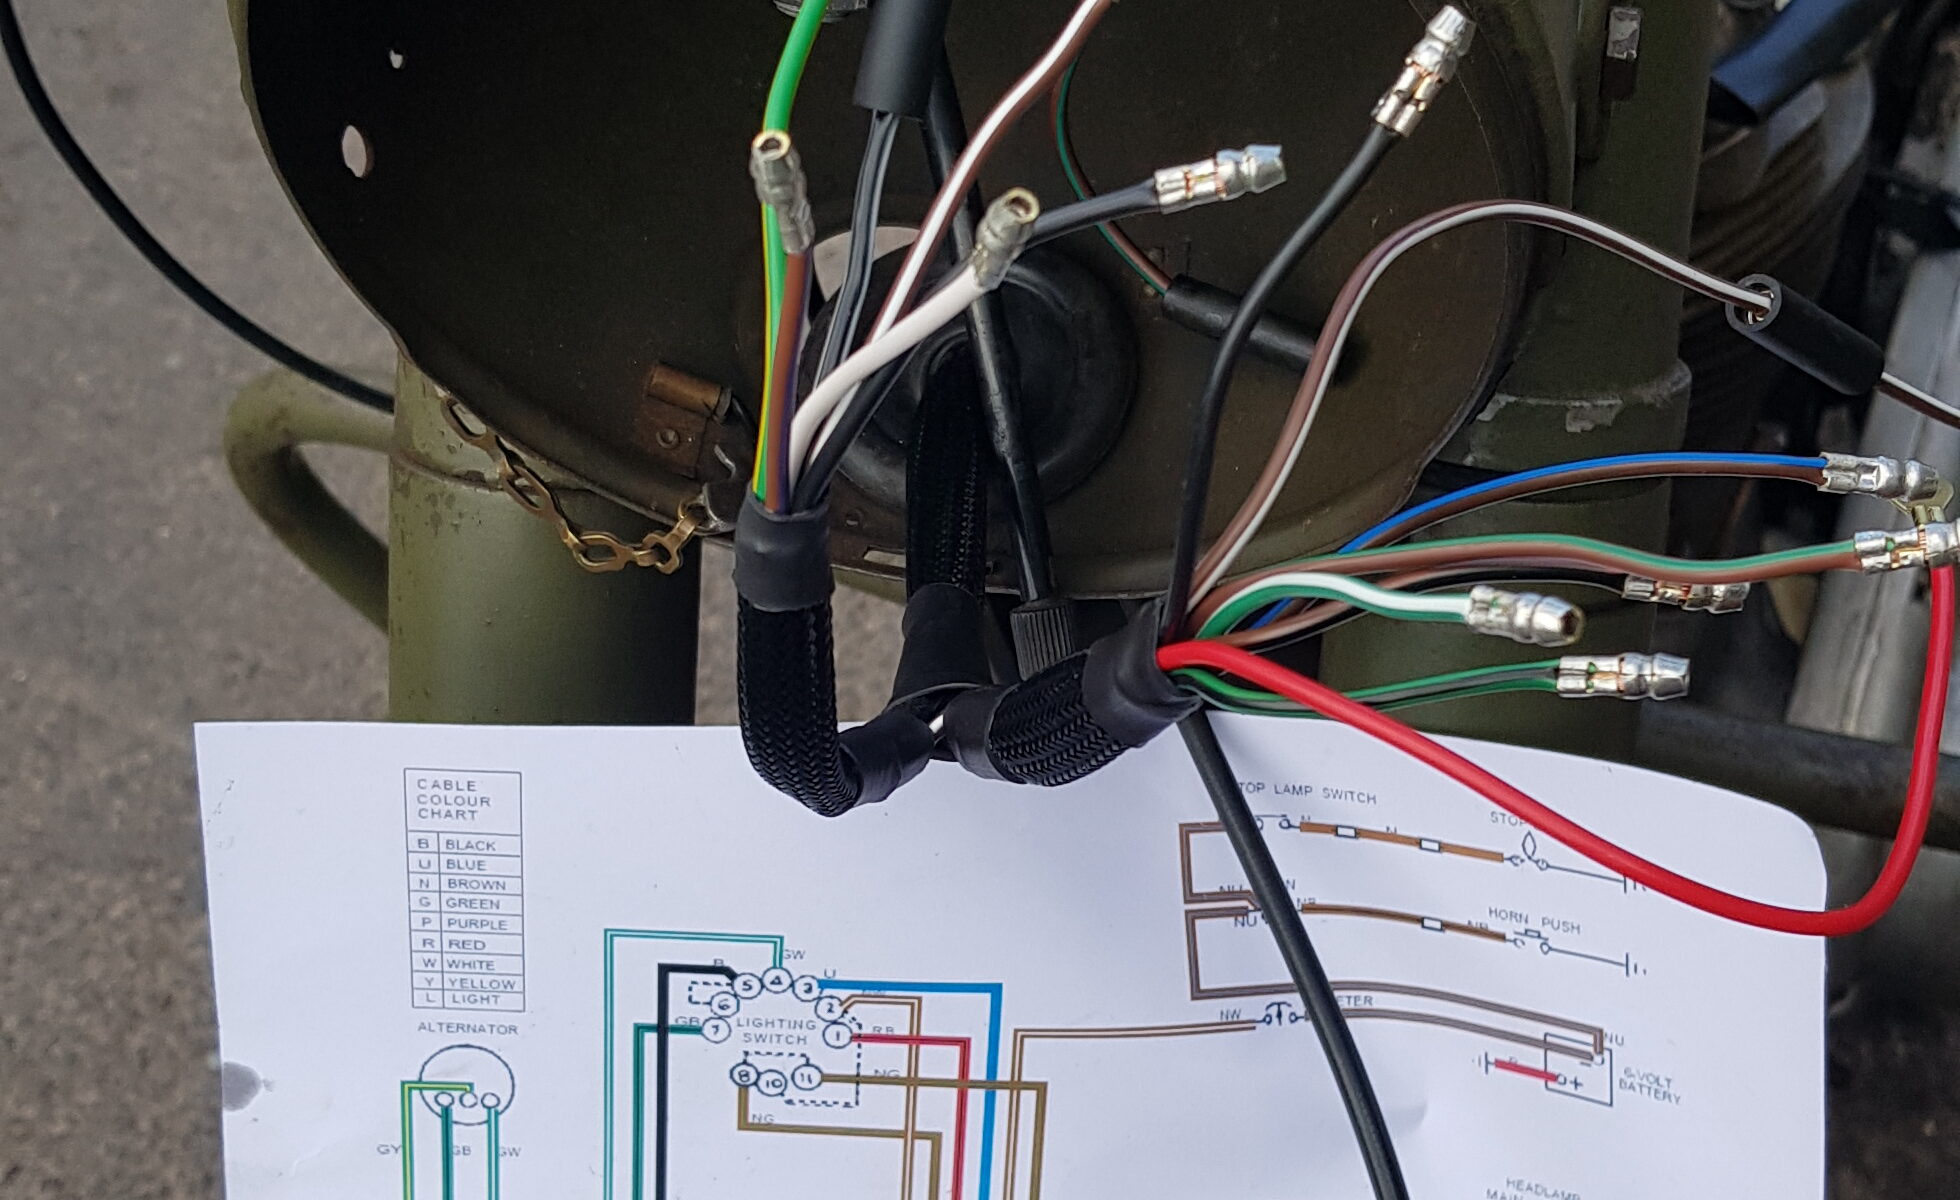
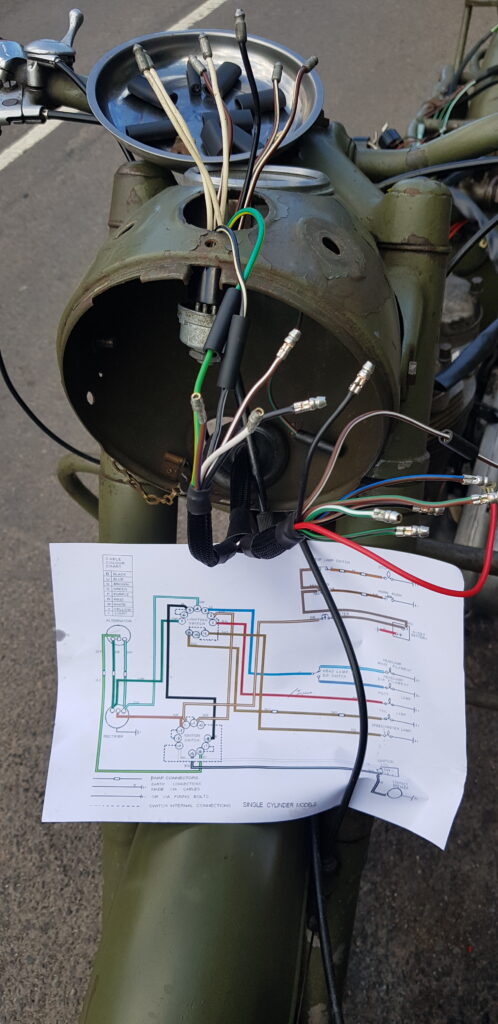
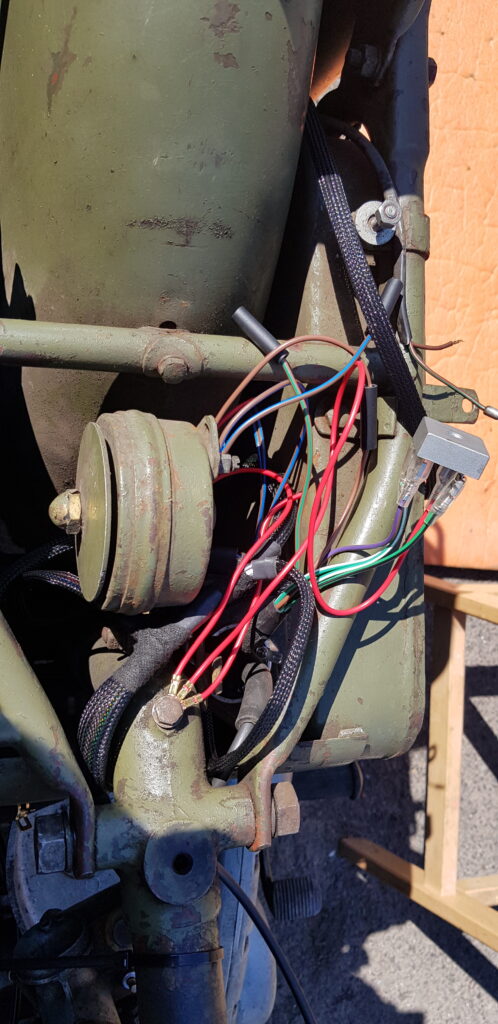
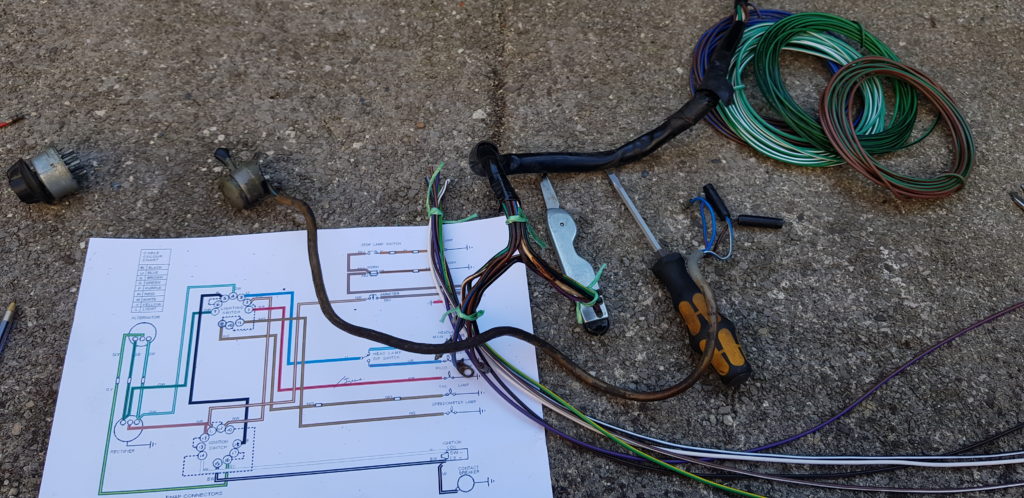
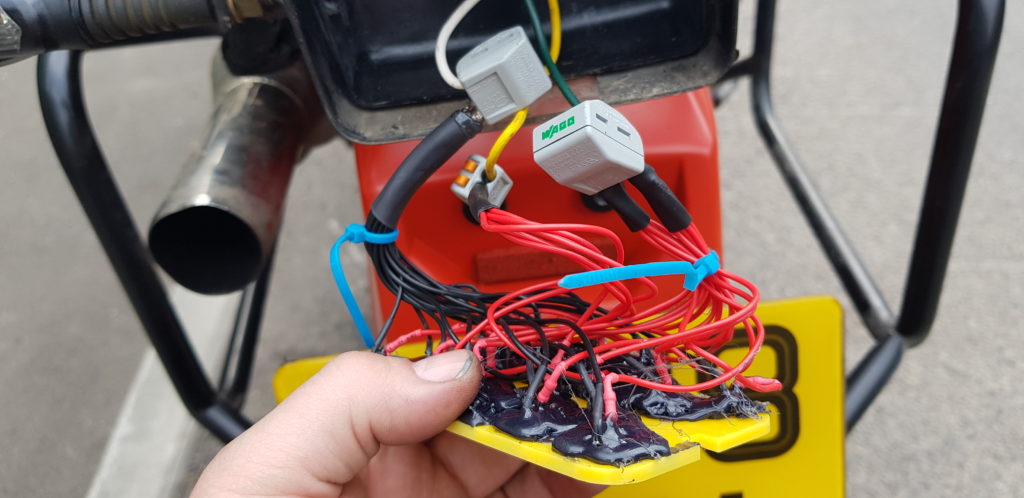
Now it is time to fit the loom, not too hard on these old bikes but you still need to start off with the right mindset so make a brew and drink it as you work out what to do.
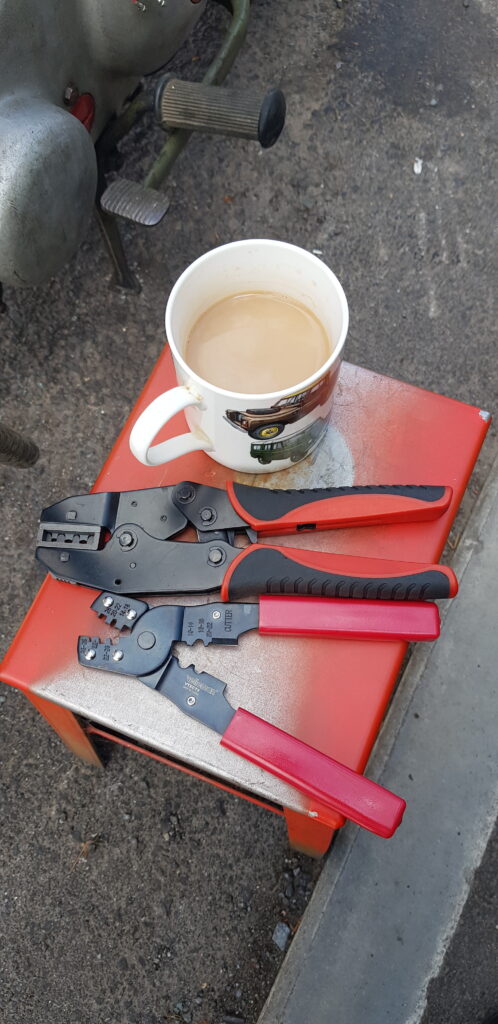
Basically, that is my crimp tools for un-insulated wire and I tend to use both of them as work on this bike. Some are better for the bullets others are better for others. Though I ought to look at what AMP/DMC/Tyco make for this as I am sure it is expensive but they would do the job right.
It didn’t take long to feed the main part of the loom into place. Now the fun task of crimping the ends and making the various connections.
Lots of tea was needed for this task as its a right pain to follow the diagram and get it to work. The switches I have don’t seem to have the same bridged connections as suggested in the wiring diagram. Thankfully it isn’t to hard, but you can still make mistakes (more of that later).
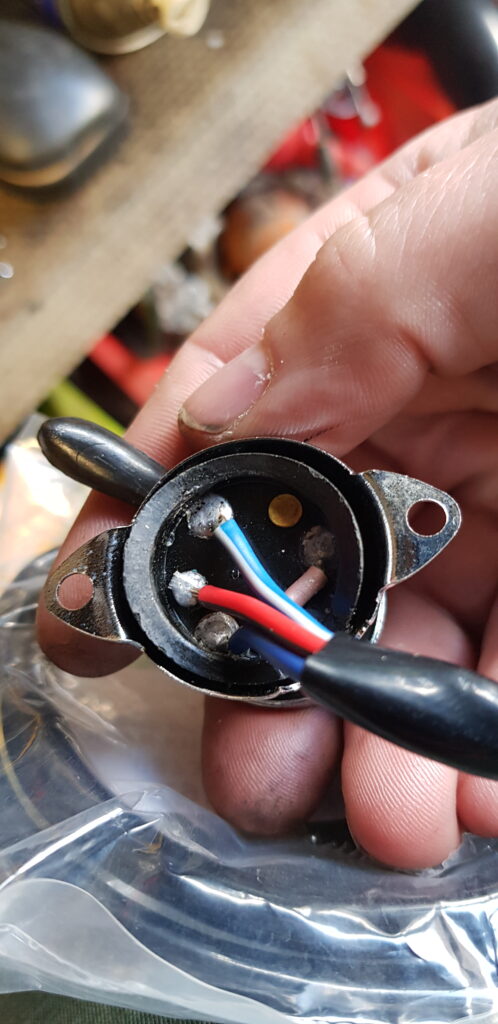
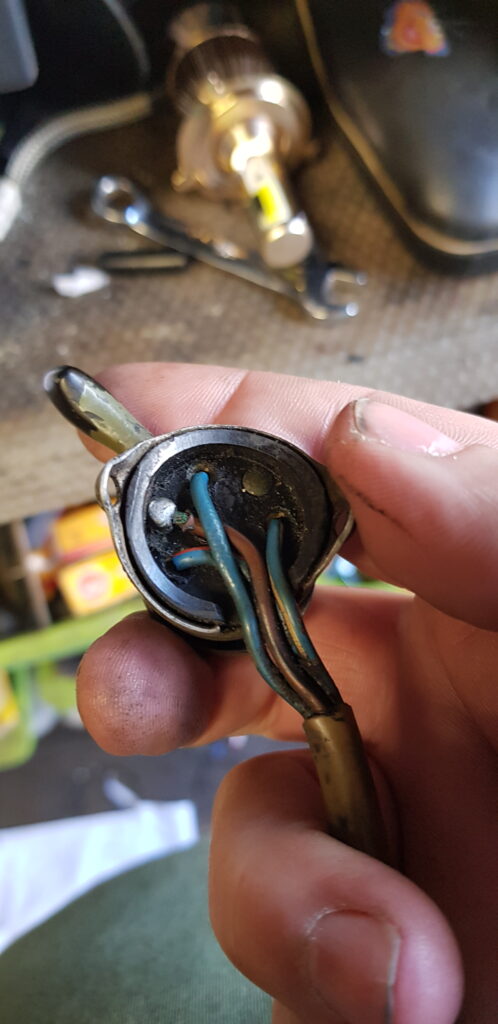
While I was in there I had thought it would be a good time to fit a new horn & dip/main switch but annoyingly the new switches aren’t the same and the wire colours were wrong. Oh well, not wasted, this will go on the AJS once I get to it.
New on the left, old on the right. Didn’t like the newer tabs.
After a lot of faffing its starting to come along,
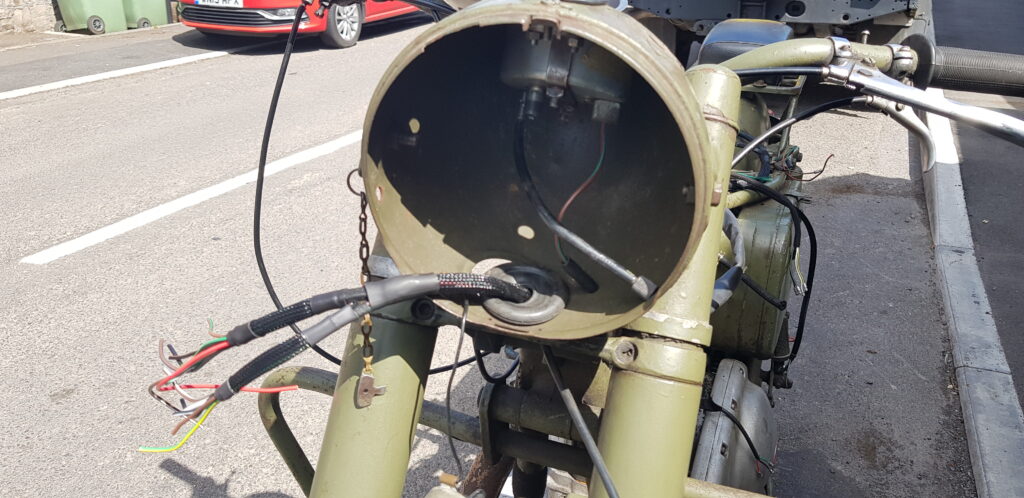
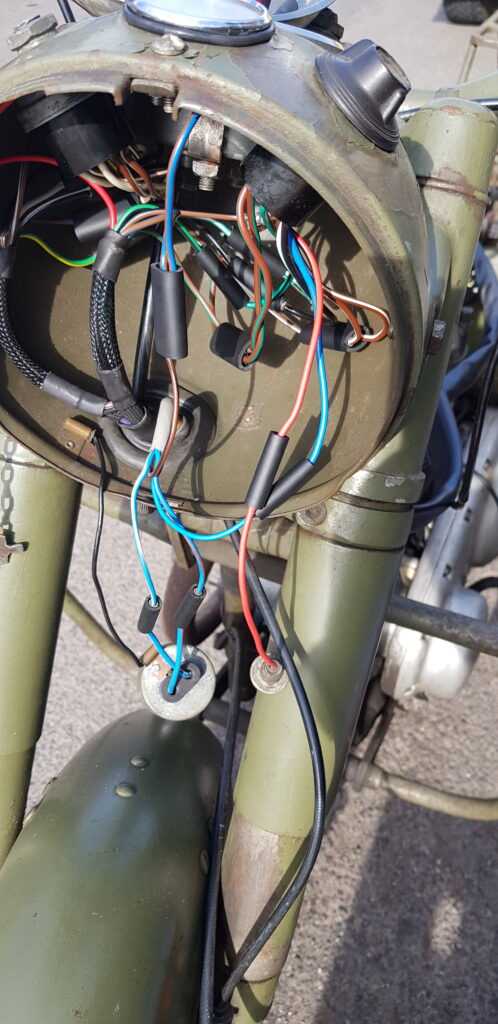
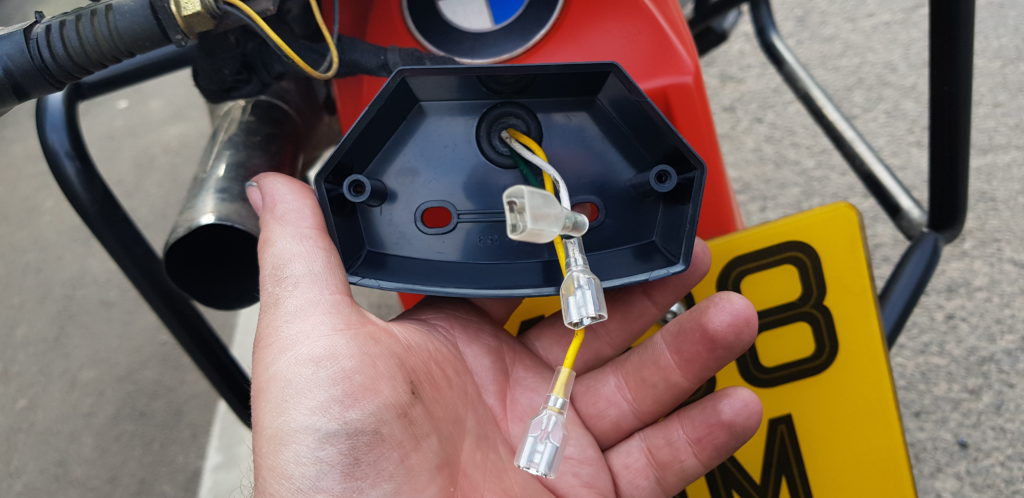
As with the modern loom, I had tried a few months back I also fitted and extra earth to the headlight for extra care. I must say the old way of using these connector blocks is quite nice. You can usually and up combining a few connections with little mess or bulk.
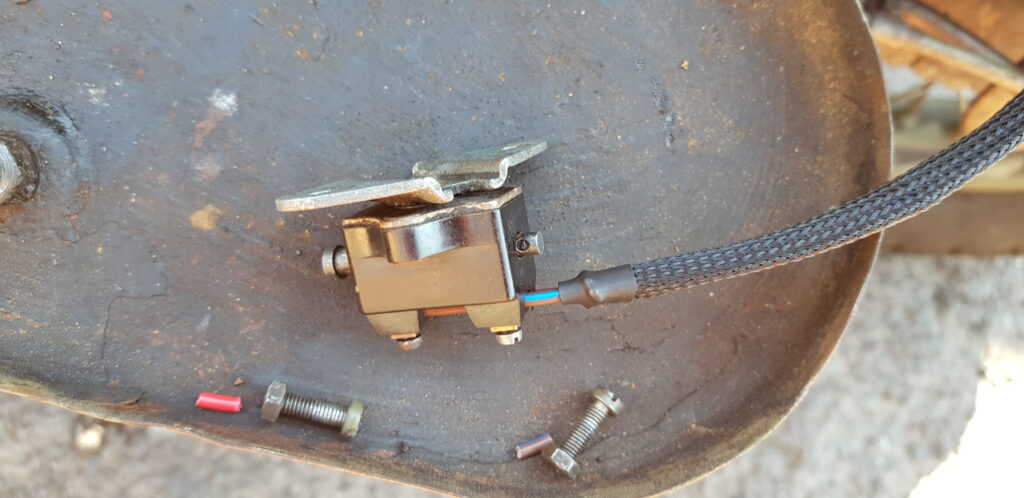
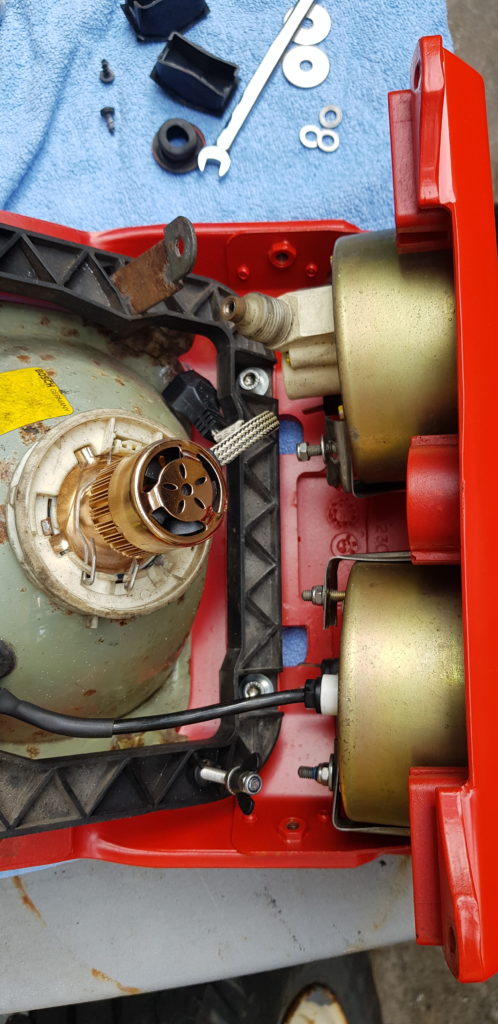
Then it was time for the midsection to get a look at. I fitted a modern rectifier (KPBC3510) as I was suspicious the old one was not in the best of shape. The modern bridge rectifyer I bought at the bike show but a search shows its avaible at RS for not a lot.
New unit in
Old
Not in the best condition.
Then I had to wire in the rear brake switch and rear lights. The rear lights have caused me issues in the past, at one point using the rear brake was enough to act as a kill switch for the bike which was never fun as I approached junctions. I had again ordered a new rear switch only to find that the mounting holes didn’t align so more stuff for other bikes.
I’m glad I did this as the wire wasn’t in good condition. Then it was just a case of wiring the battery up and the ignition coil which again wasn’t too mad.
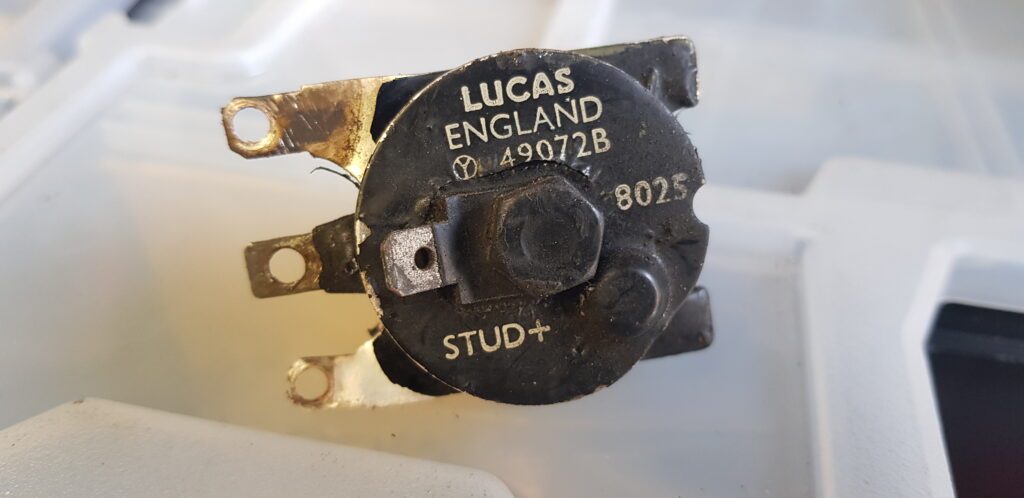
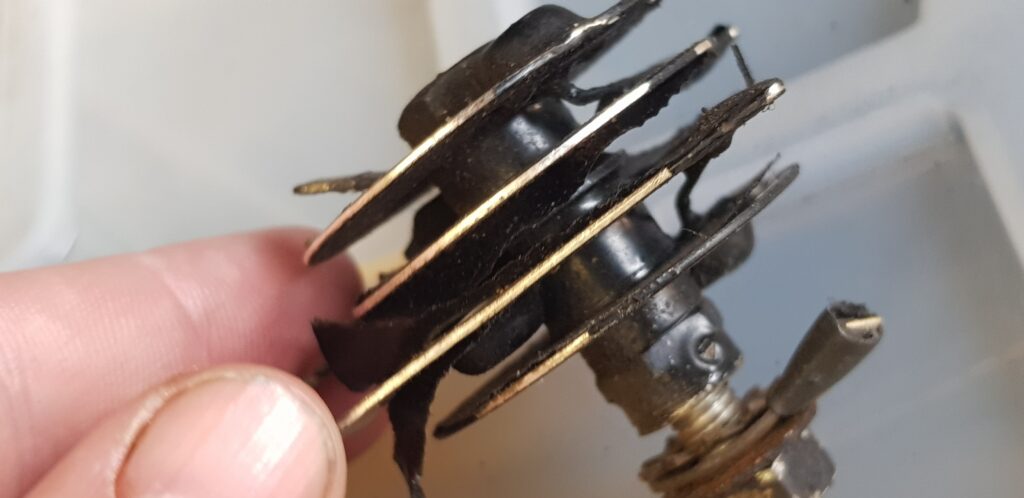
After all this, I revisited the Points and condenser. I replaced both units as I had a suspicion that the condenser was on its way out. While also in there the springs for the auto-advance/retard unit were replaced. Many of these bits aren’t that expensive but at least give you a bit of confidence when it comes to starting.
Now it is all done, so I do a few tests and erm it’s not working. Not getting a good spark and but the lights work but if I hit the horn I don’t get any sound but the horn gets warm to the touch rather quickly. More tea, and maybe dinner I rechecked my wiring in the headlight, I had make a error and had turned the horn into a dead short for the battery and the points wasn’t getting any more than the power from your kick. Thankfully I had used good thick wire so no burnouts. I was kicking myself for not fitting fuses but then again I didn’t see any fuse boxes I liked the look of, may fit one in the future to be safe.
After that was sorted out I took it for a ride and its working fine, then dad went for a ride. Later a neighbour who last saw this bike on the road the day he moved in 6 years ago managed to start it and off he went for a ride. I have yet to take it on a long ride but I will soon.
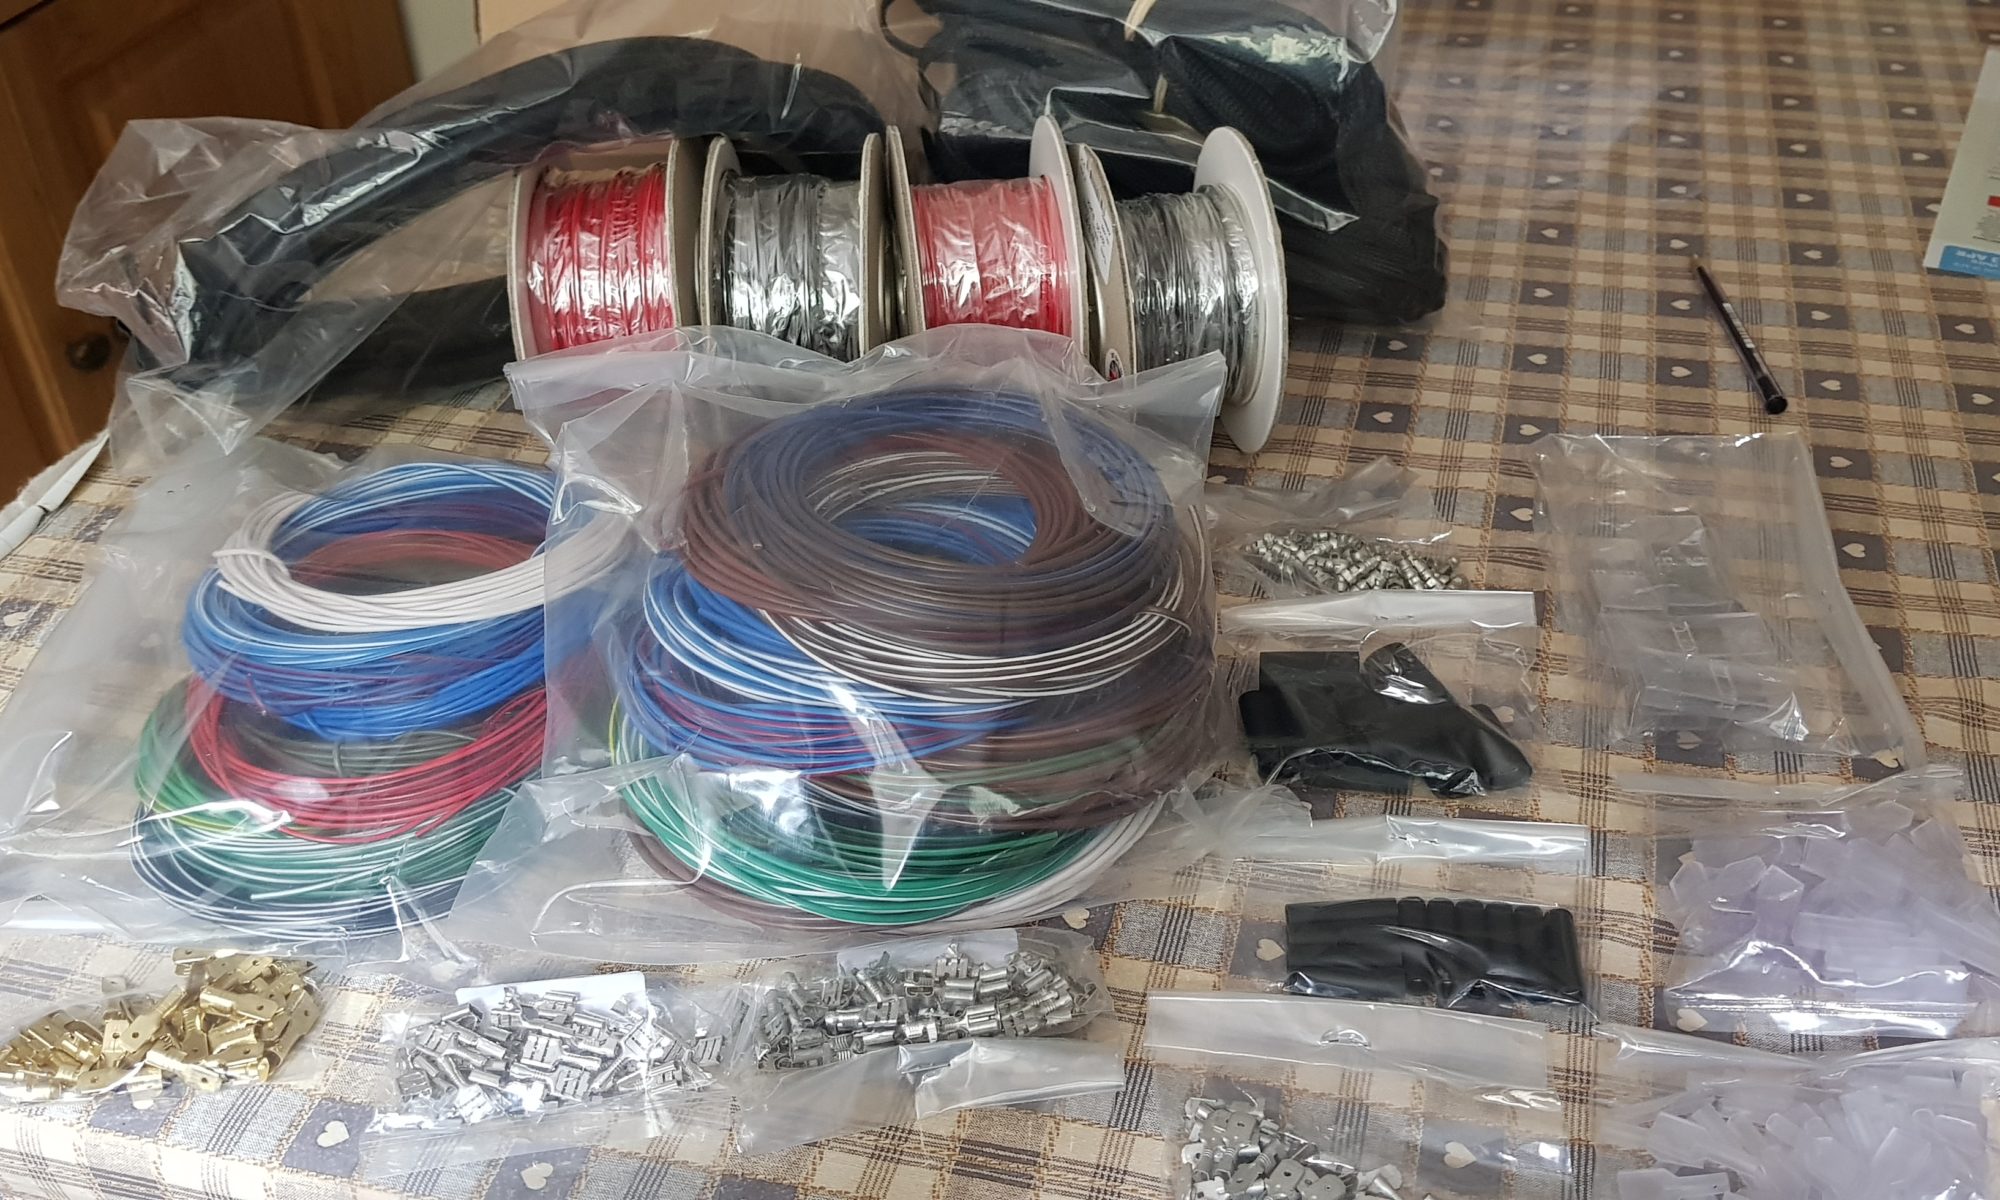
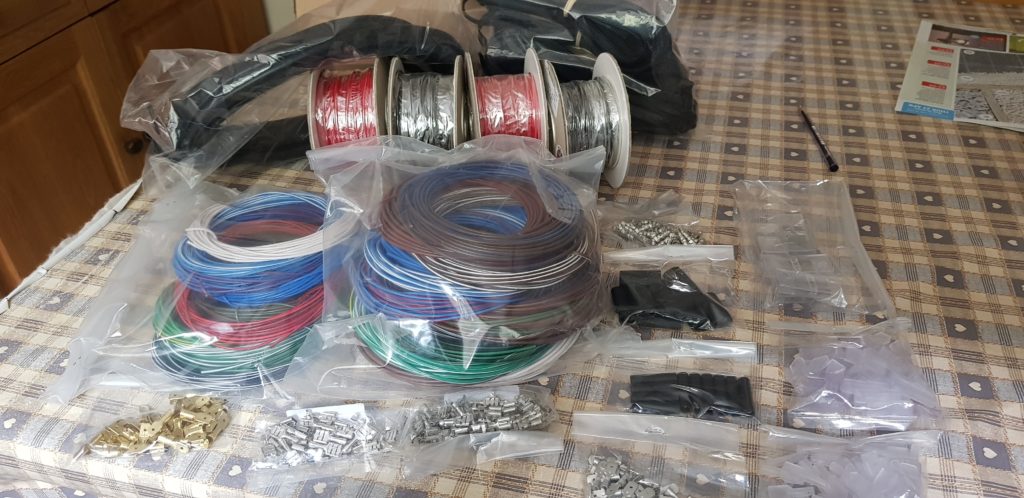
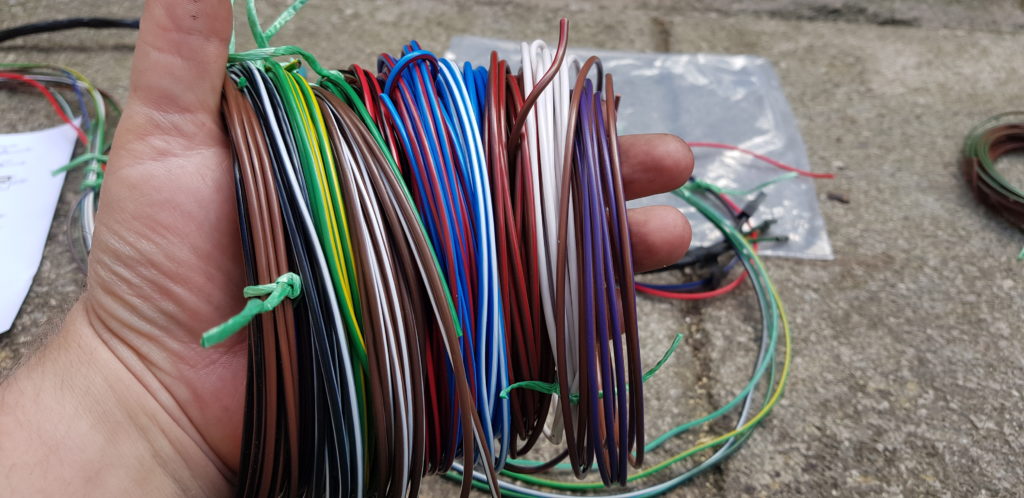
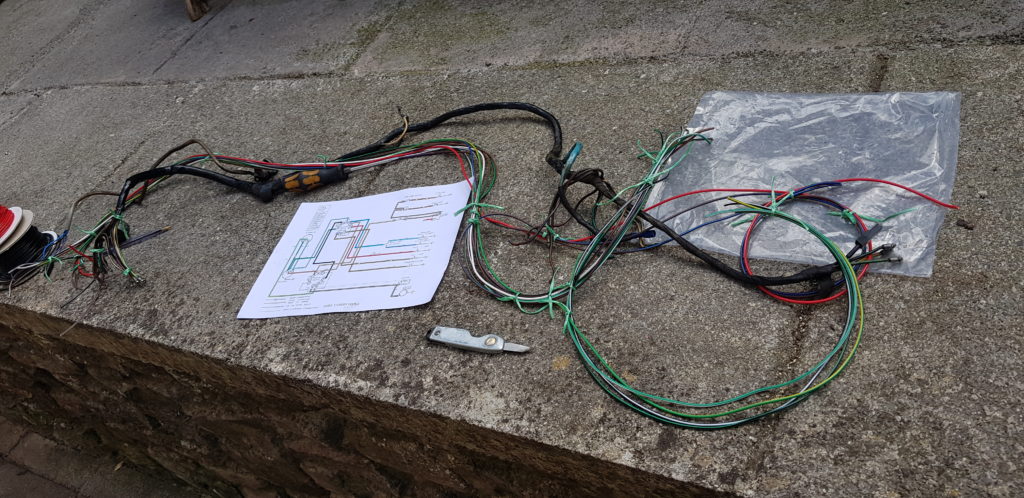
I bought a Lucas loom, it didn’t work. I suspect I could make it work but considering I have moved the coil and added a modern rectifier I thought I might as well make my own. So an order went into Vehicle Wiring Products for some wire with the right colours stipes on and a selection of uninsulated Bullet (4.7mm/0.1850″ for the old bikes), and spade connectors.
I ordered wire in 1.0mm² (16.5A) and 2mm² (25A). I did some tests and the bike uses 11A but the larger wire diameter means a little less voltage drop. I got the 1mm² in case the 2mm² was way too big for my needs. Turns out the 2mm² was about the same as the old stuff. I took the original Matchless wiring diagram for my bike and added some colour to help with the wiring.
Now before I could start I had to sort, so the boxes of electrical bits came out and I procrastinated for a while sorting out the bits. This won’t be the last time. By the way, I have a large selection of Red and Blue insulated crimps with heat shrink, I have gone off them as a few times now I have done the crimp and it’s just pulled out, this could be a wire gauge issue or a crimp tool issue but I am converting to uninsulated crimps as I can get a good grip when crimping.
With that done and a cup of tea I started to look at the old loom. Its rather basic but I would like to have a neat loom.
I started off with tying the wire together with bailer twine so I could work out where the wires go an where they branch off etc.
Now I ordered 5m of each colour I needed to be safe, which means I have plenty left over for other projects.
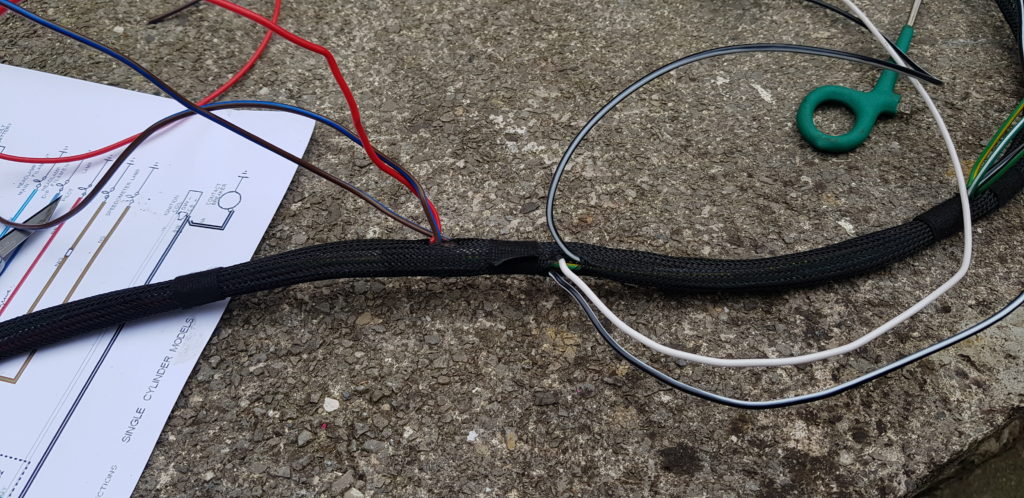
With the basics done I started to think about how I was going to get the sleeving on. I had gone for the Braided Sleeving which is a pain to work with but does look nice once done. But with several cups of tea, I managed to get it on and the wires branching off where I needed them.
Then I added heat shrink to prevent the braid from falling to bits.
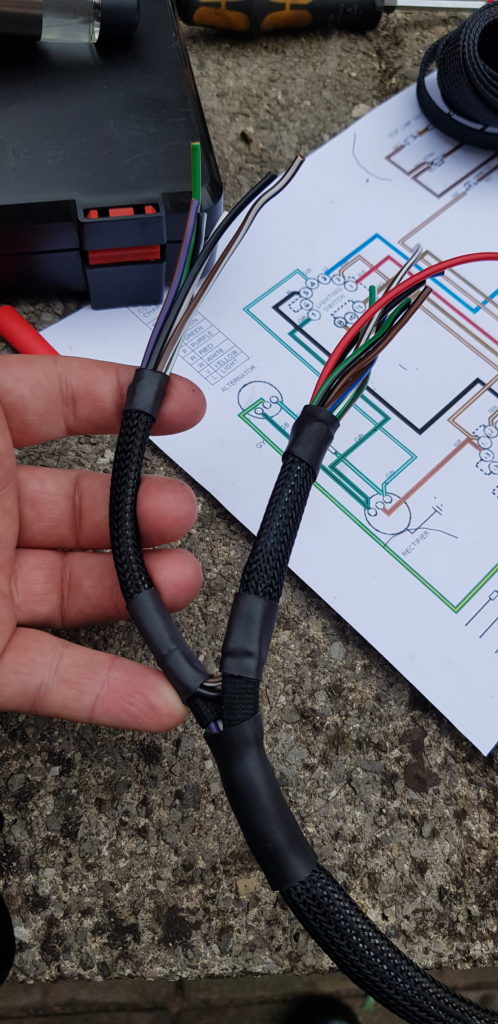
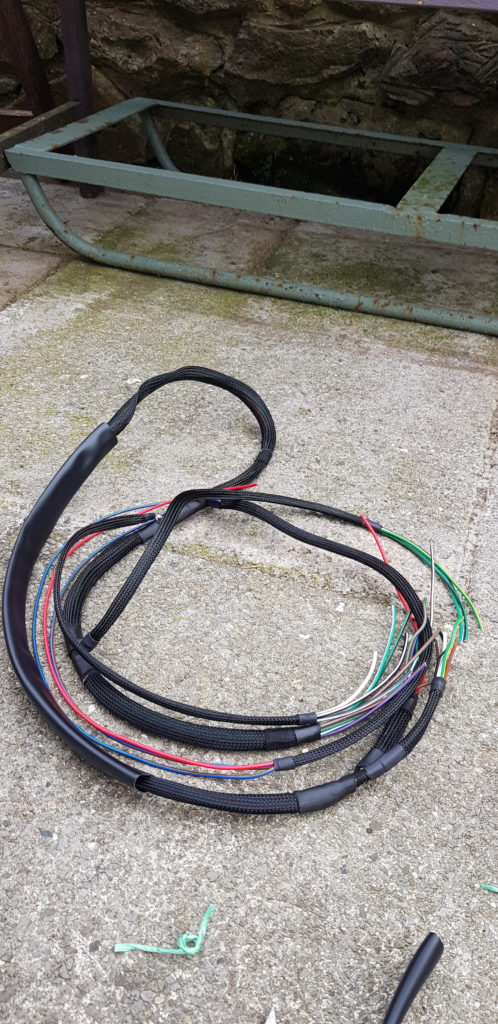
Now I have done the basic bit of the loom. I will fit it to the bike then make the wires shorter where I need them and then start crimping. I added a length of protective sleeving to prevent any undue wear from the tank and steering.
There is an extra wire in this loom, a red one. Its to run an earth (remember positive earth) to some where in the headlight as a backup. During this process I thought that I needed more eyelets to crimp on, I have a few but I ordered some to add to the collection, plus a new horn/dip switch and a new rear brake switch. This re-wire won’t be cheap but I enjoy having a go at stuff and learning new/developing skills.
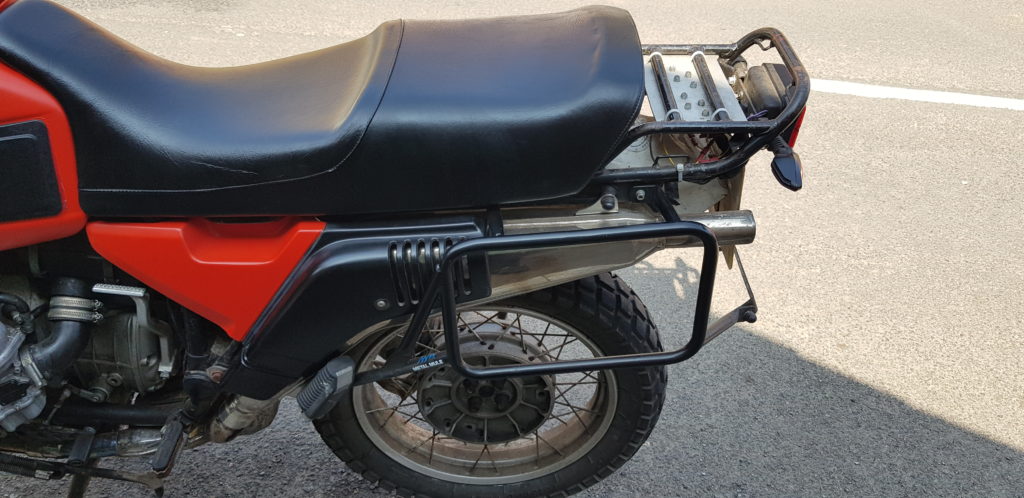
In other news, I also challenged my friend with a Welder, “This Old Hoddy” to make me a tool for taking the inspection covers off the bike. It is rough but does the job. I just don’t like using a screw driver to undo them.
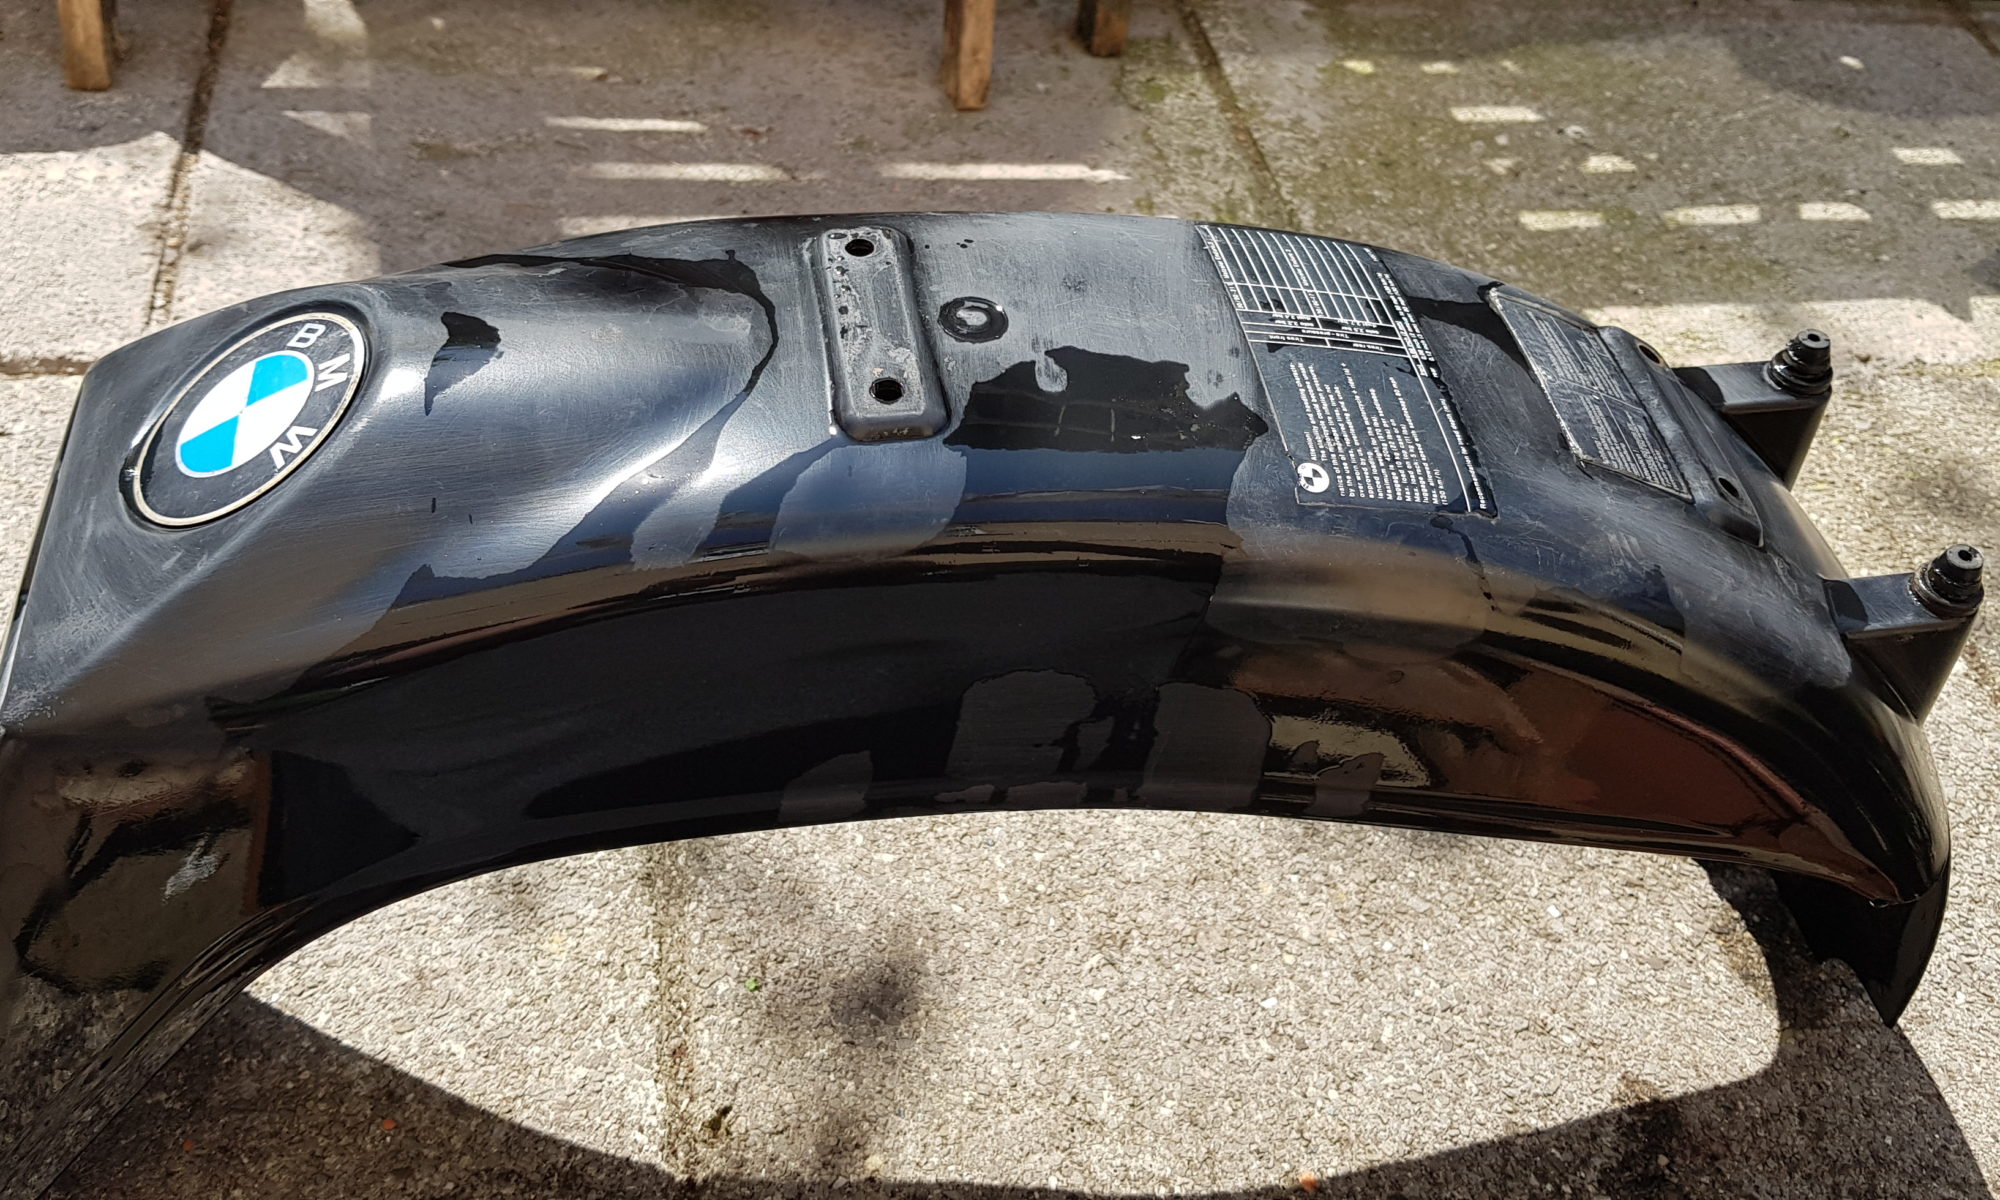
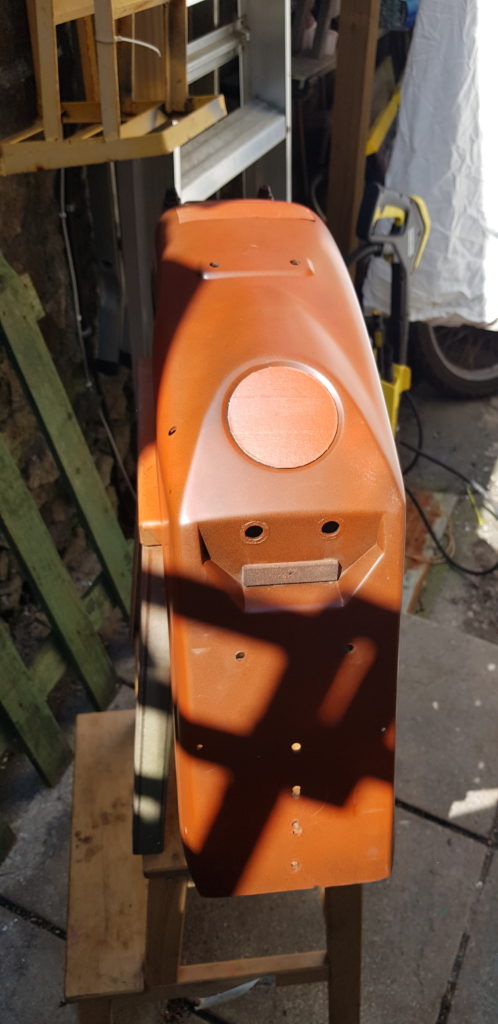
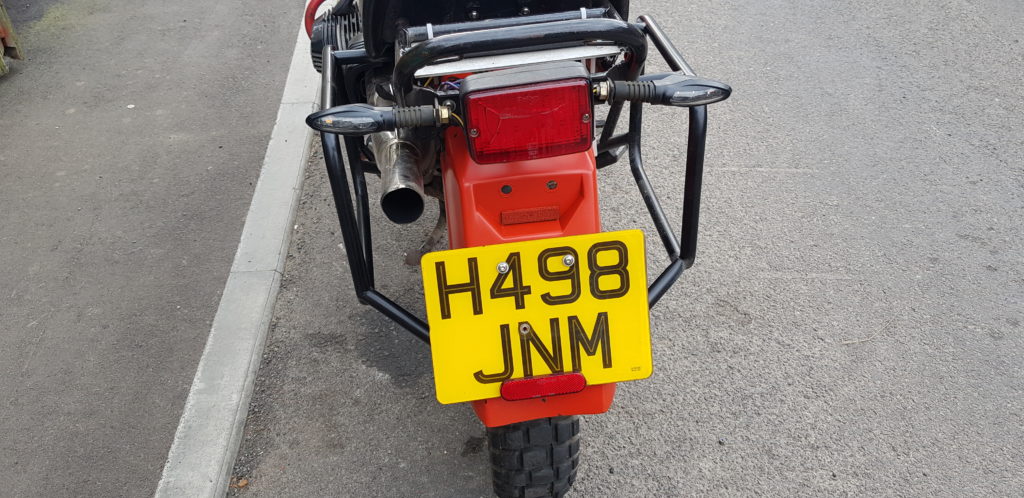
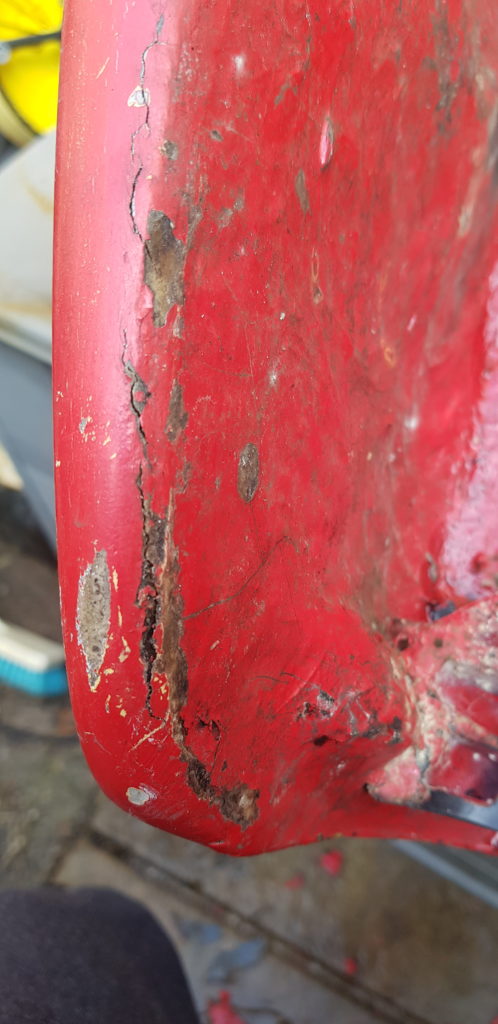
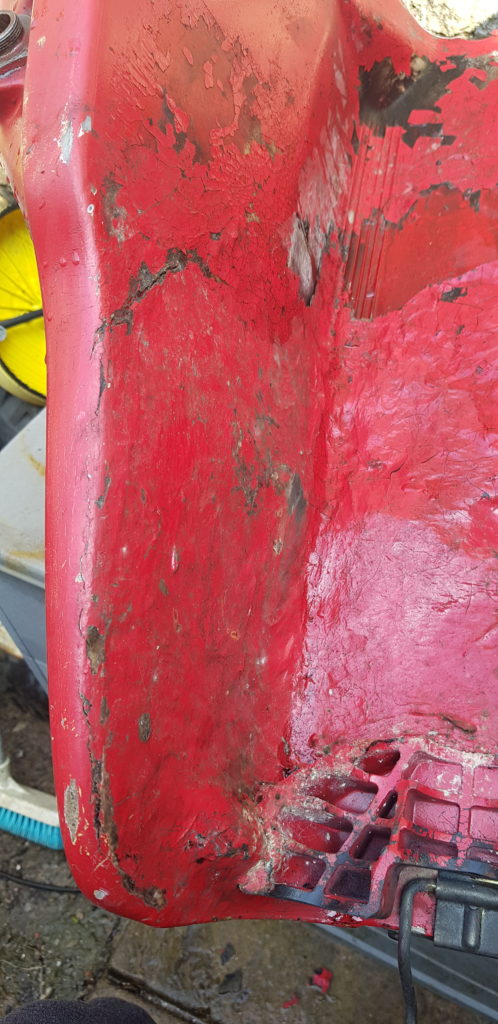
I had a birthday recently, I spent that weekend painting the BMW. At the end of the day, my Dad’s only disappointment was the hacked up rear mudguard and how rubbish it looked. So as a present he offered to buy me a good second hand one. So moments later I ordered the BMW brake light from Motorworks and a more paint from Craig at Buzzweld because the mudguard we found was, of course, the wrong colour.
The guard eventually turned up and as I had to take some Holiday during this COVID-19 stuff I thought oh well might as well do something with the time.
A quick scrub down and I masked off the stickers and the BMW logo. Then out with the paint. I chose to go red again as it covers well compared to the white. and I thought I like to be different.
First Coat
3rd or 4th
Done
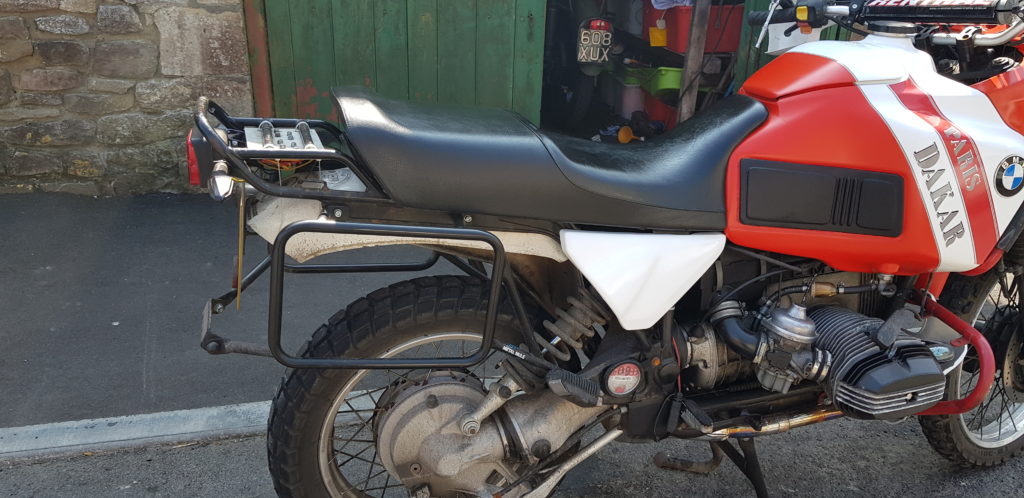
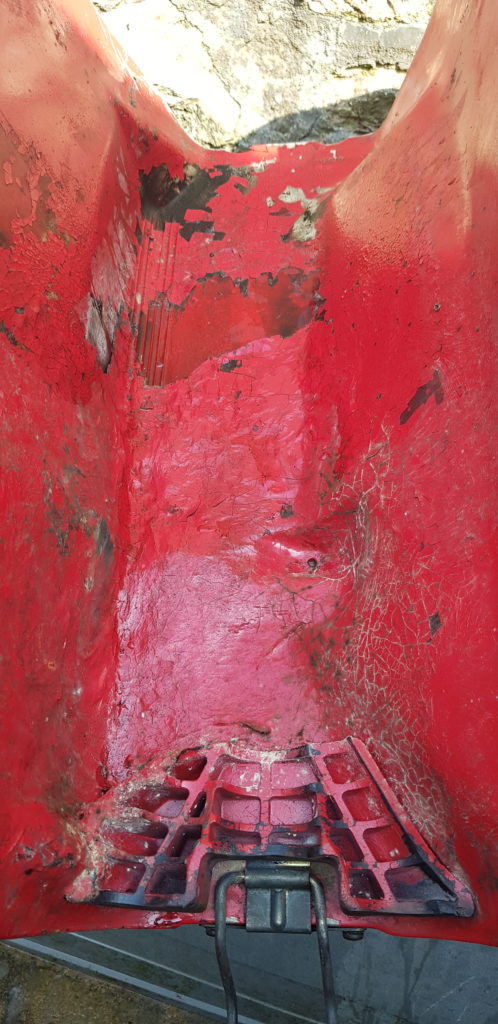
Then came time to fit, oh how much of a pain that was. It decided to interfere with the Metal Mule Pannier kit, and so, therefore, got a few scuffs in the new paint. I will touch that up another day. I took the opportunity while the mudguard was off to paint some Coo-Var Rust Converter as I do plan to repaint the frame one day but not just now, but I would like to prevent it getting any worse anytime soon.
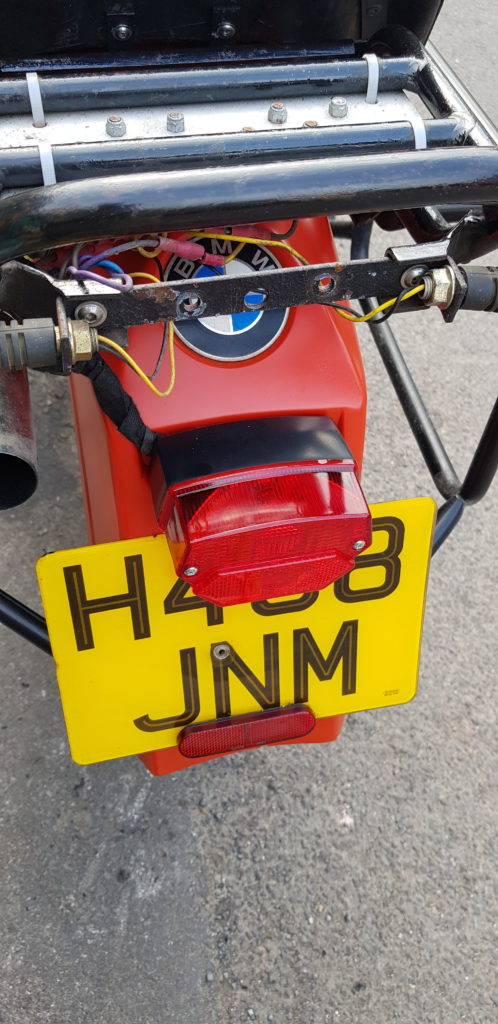
Looks a lot nicer with the proper guard in place and I have got rid of the horrible bracket for the numberplate. Decided to fit the new brake light so the LED one I made had to be removed.
The indicator bracket I made up one afternoon looks like it needs to be removed and something else made. The Resistors for the Indicators also needs to move now. I am thinking under the seat on a new mount.
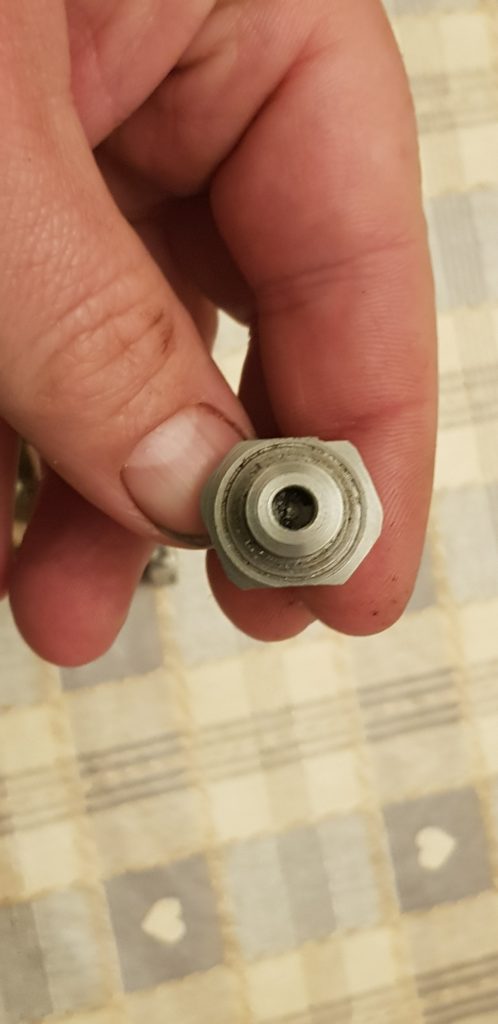
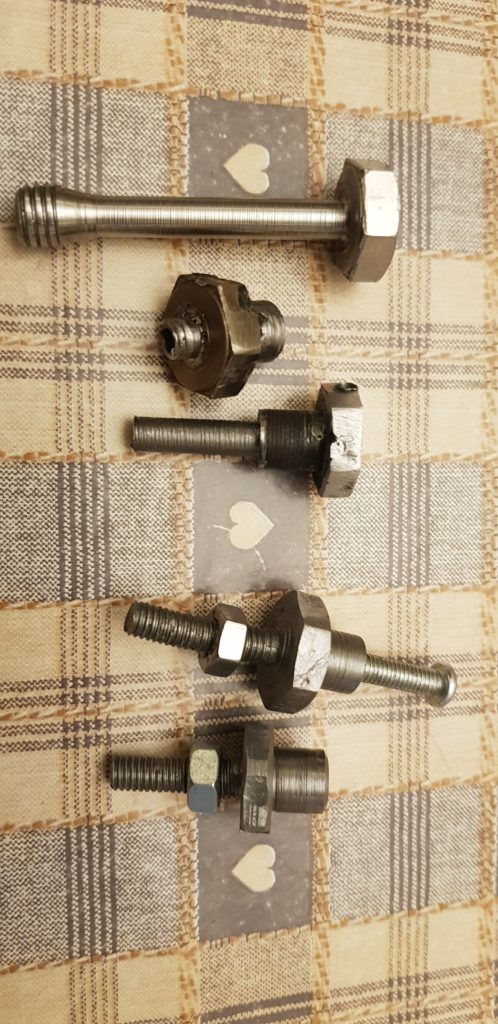
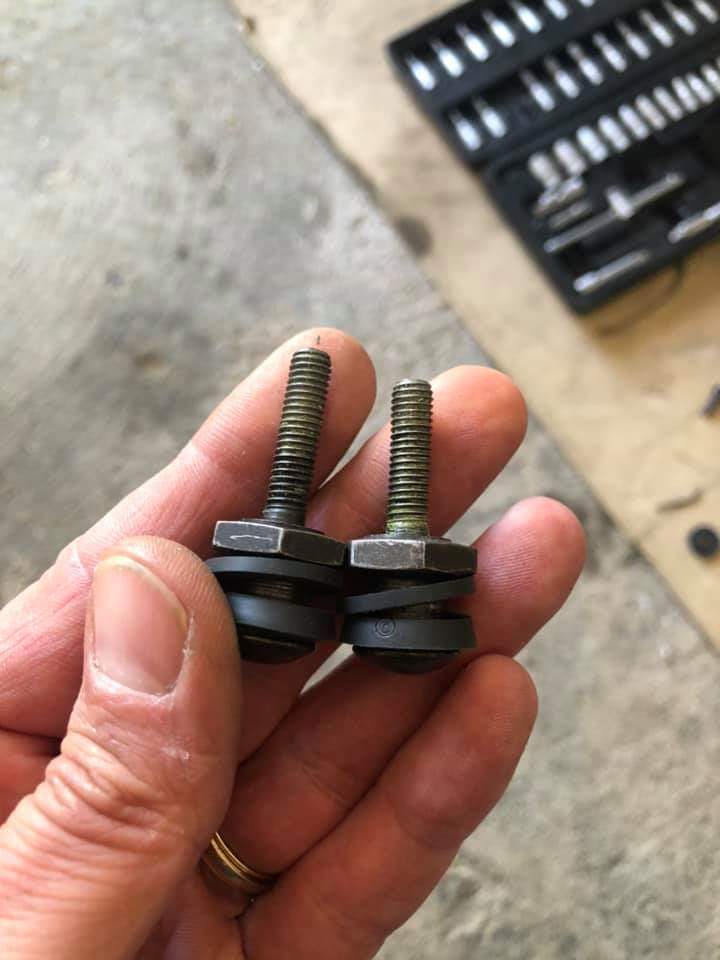
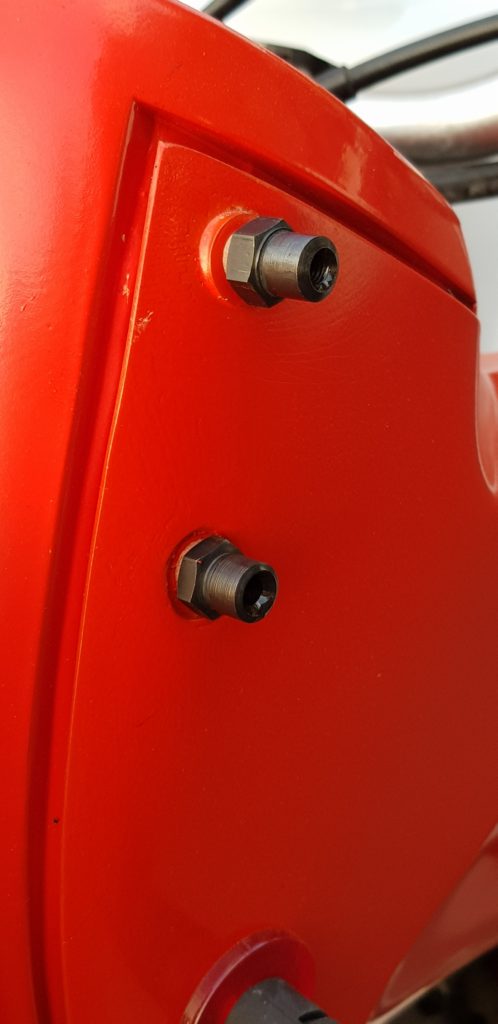
One of the other things I have been meaning to do is sort the Screen mounting points but I can’t seem to get the BMW bolts which are M6 with a 10mm spigot on top with an M5 tapped into that. I asked a friend if he could have a go so “This Old Hoddy” made up a few, they are interesting as he is still learning his lathe and Mill. I needed 4 but he had only made 2 that could be used.
But he told be he had ordered some hexagonal bar stock and would be having another go. A week later and he had done them, I collected on the way home from work kept distancing rules etc I even left them on a bag for a few more days before taking them out for a clean etc.
Technically they should look like this,
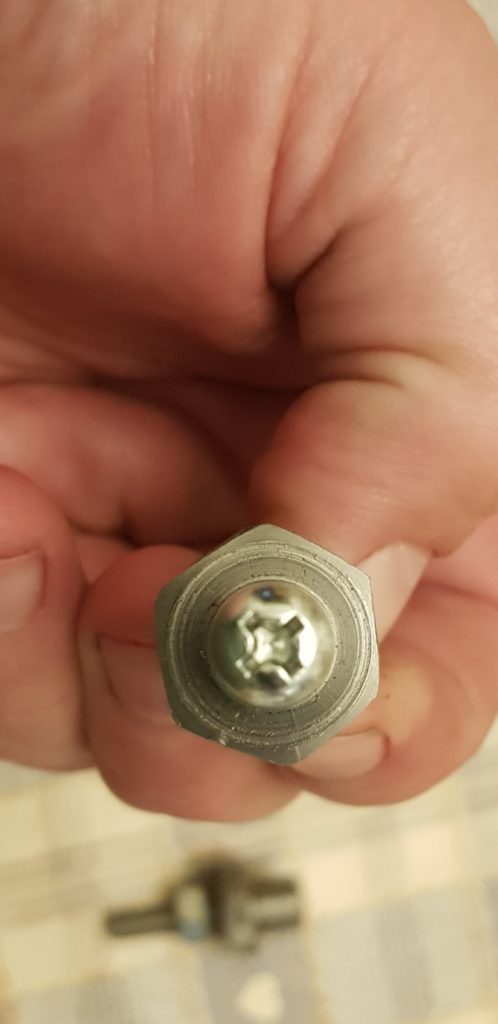
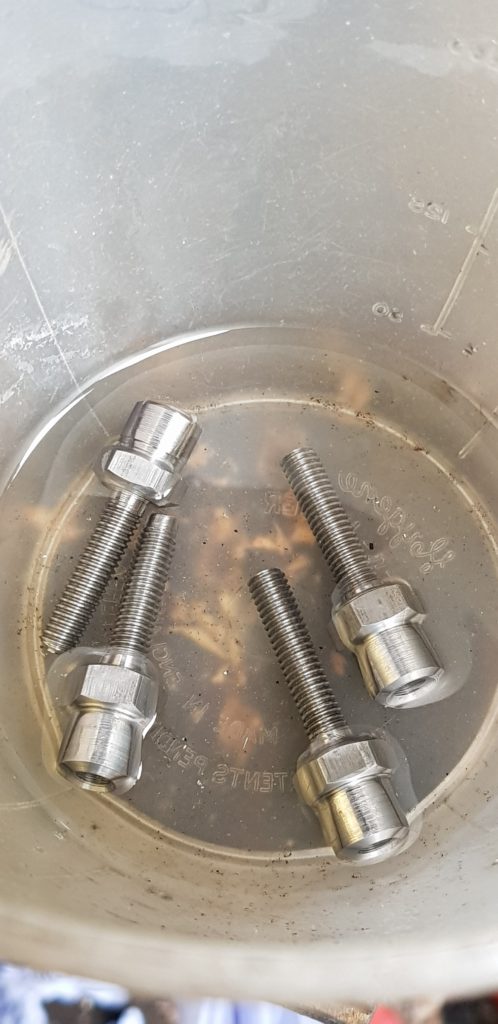
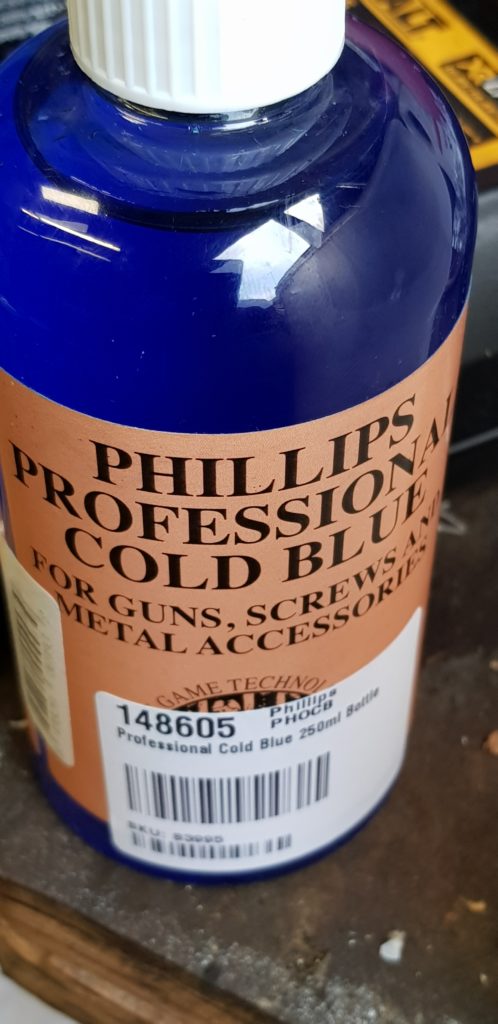
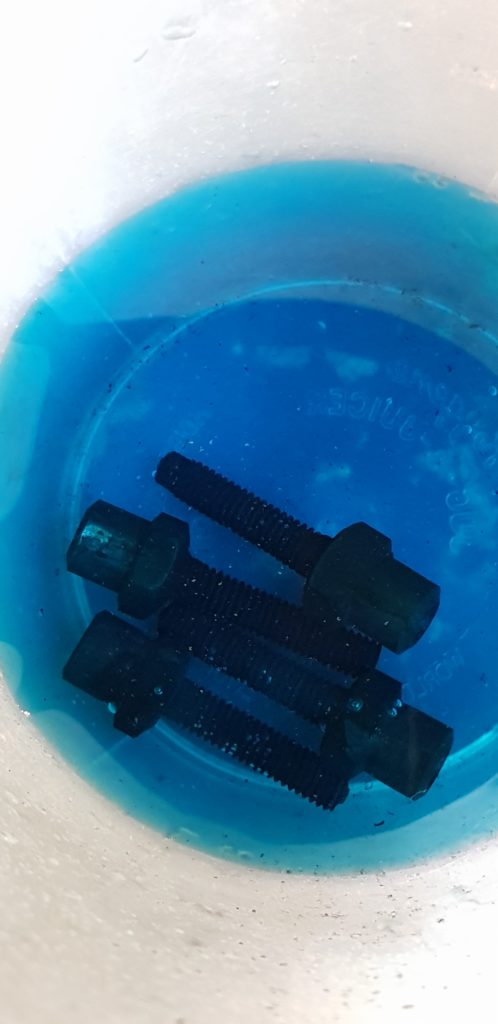
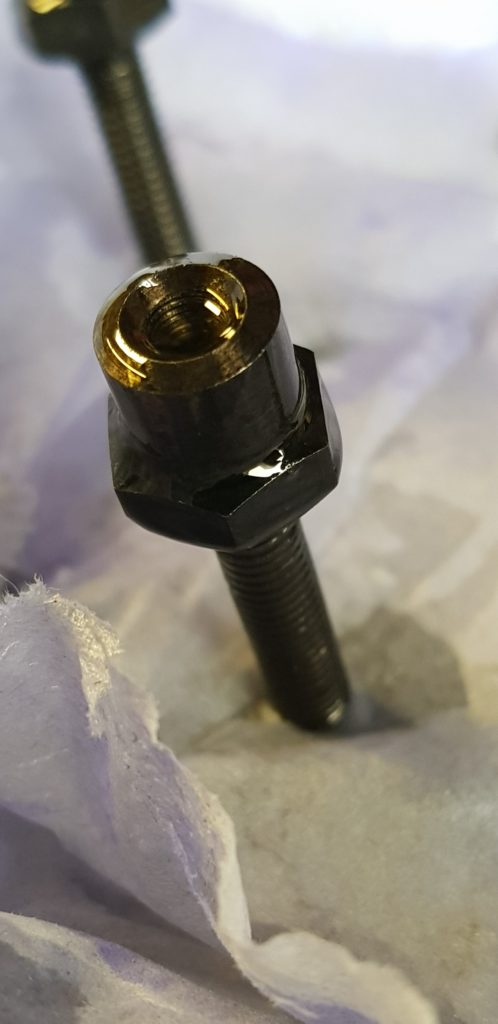
With a 17mm spanner head on them etc etc. But they fit and look right and they are mostly hidden. As the ones Hoddy made for me were plain steel I had to treat them. The idea of Cold Bluing them sounded like a good idea. Its a technique used on Guns to give them a layer of dark blue rust that can be oiled and precents the red rust we are all used to. Ordered a bottle and gave it a go, as I did this I asked some of the Ixies on Ixion and they were strongly against it but it was too late I had done it.
Doesn’t look too bad, if it doesn’t work I will take them off and either spray them or get them treated. I am trying to avoid buy a DIY Zinc plating kit but I am getting weaker by the day.
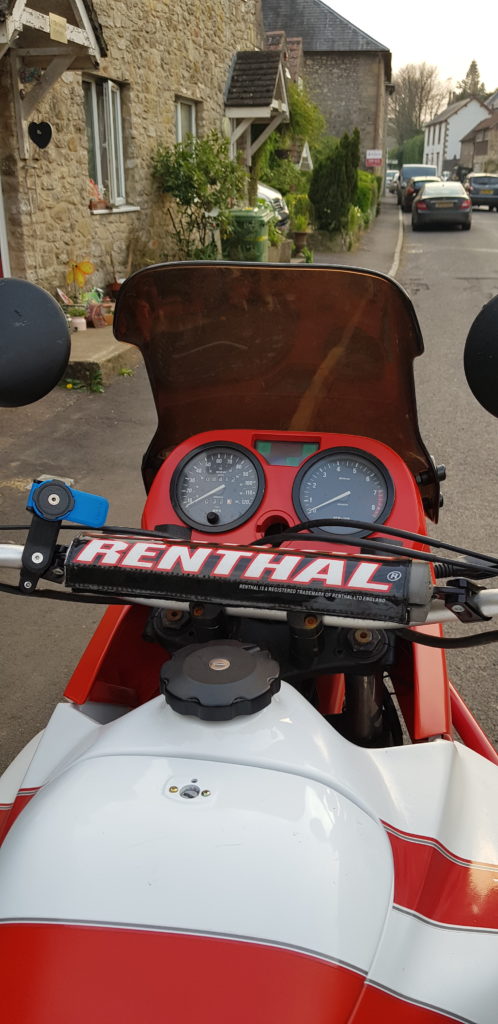
Fitting the screen etc was rather easier than before as I now had the right sized bolts and wasn’t faffing about.
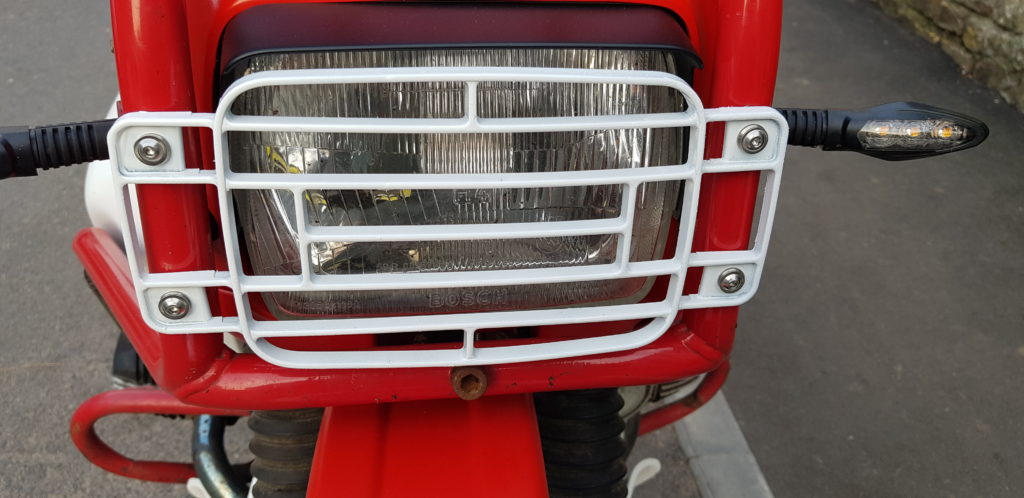
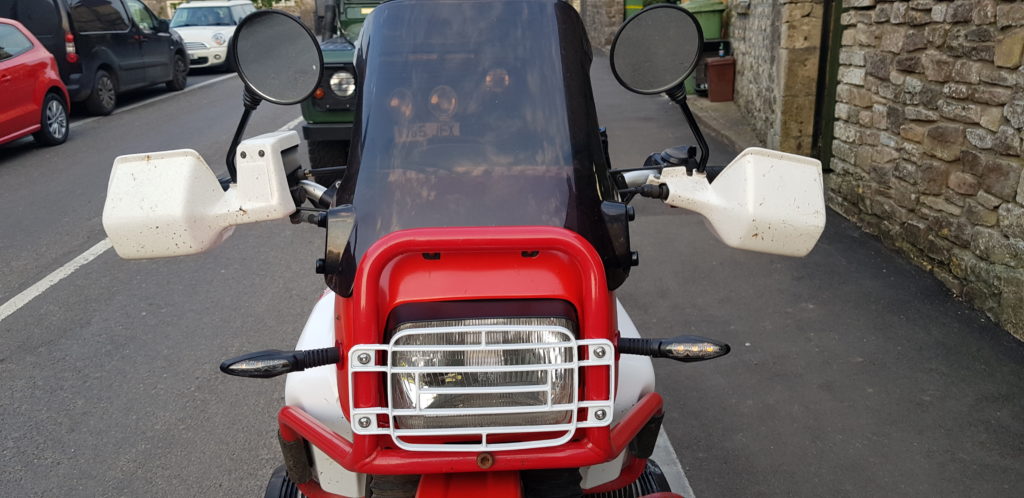
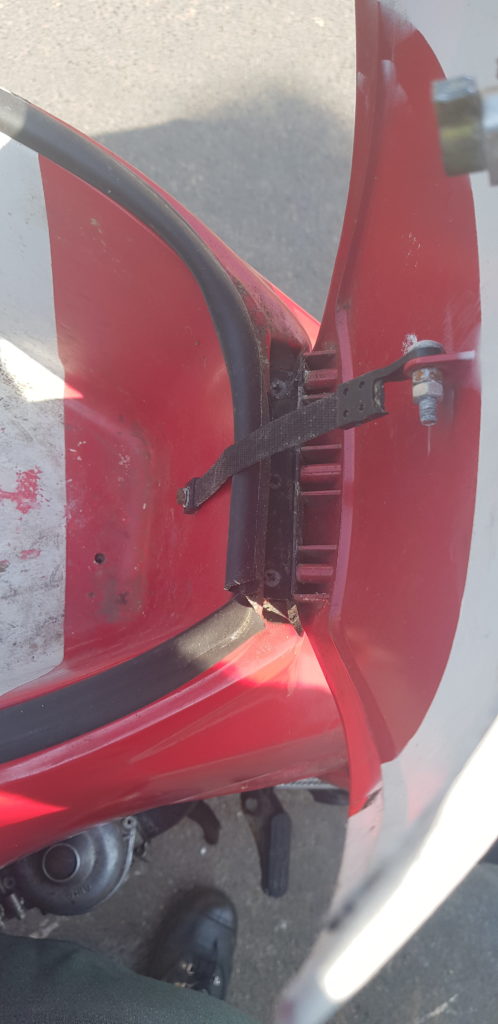
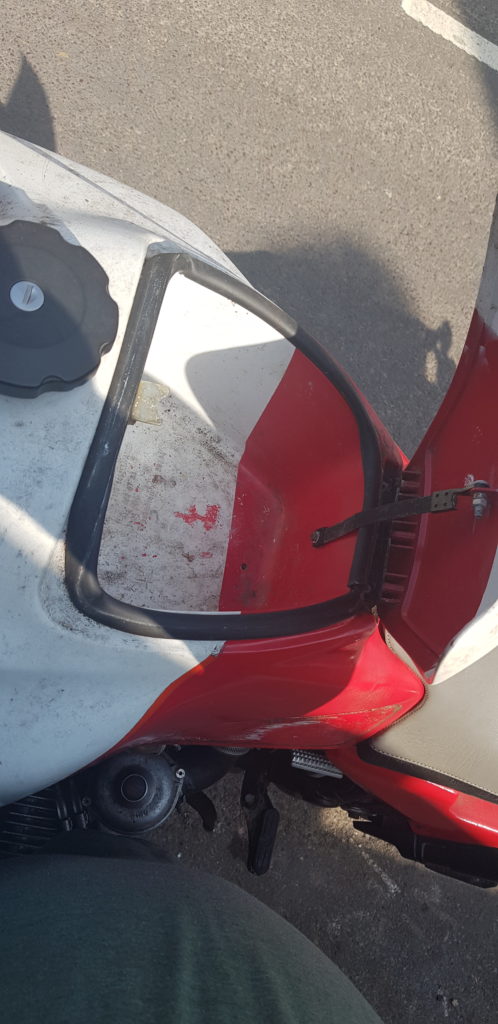
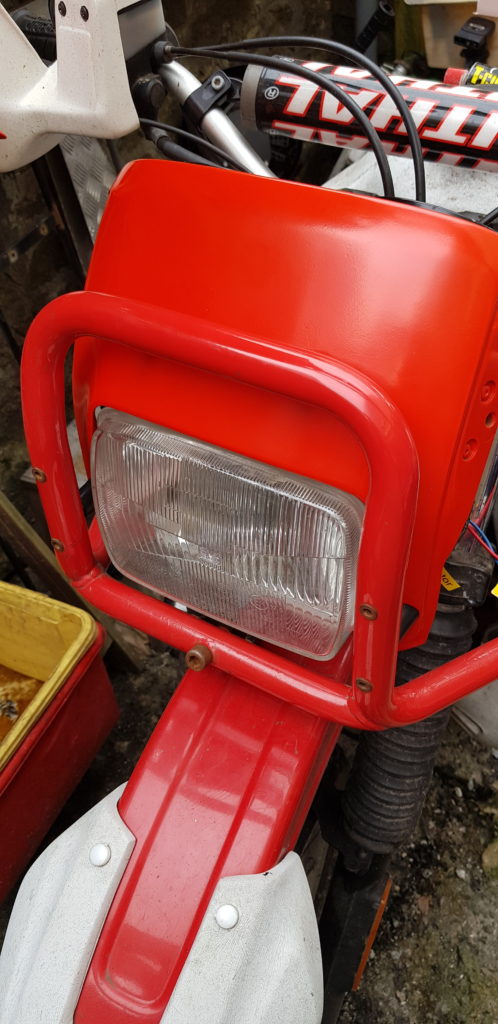
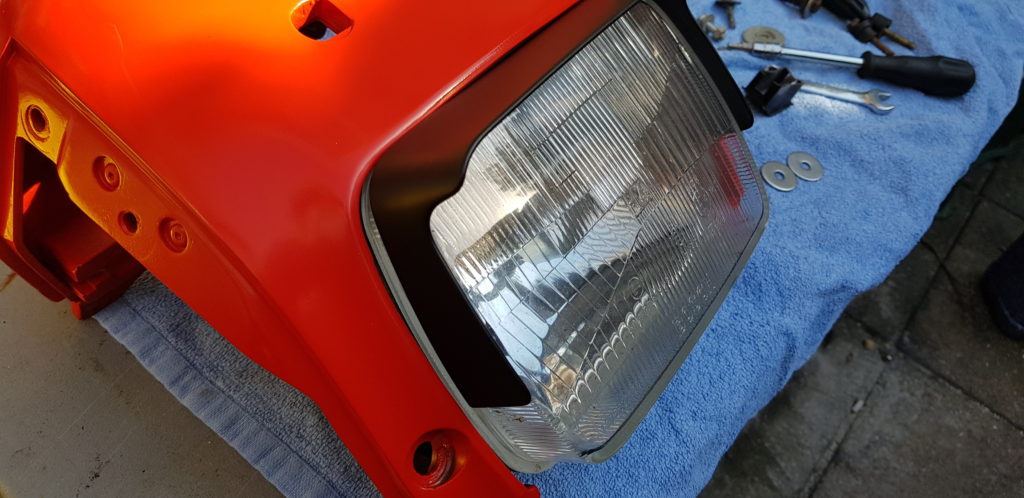
You might also noticed I fitted the head light surround, using some more of the 3M double sided tape. With the evening starting to draw in I decided to give the headlight grill I found at the bike show a bit of a spruce up.
I went for white to go against the red. Now she has pretty white teeth to smile at others as she goes by. Maybe then people wont stare at her saggy pistons (she isn’t a MV).
For ages, I have had a squeal on the Land Rover. I made the mistake of asking on the forums etc. Which is never a good idea as you always have people quoting the most expensive item to fix. I decided to let it develop so that I could finally be able to hear it easily and know that it was.
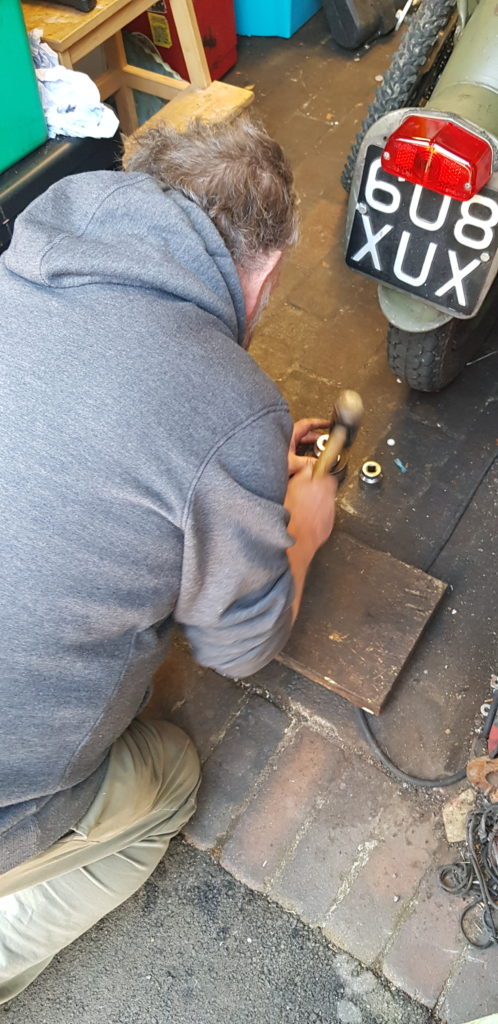
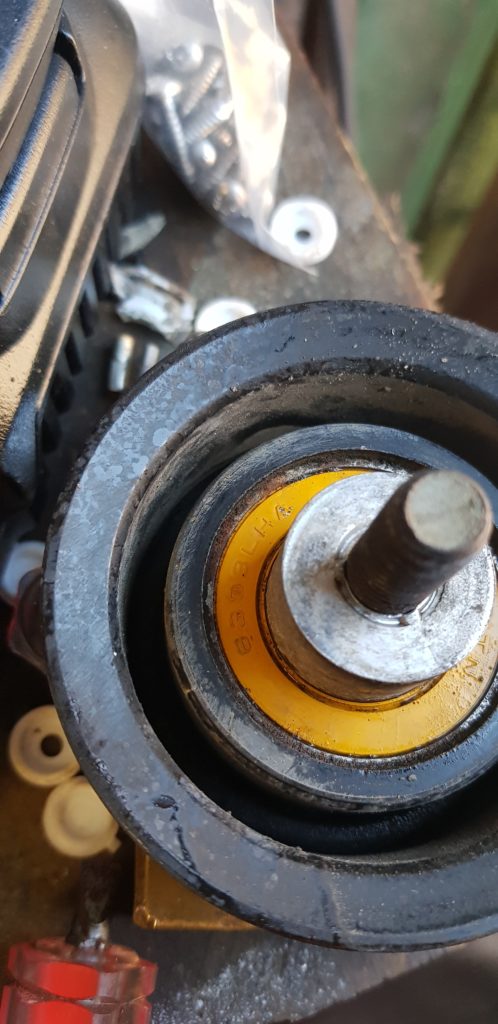
I had thought it was the Viscus Fan Pulley Bearing but as I stripped it down to get to that bearing I removed the serpentine belt and behold the two idler wheels were rather wobbly and one was crunchy. Look at the price of the parts, £45 without the postage, eek. https://www.lrworkshop.com/diagrams/land-rover-defender-engine/td5/drive-belt_53211
Hmm, they look like standard bearings, a quick call to Frome Bearings and Belts LTD and they have them in stock. Less than £20 and I had the bearings, admittedly it should be 6303LHA and I fitted 6303LLU but it will do. The only info I can find is HA is case hardened outers but not sure how that is going to make a difference.
I started to tap the bearings out but soon the shed dwelling parent turned up and using some random old sockets and a number 2 hammer managed to convince the old bearings to leave and move in the new ones. I refitted and now the Land Rover it quieter, for now. I may need to give the Land Rover a wash now.
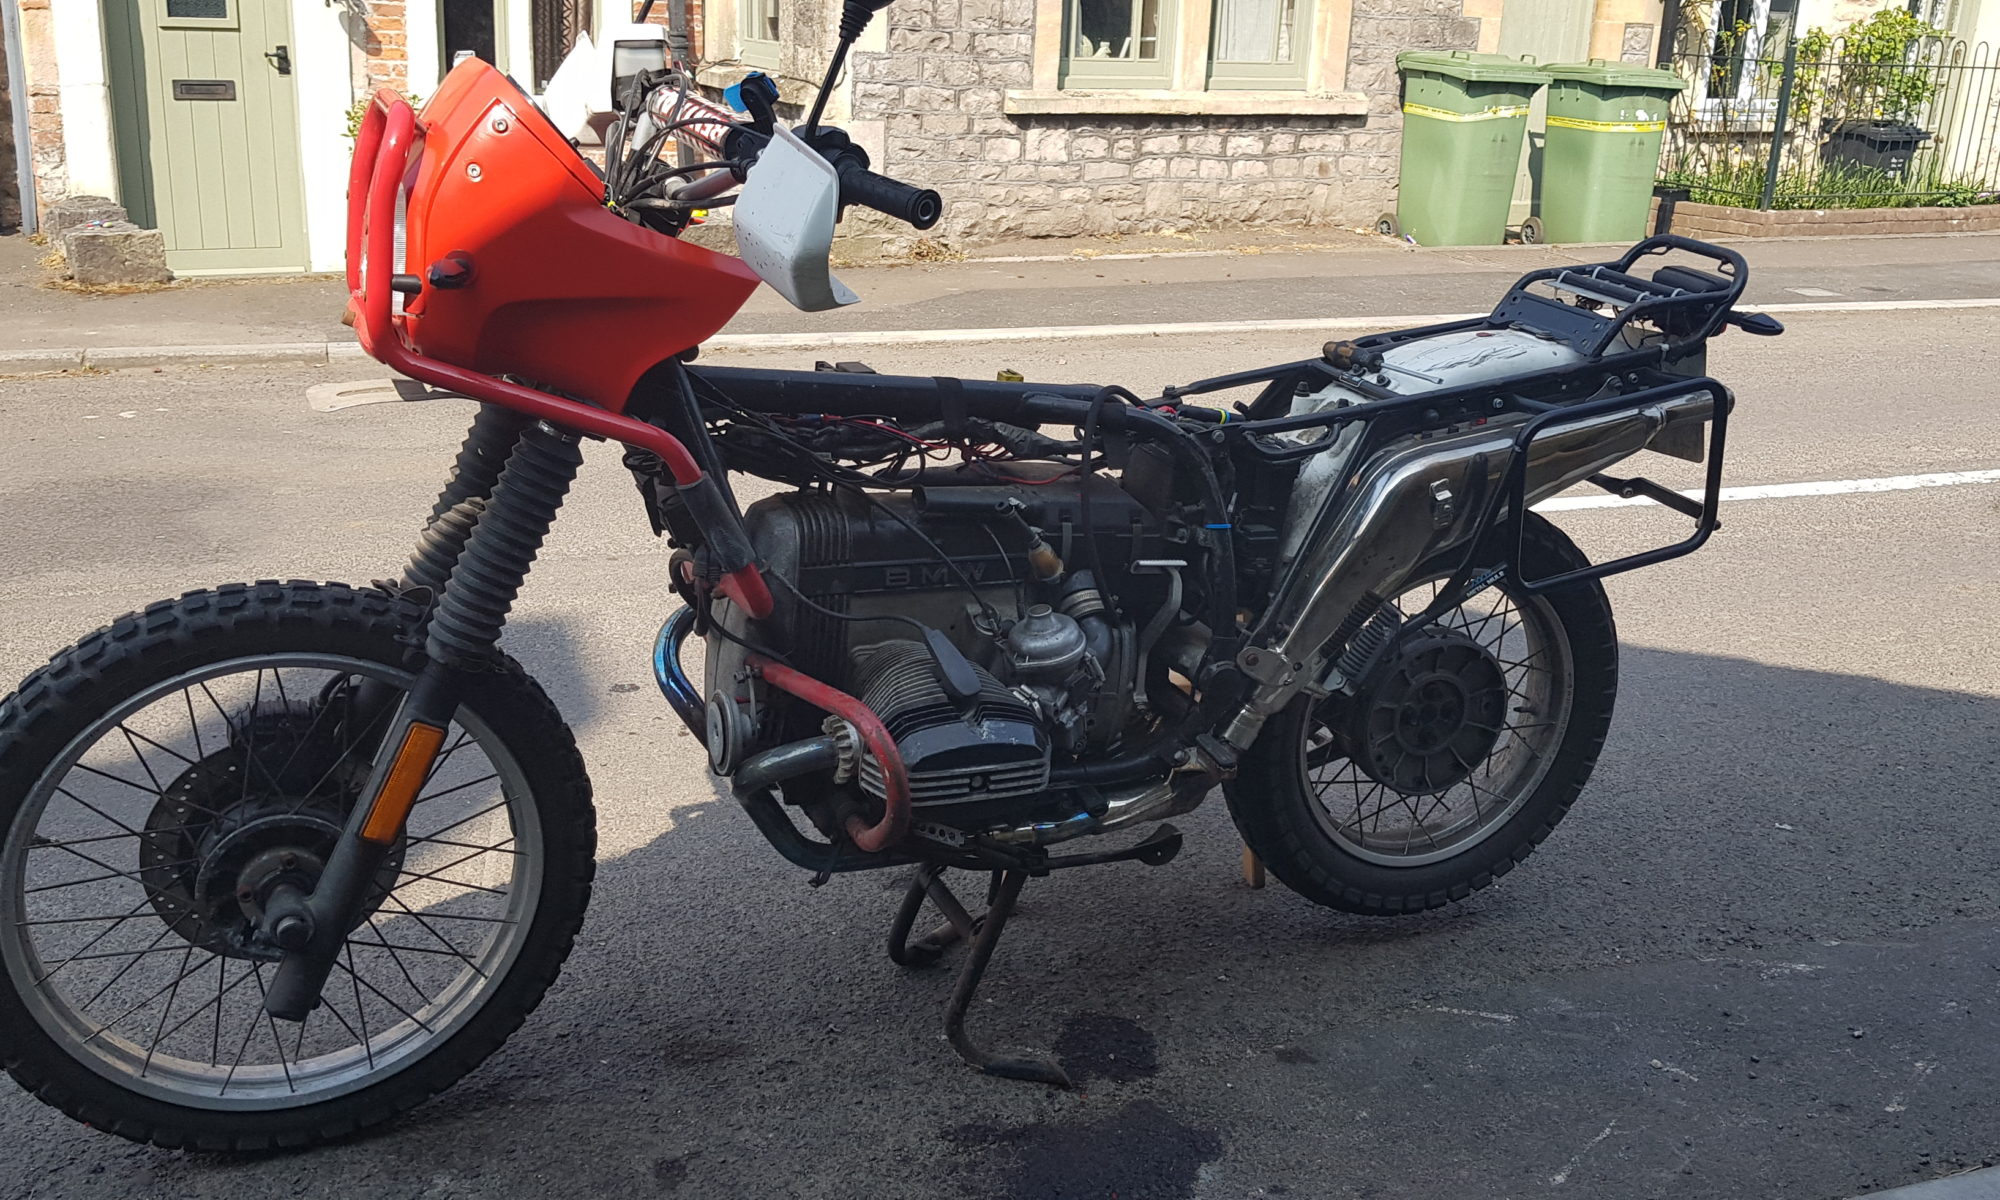
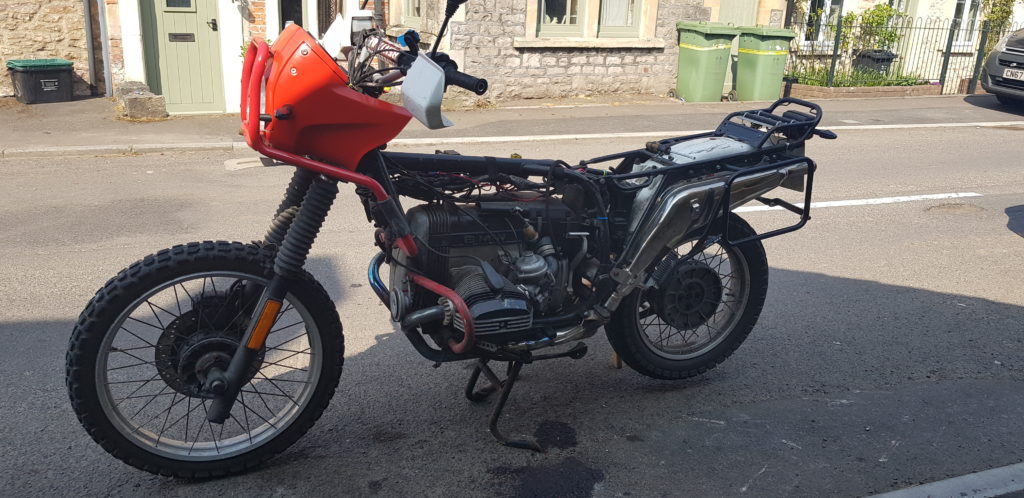
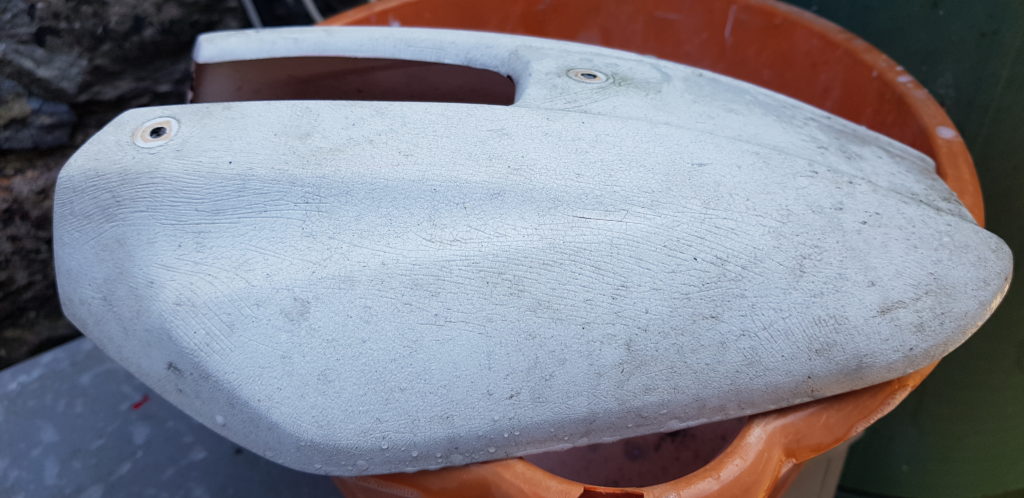
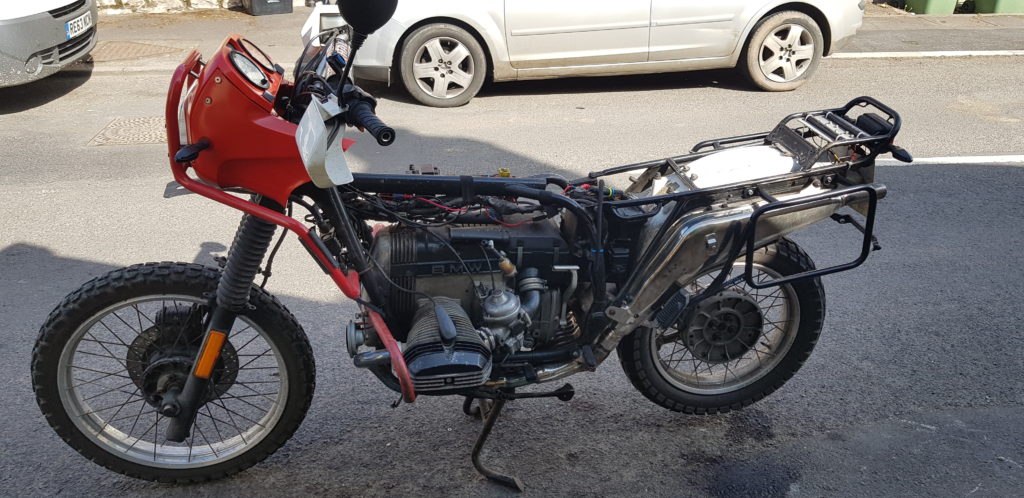
The Easter Bank Holiday weekend loomed and that would give me 4 days of OK weather to try and get the bike into a tidier condition. I started Friday morning and started to strip her down.
There was some rather crappy looking bolts in there top part of the tank, even a self taping screw stuffed in for good measure. The knee pads were stuck on with some silicone and needed to be refitted.
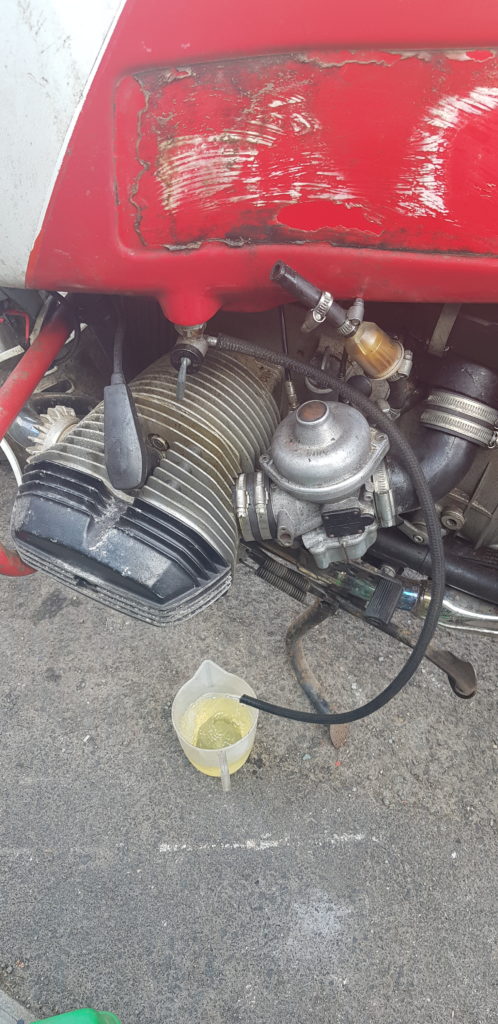
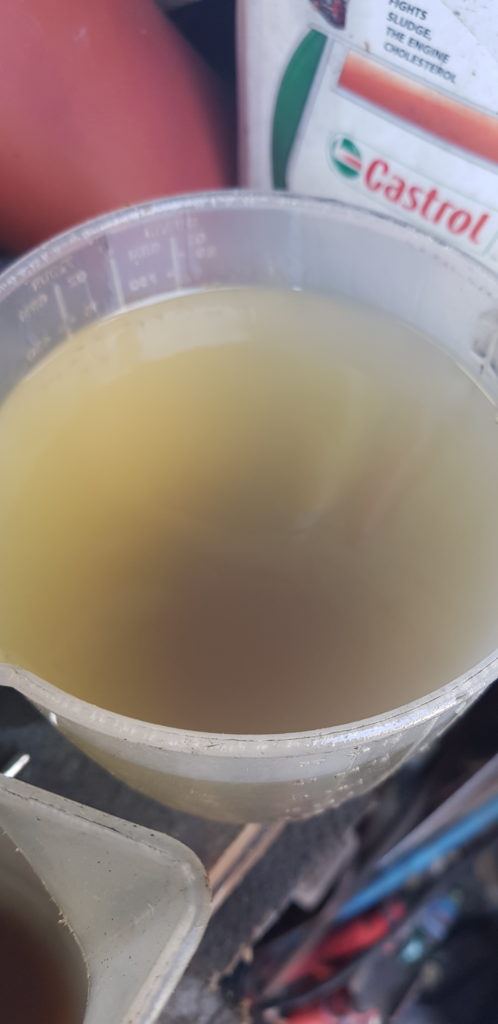
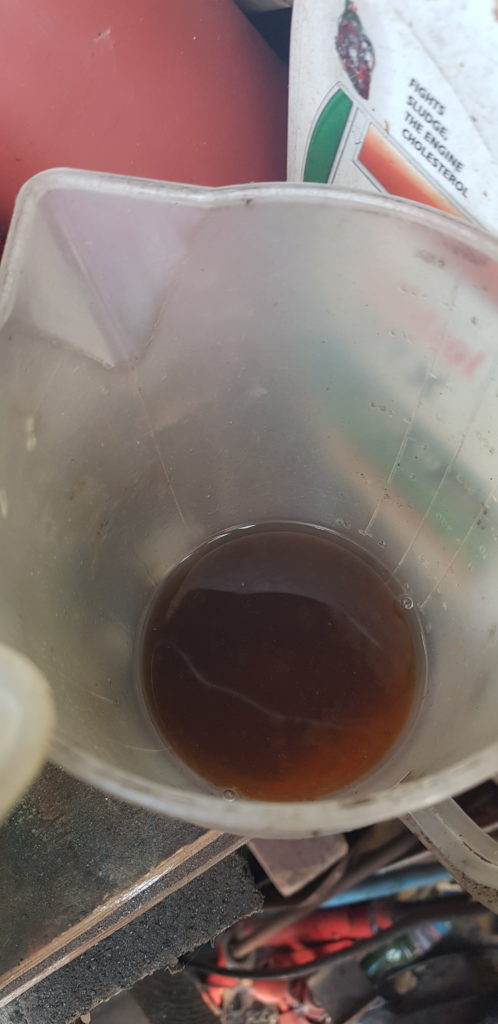
That also meant I had to drain the fuel out of the bike. I had run out of fuel a few days earlier and had put some 15ltrs in and rode it to work and back etc. (with COVID-19 this is how I get any chance to ride). I attached a bit of pipe to the taps and let it drain.
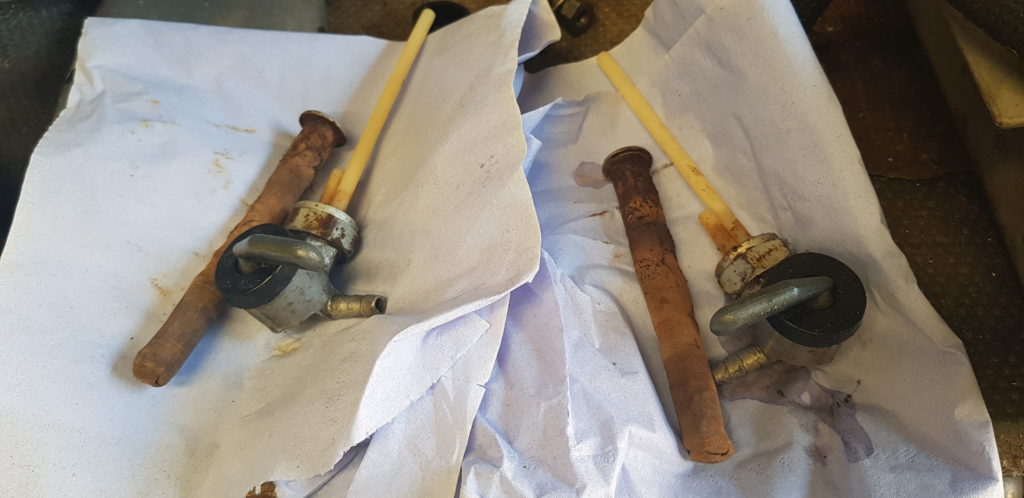
I got most of the fuel out but the condition of the fuel at the bottom of the tank wasn’t great. I have cleaned the taps etc once before.
Now with the bike totally naked, I did contemplate sending the picture into Bike Exif but I have been informed the lack of exhaust wrap, the correct sized tyres, and I had handlebars meant I lost enough points and they wouldn’t use it.
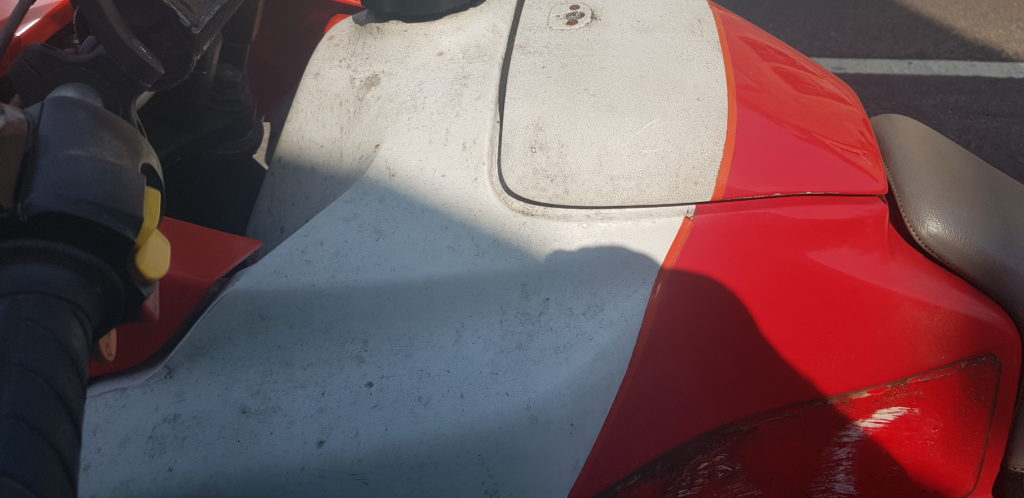
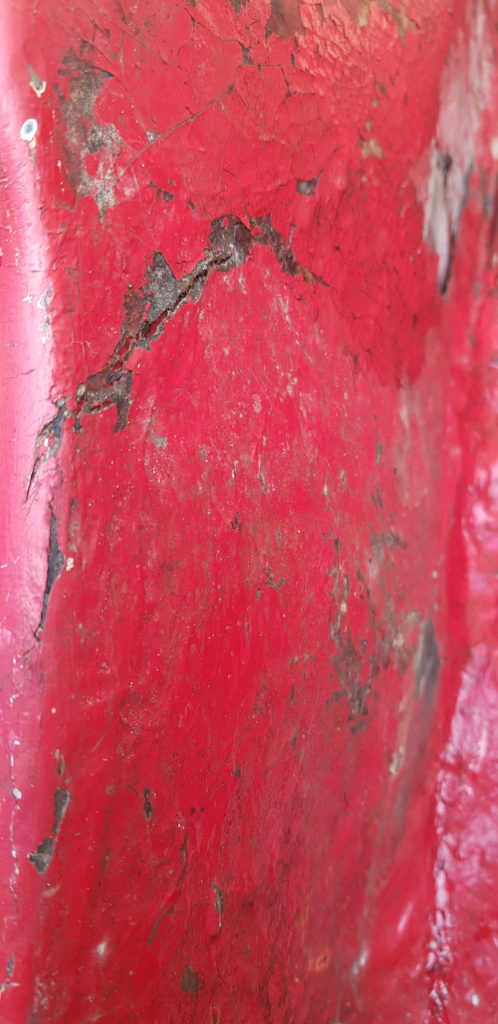
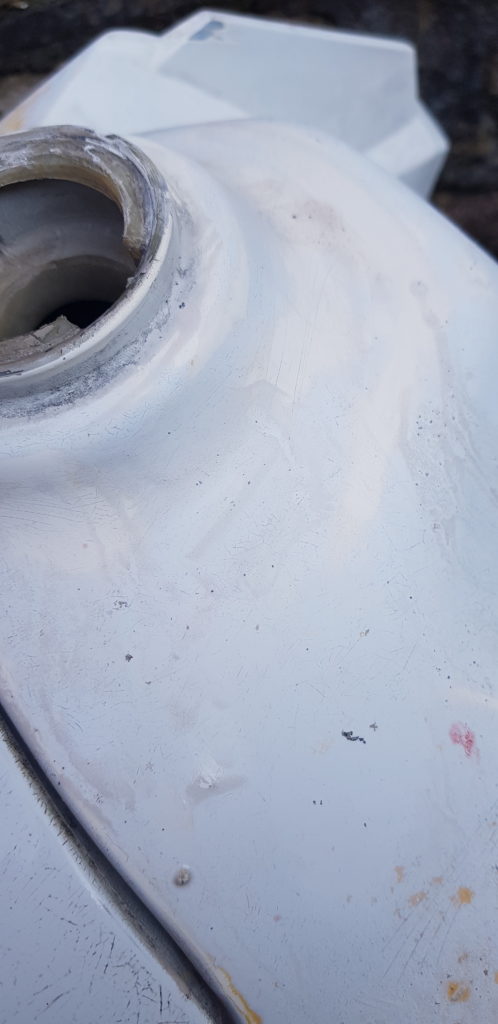
After emptying all the fuel out I took a good look at the tank and paid more attention to some of the repairs done to the underside of the tank. I think its been repaired with fibreglass and as much as I wanted to pick at the stuff and see how bad it is I left it alone. I will keep an eye out for a replacement tank I see HPN do a 45ltr version, 10 extra than the standard BMW so that would be tempting.
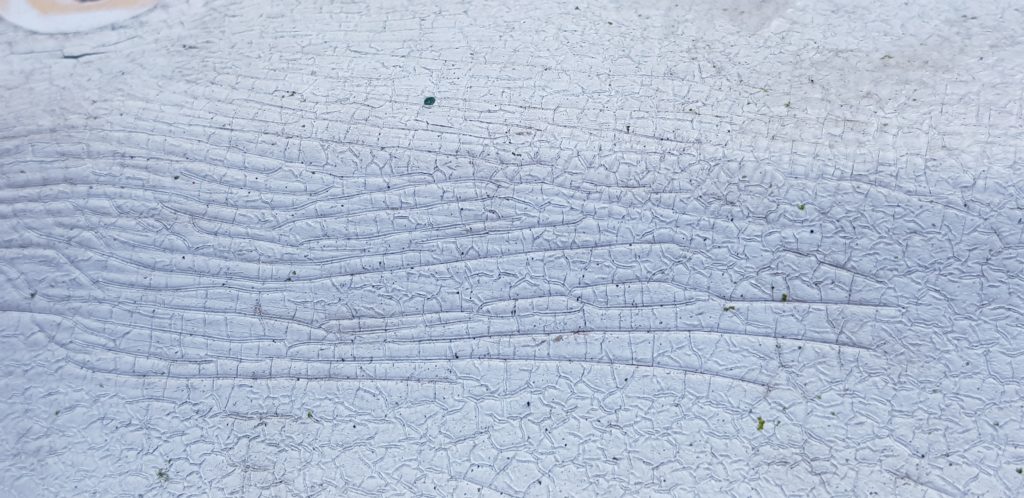
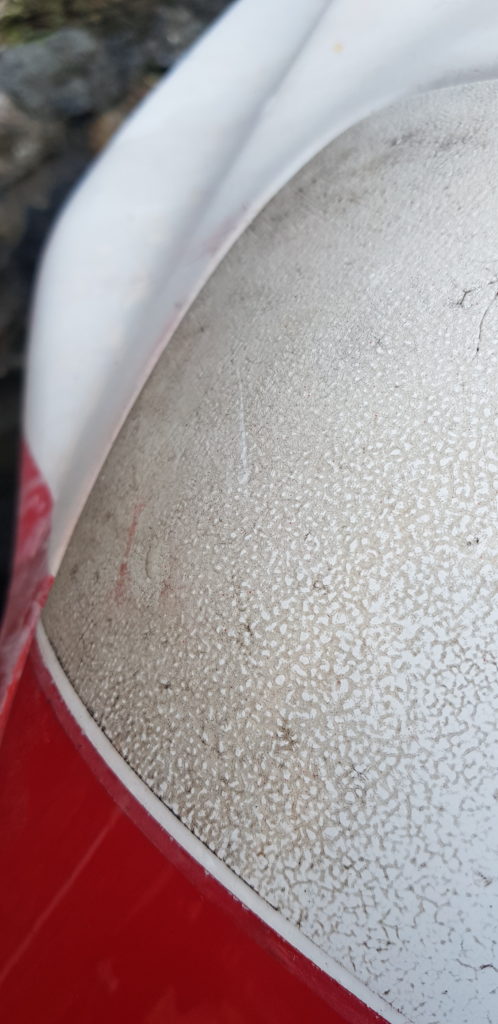
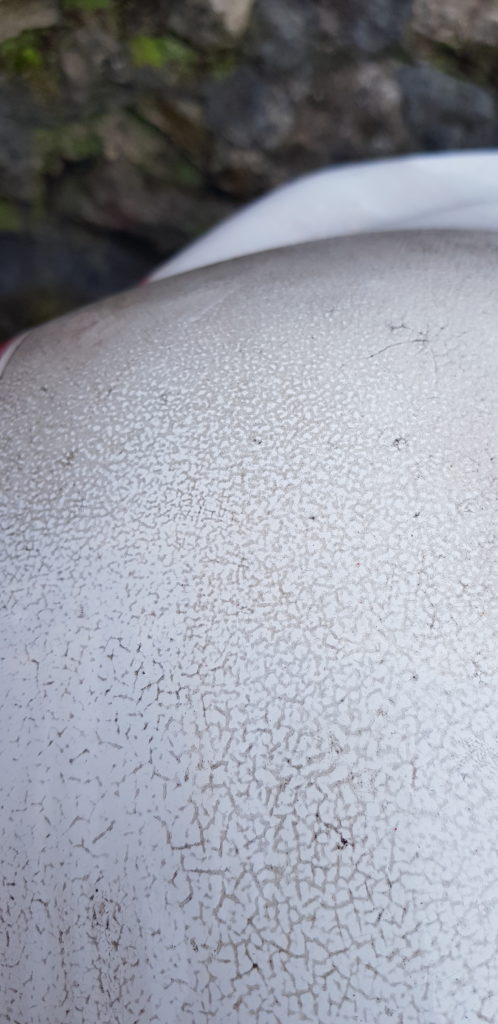
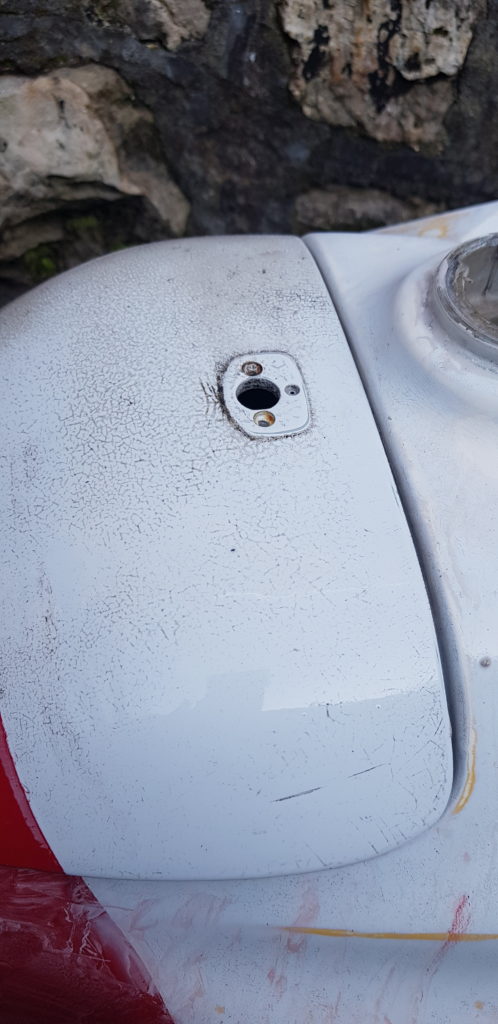
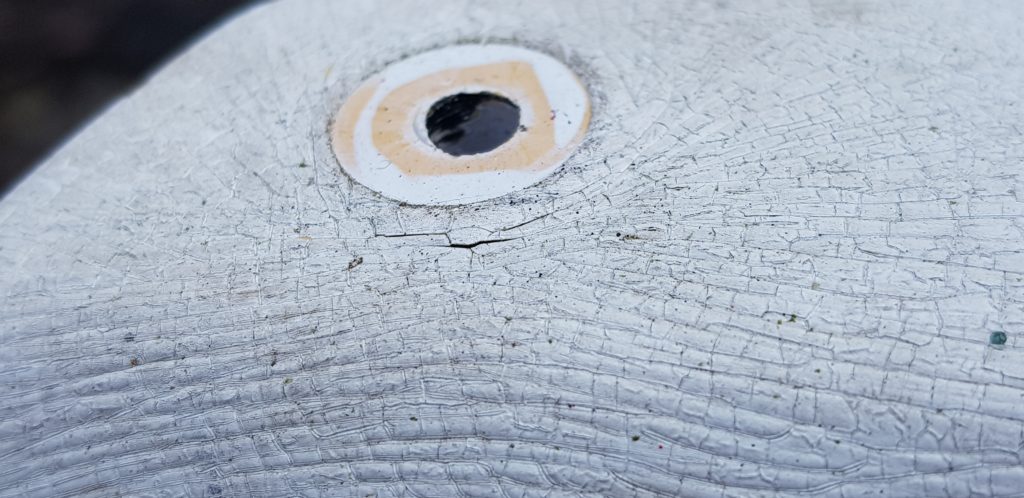
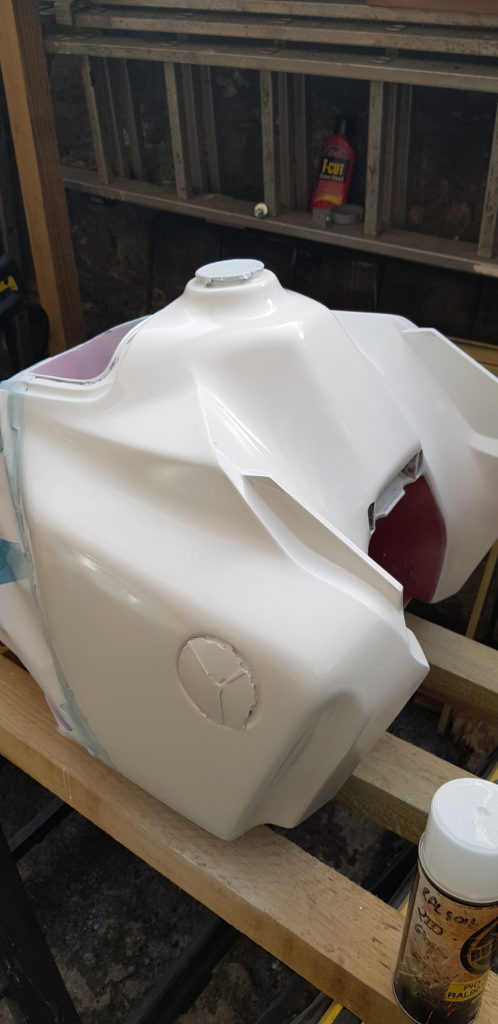
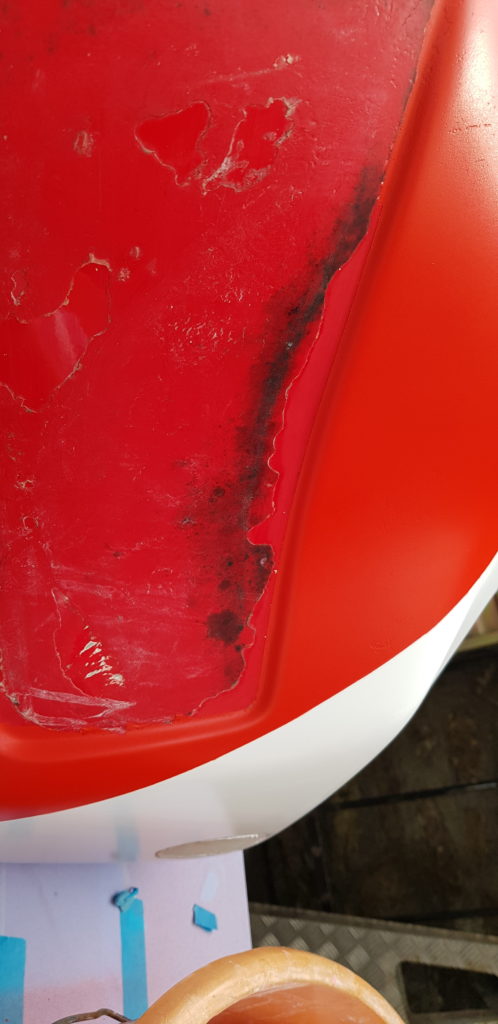
Now the ahem “Fun” part. Prepping the stuff ready to paint. This took the rest of the day and most of the second day. Not helped by the condition of the paint especially the white, now I believe the tank has been re-sprayed at some point and that paint had a nasty reaction to something and had developed a texture akin to elephant skin. This is mostly the reason why I wanted to paint the bike as the texture meant I could never get it clean.
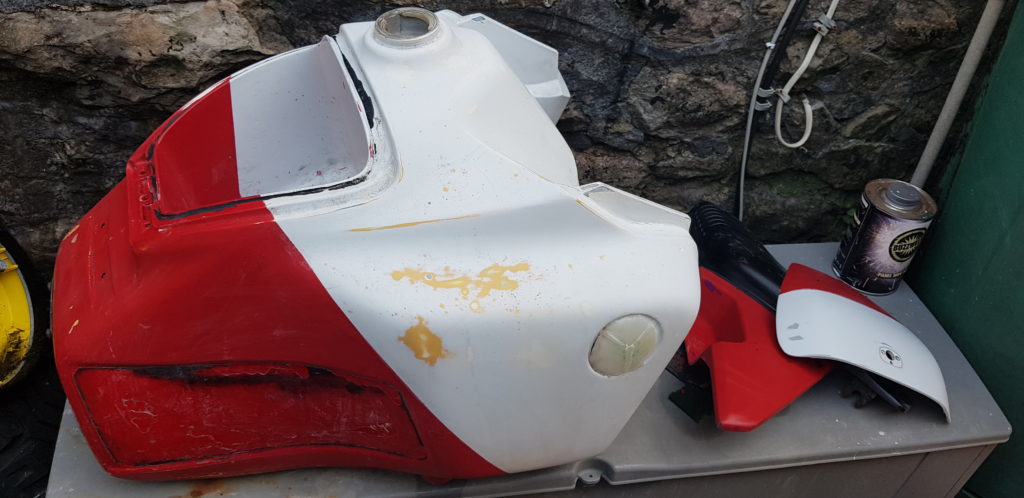
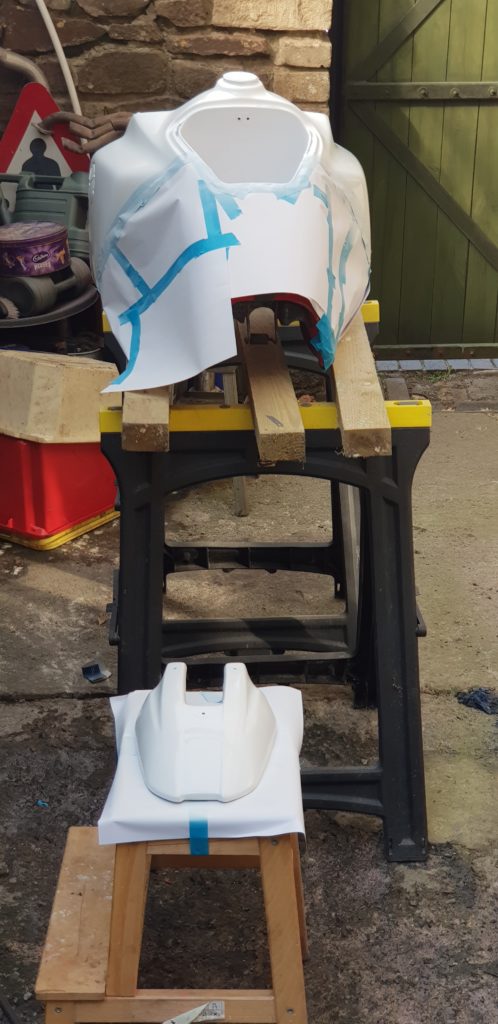
It had been suggested to me that I would be the best idea to paint the white bits first so I masked it off and set about it using a paint I purchased from Buzzweld called PIO (Plastics in One) which is a self-etching paint for going onto plastic materials. I hope it has enough flex to cope with the plastic tank. Craig (the owner) had mixed me up a can of Traffic Red and Traffic White which are RAL colours so has less of a mixture of tints so a stronger final colour. I will admit my prep work wasn’t the best and there was plenty of bits I missed but I was starting to get really tired of sanding stuff by now.
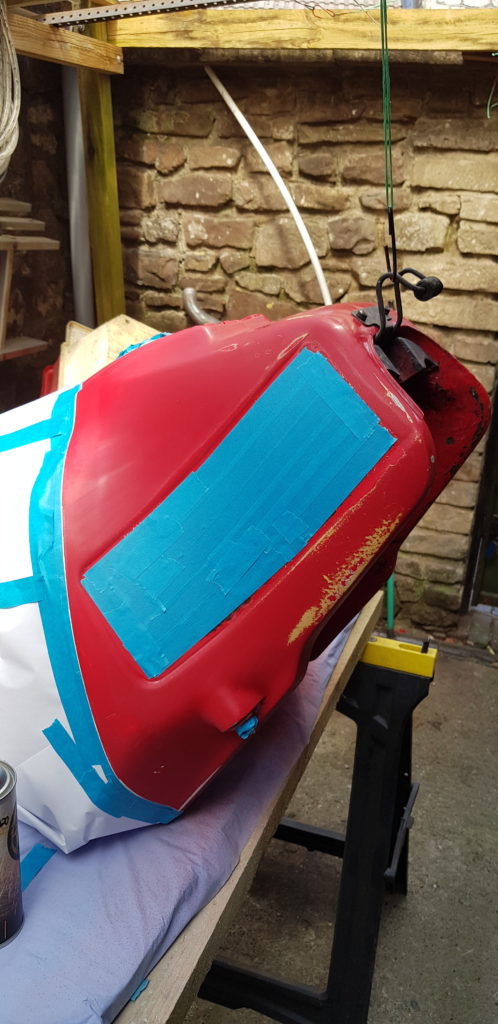
The white isn’t very good at coverage so it requires quite a few layers, this lead to the inevitable impatient me and runs. So some parts might need looking at in the future but for now, it looks OK from a distance. I left everything to cure for the evening, so that I could get to work on the red bits on Sunday morning.
Sunday was a special day for it was Easter and my Birthday. But the forecast was for Thunder and rain by the afternoon so work had to start early.
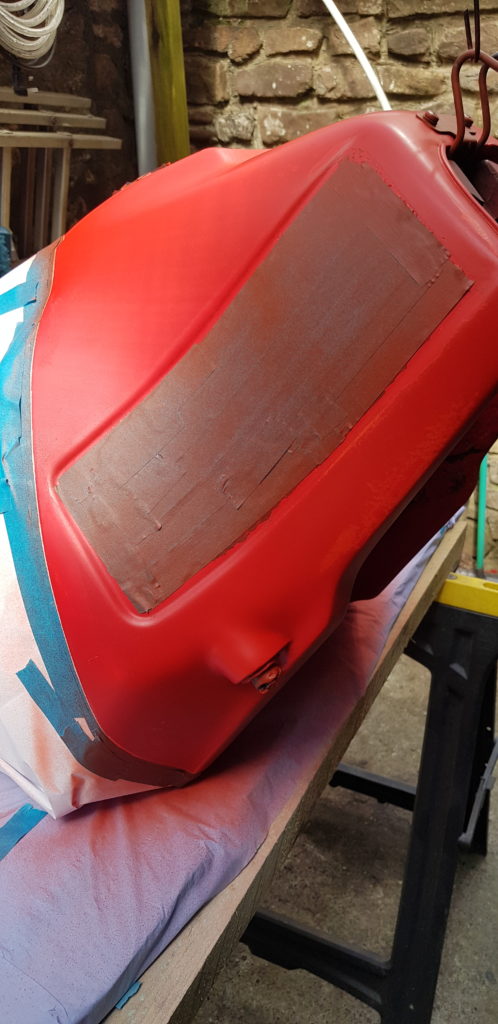
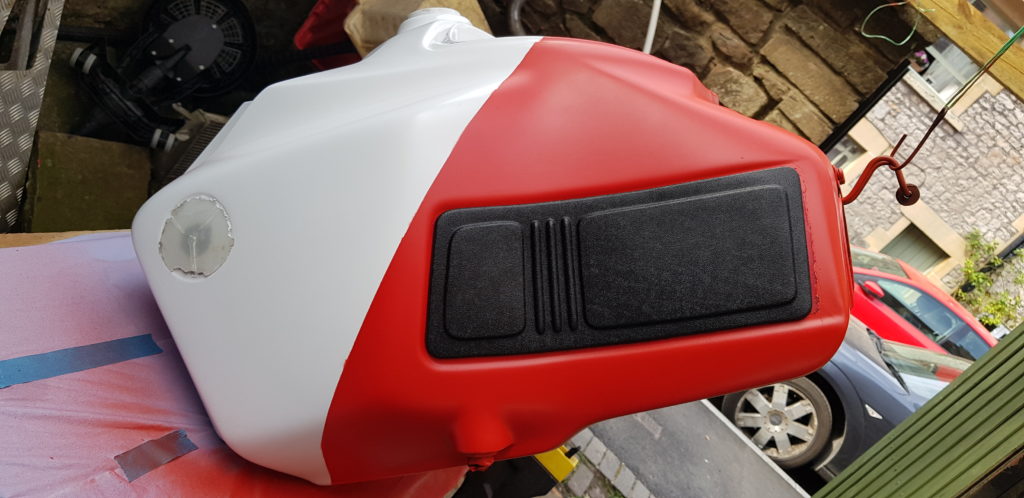
Thankfully the red is better at covering than the white and it went down nicely. This red is more of an orange-red than a blood-red but it is still nice. Due to a little mess up, I ended up with Satin Smooth for the Red paint so its a bit more of a matt finish but it still looks nice and I like it.
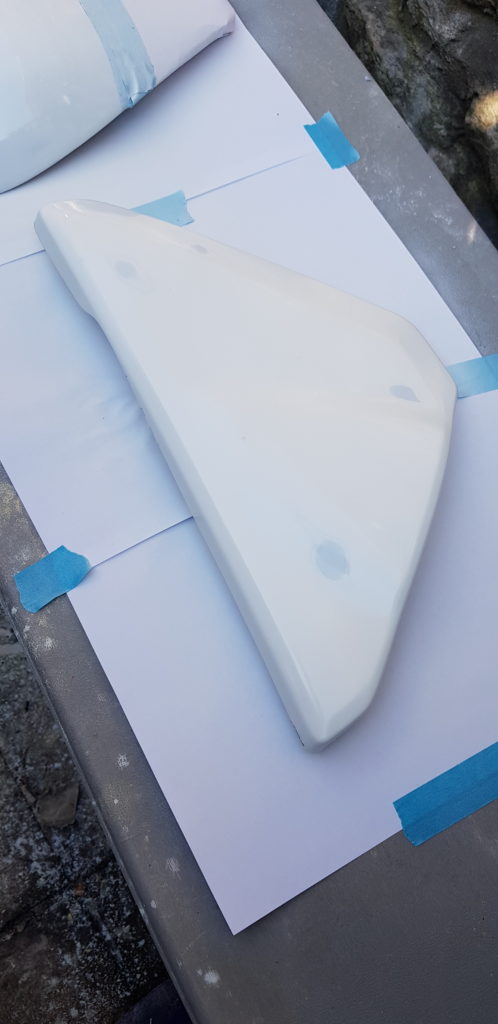
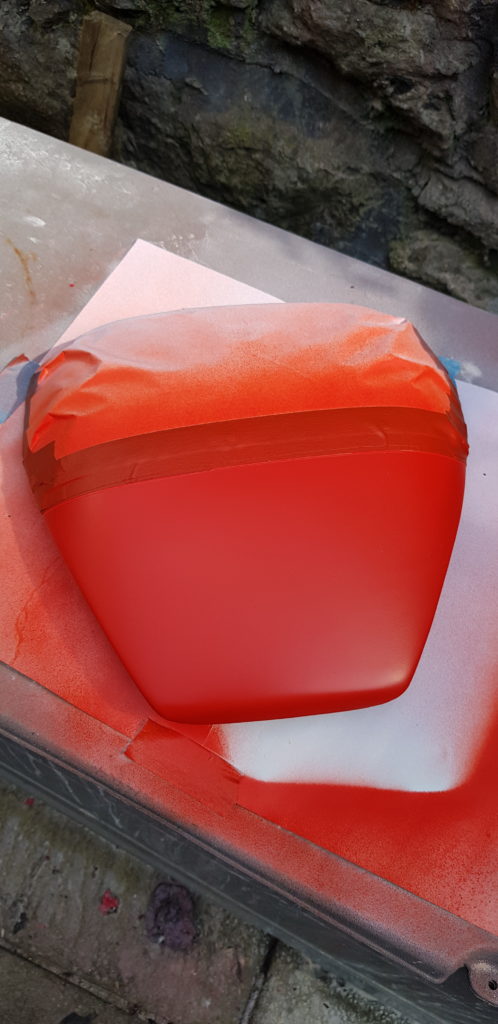
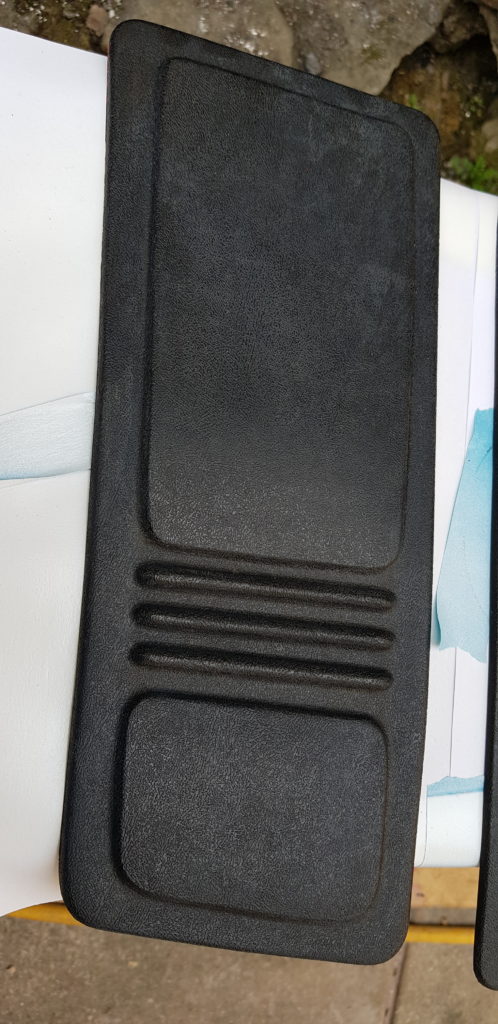
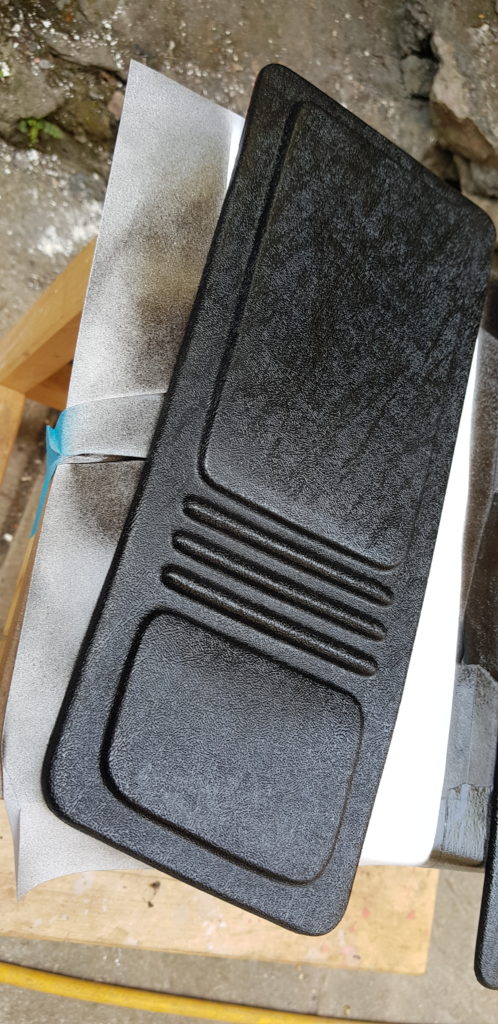
While I was at it I thought I would give the knee pads a spruce up with the Plastics in One paint.
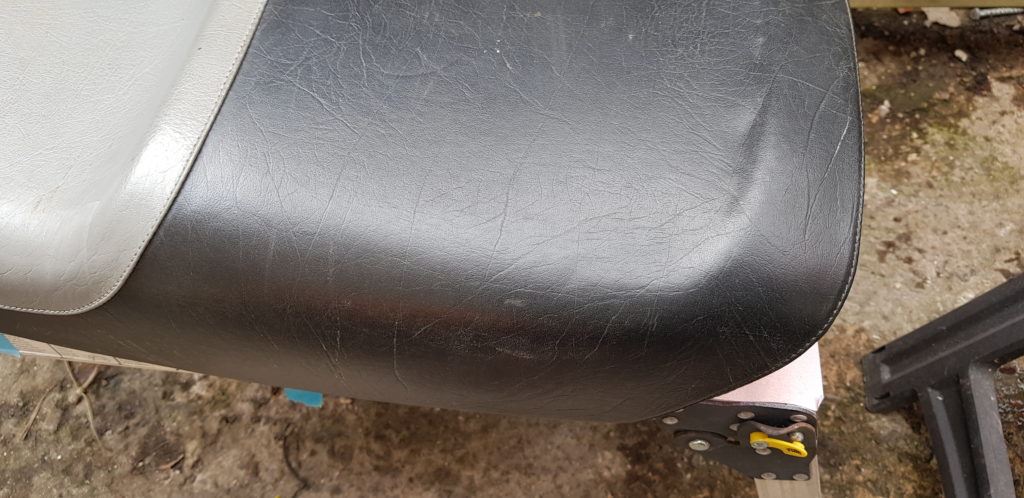
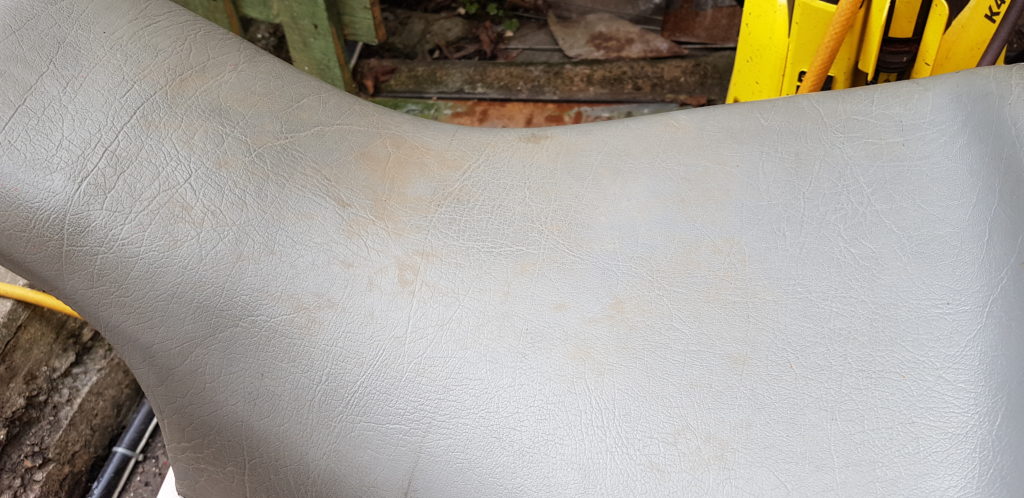
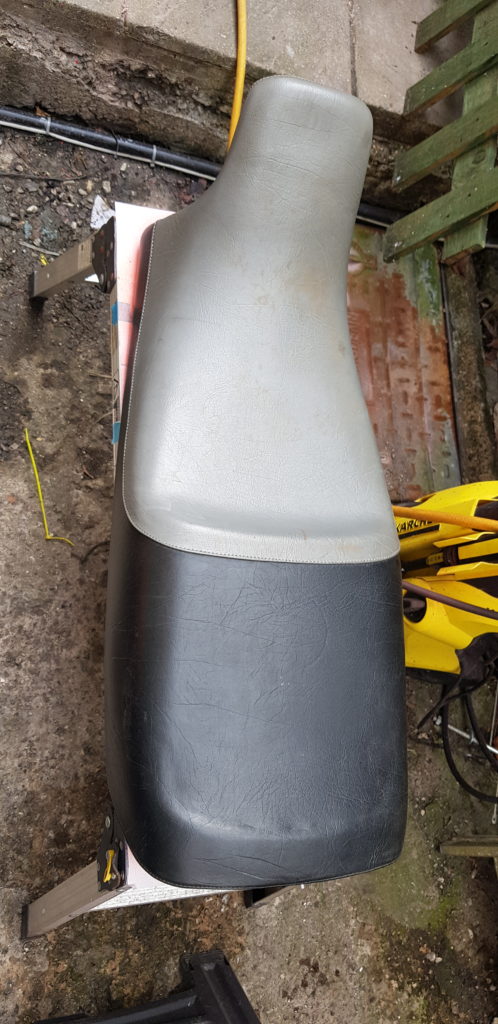
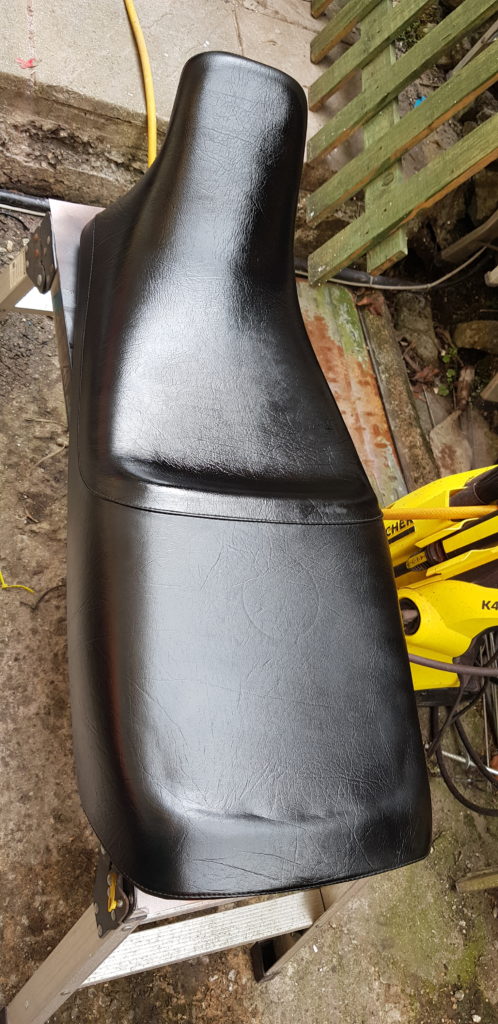
Then I looked at the seat,
So I painted it as well. According to Buzzweld it should be fine for vinyl etc so its worth a shot just to get it looking tidier.
Took only two or 3 coats but a improvement.
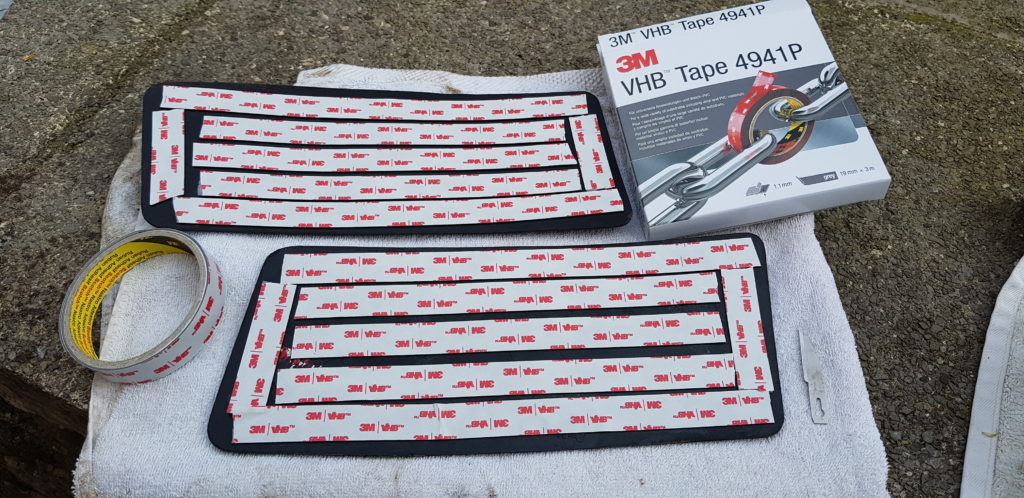
Now to begin reassembling. I had removed a lot of the sticky crap that was holding the knee pads on and had masked the area so that I had a good surface the get into. Being a snob I had opted for 3M products to stick stuff back on as I know the stuff they have works.
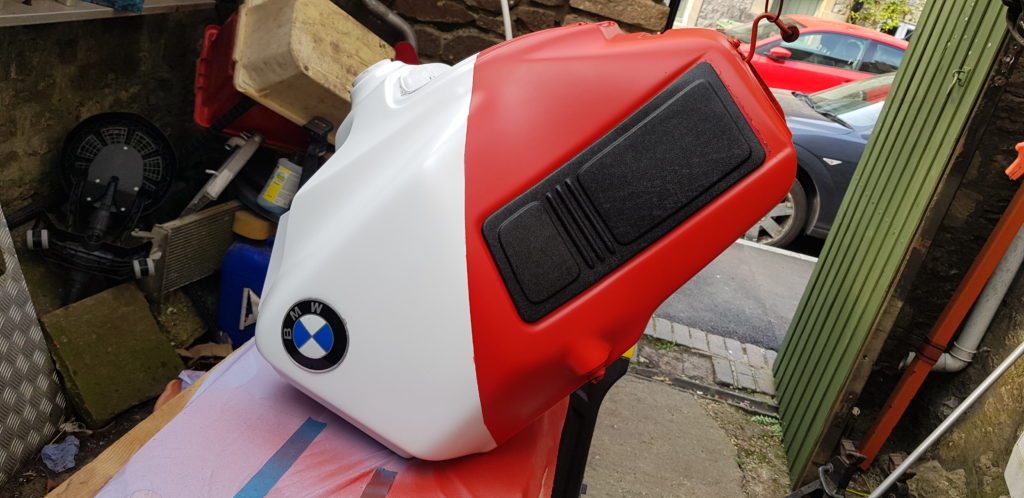
As you can see from the tail edge there is a little bit showing. This will be touched up at a later date once I get some more red paint. I then looked at where the BMW badge goes, much to my annoyance its silicone and not many glues like to stick to that, I am not sure that is original fit but I can’t seem to get it off the bike, I have tried some RTV silicone stuff to stick the roundels on and will see if that holds.
Starting to look more like it now. I am pleased how a bit of fresh paint on the knee pads just gives it a new shine. At this point I gave up for it was my Birthday and there was a BBQ in my honor and I am not the kind of man to miss that.
Monday morning arrives and I start Re-assembling the bike.
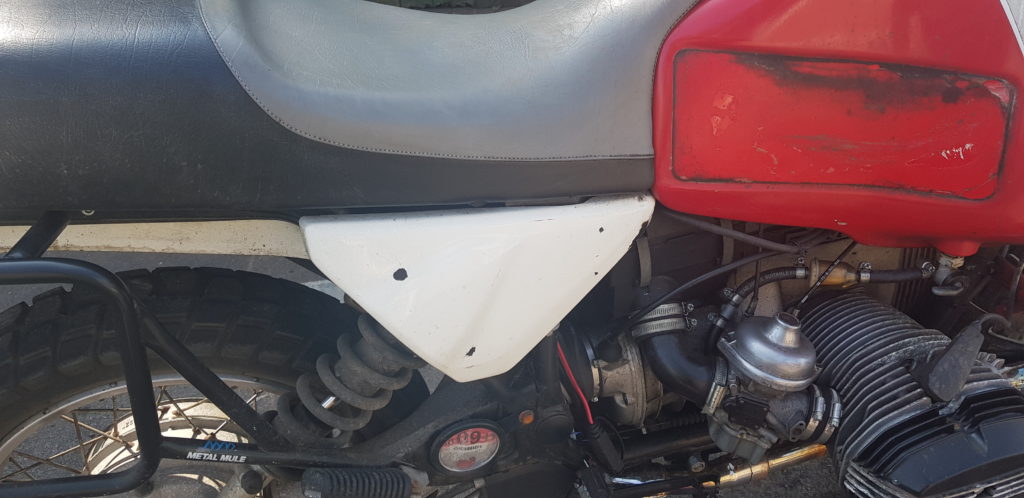
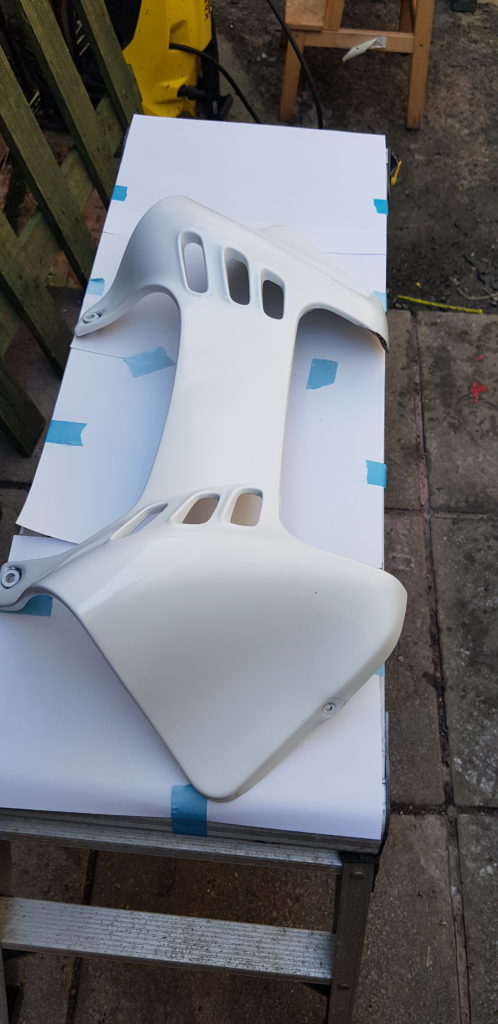
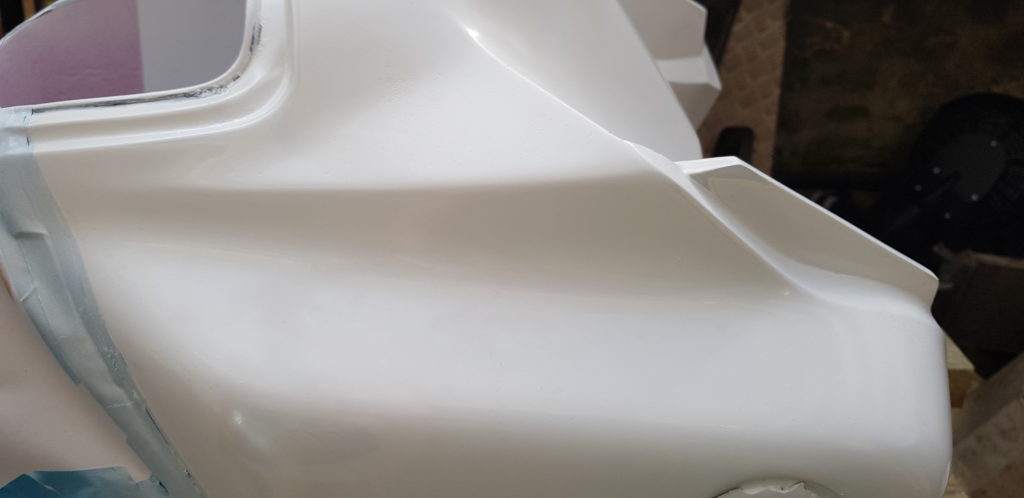
First the Side Panels went on,
Then the Bra and Front Mudguard,
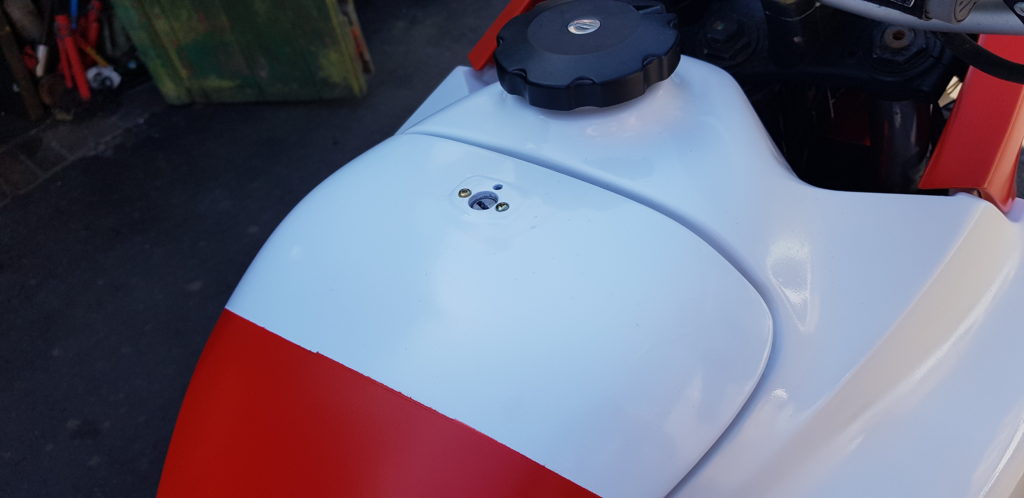
I am taking the opportunity to replace some of the bolts and nuts etc. mostly because I can. Now the Tank goes on.
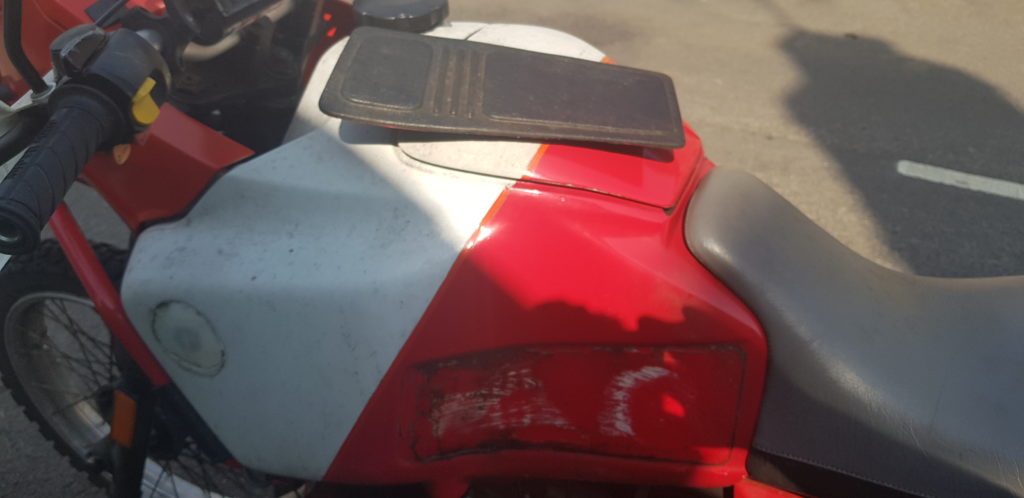
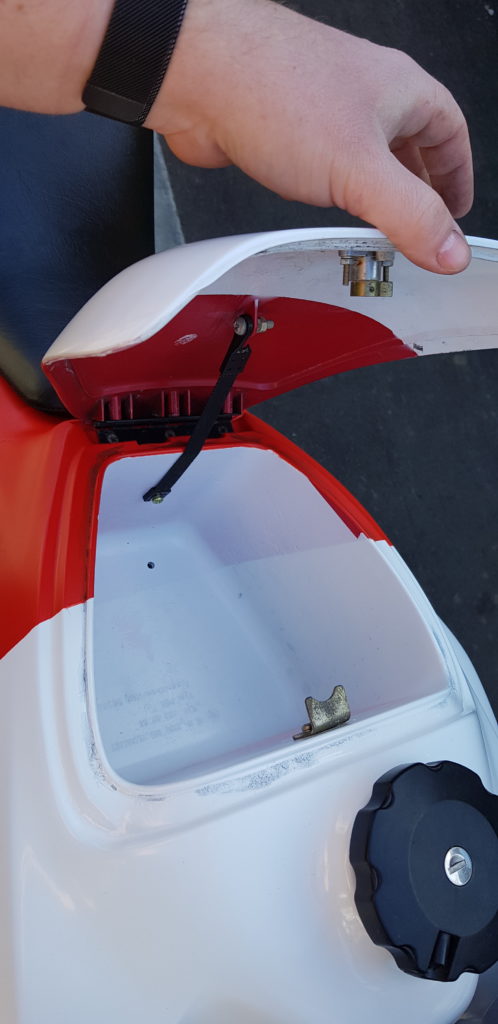
Followed by the seat and the top storage box cover.
While fitting the cover I again replaced quite a few nuts and bolts, because I disliked some of the self tappers, scrivets etc.
I plan to make some sort of tray to go at the bottom to prevent stuff from getting wet at the bottom. Even maybe adding a liner of sorts in there. I have ordered a new seal for the lid as I do have a bit of rubber that came off but it looks tired.
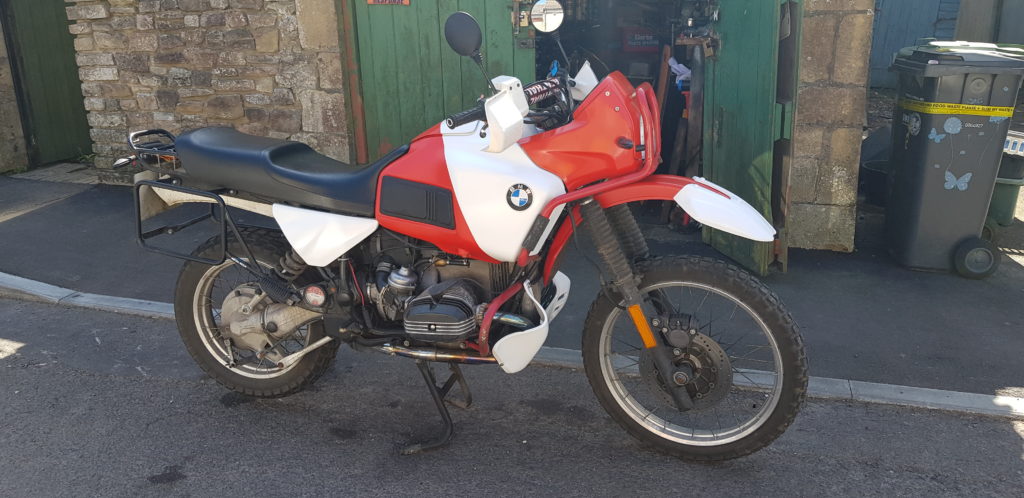
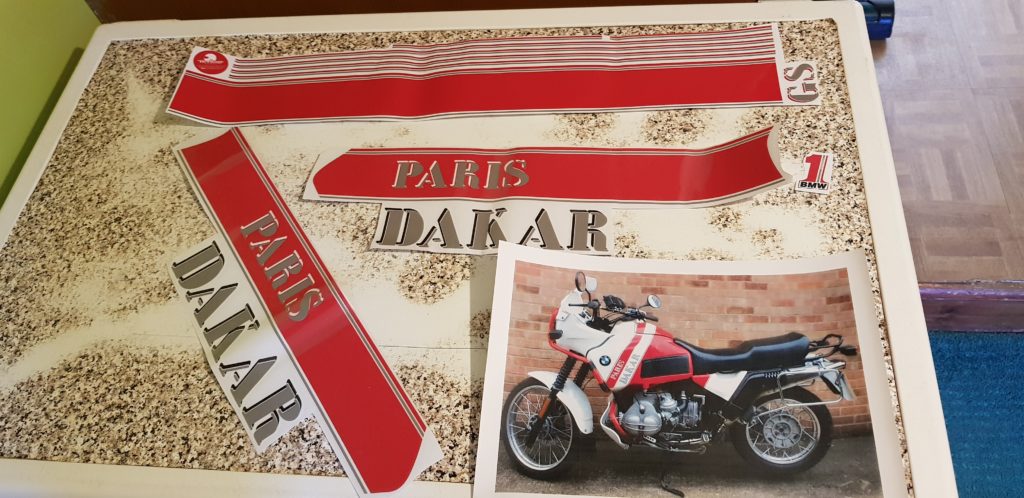
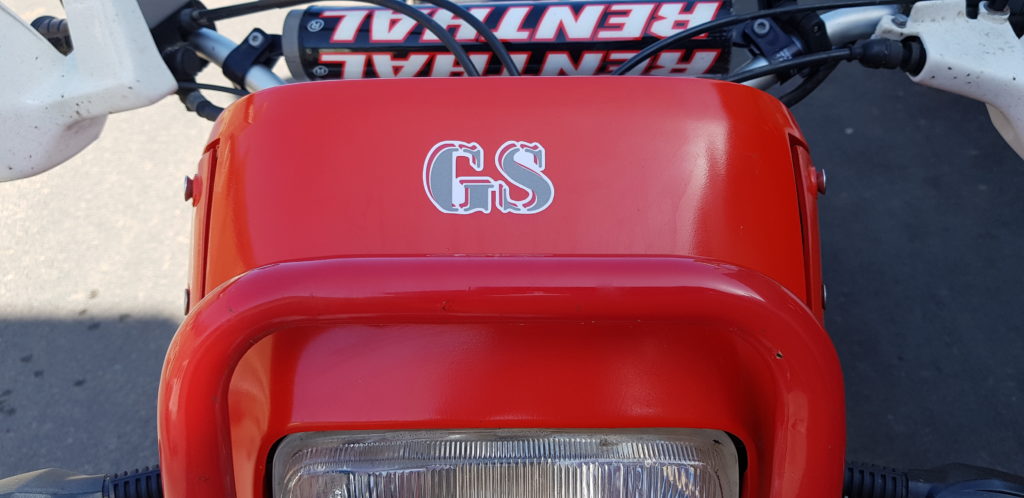
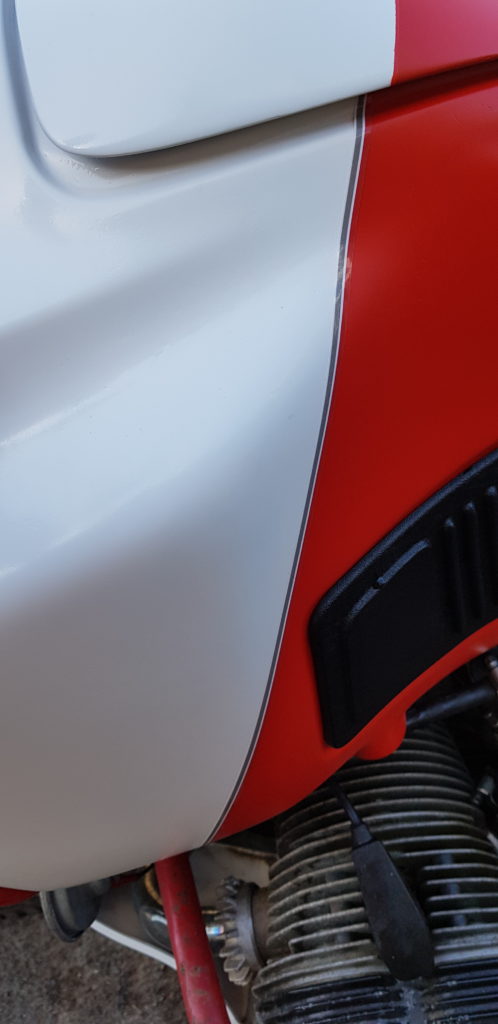
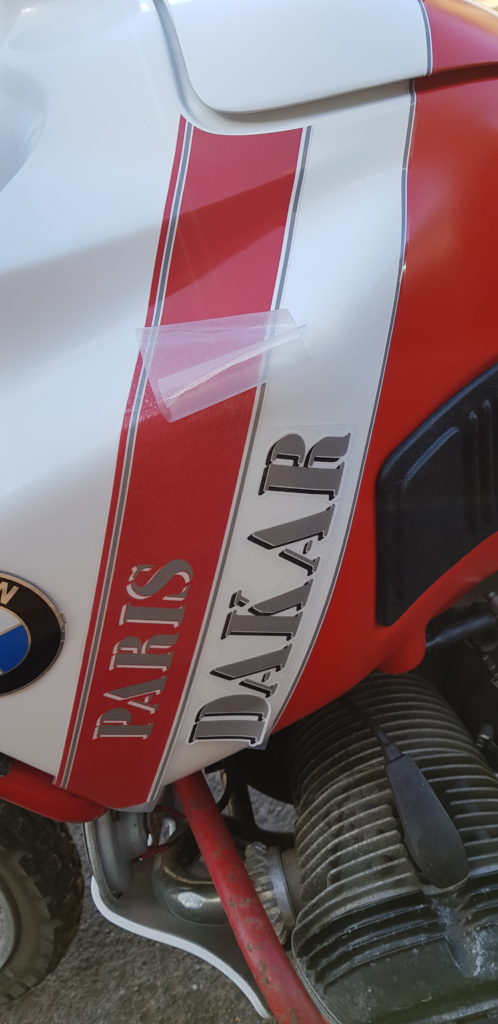
Now comes a bit that I wasn’t really looking forward to but I know it needed to be done. Stickers. The bike didn’t have any other than a bit of faded pinstripe tape to hide the seam. I bought a kit from heritagestickers.eu for the ’91 bikes as I preferred the Paris-Dakar before the lawyers got there and stopped BMW from using the words and they went to PD.
Sadly no real instructions of how to fit these, but I did find a OK picture of a bike on the net. I promtly went outside and stuck on the first one,
I just wetted the back of the sticker with some soapy water to allow for placement. The wind was very keen today so no point in getting the hair dryer out to get them warmed up.
I then did the pin stripes. That was a pain to get right, it is a very curvy tank. I used a small gas powered soldering iron with its end used for heating heat shrink to get it to bend to the angles and to get it to dry enough to stick.
Now for the big stickers, oh my what a swear inducing effort that can be, thankfully I managed to just drink lots of tea while attempting to ignore the wind that wanted to help me with this part. Much like the paint job its not perfect, but hopefully its Fit From Far Away.
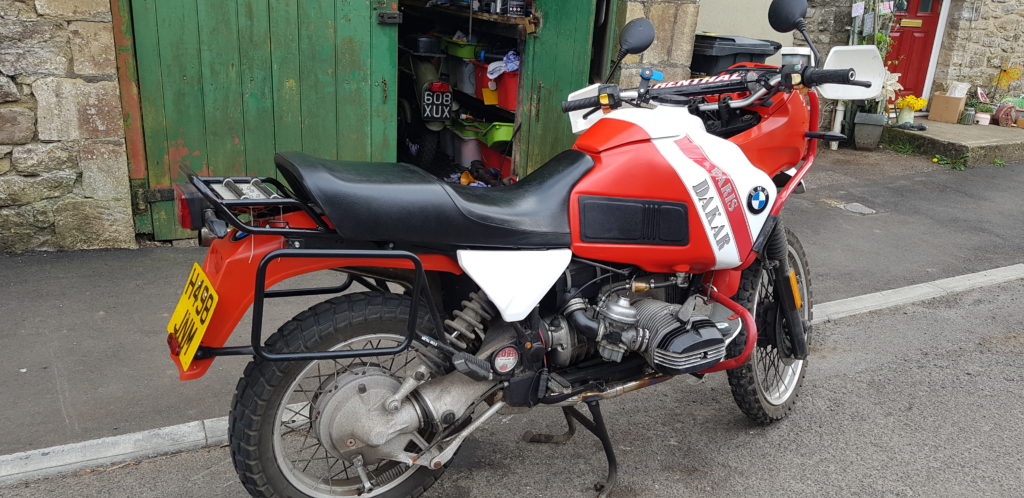
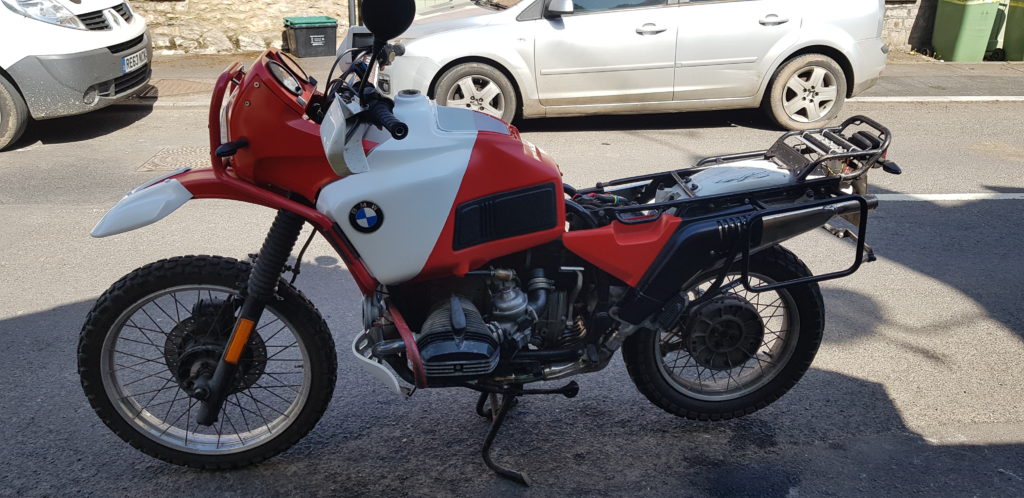
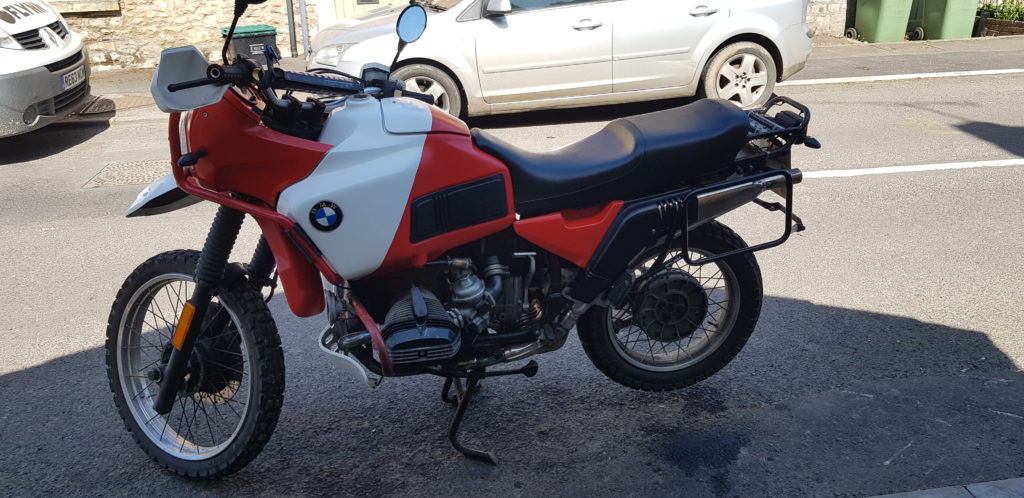
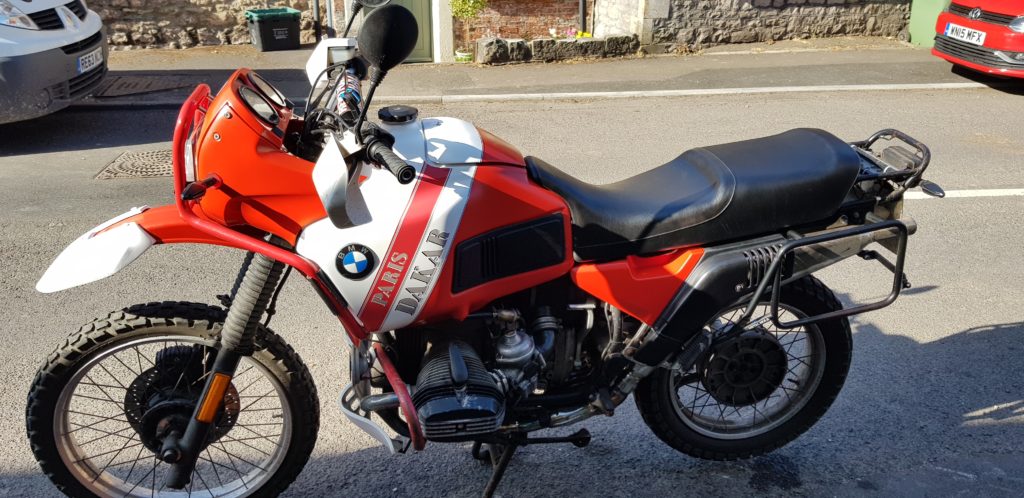
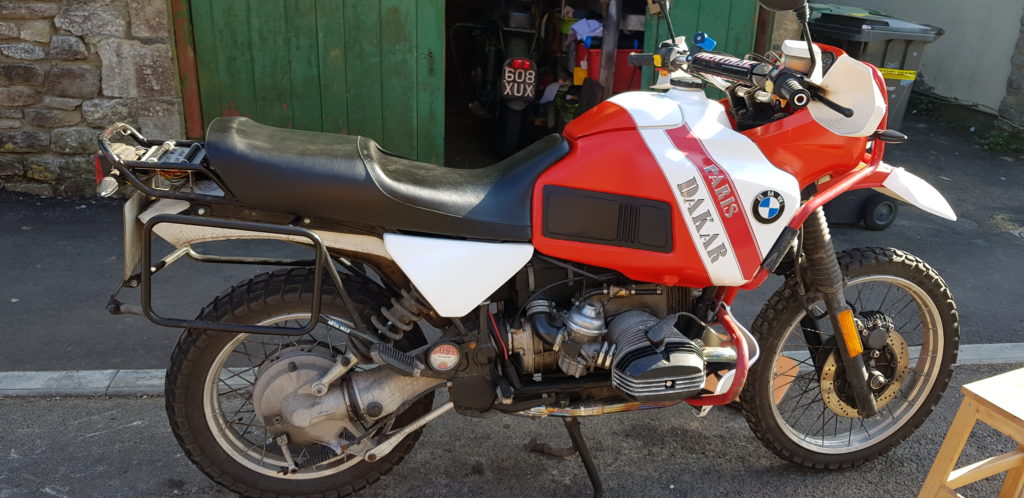
I have got some tape to go over the top of the tank but I am reluctant to do it as I will have to cut it to go around the hold for the covers lock. Fuel taps etc to be refitted after they have been cleaned. Oh, and a new rear mudguard has been ordered so that it can be finished and looks pretty. The screen will go back on once my friend “This Old Hoddy” finishes making some bolts as I can’t seem to find any place that has the BMW ones. Sorry for the long length of this post but it’s been a busy weekend where I have managed to tick off one of those little jobs I have wanted to do since I got the bike. Below the difference a year makes.
Well, I am still working for the moment so I only have weekends to work on the bike. But with this nice weather, I need to get out on the bike. So it will go to work with me. So I started to reassemble the front end.
I had ordered the parts for mounting this all nice a neatly but not all the bits are available even though many websites still list them. But the spacers I do have I have now fitted and it does make for a neater fitting. I also got rid of the LED bulb and fitted a nice Osram Night Breaker. Though it will need some adjustment, which I can do thanks to my previous efforts.
I have a shield thinggy for the headlight but no idea of how it fits. But I have ordered some 3M double-sided tape to give it a try.
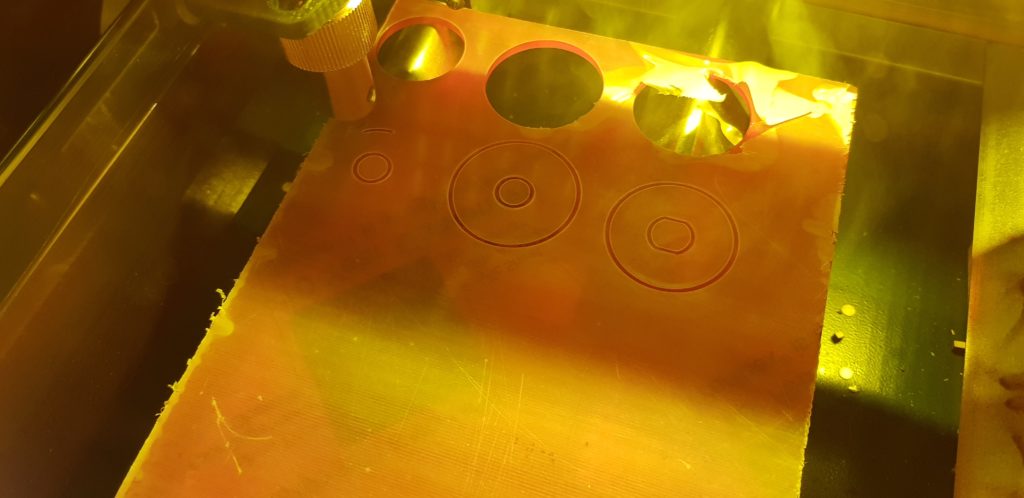
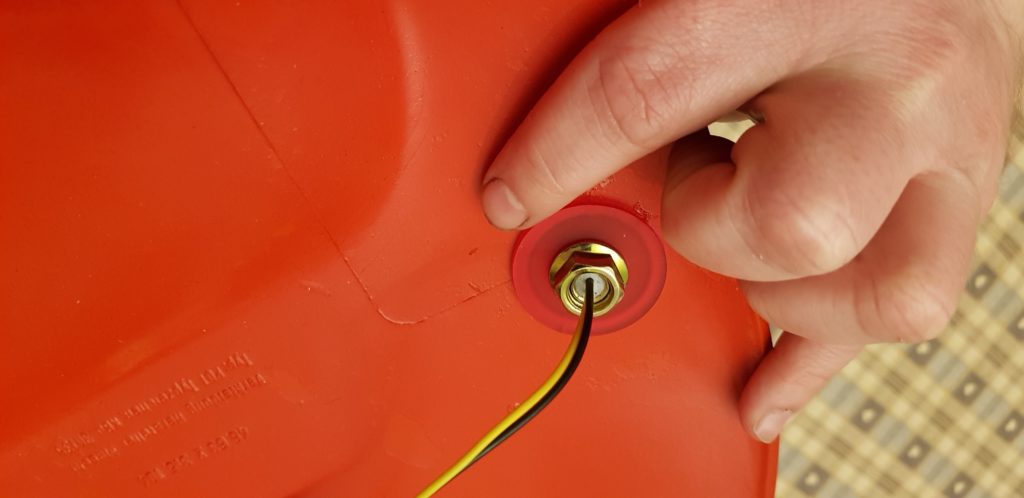
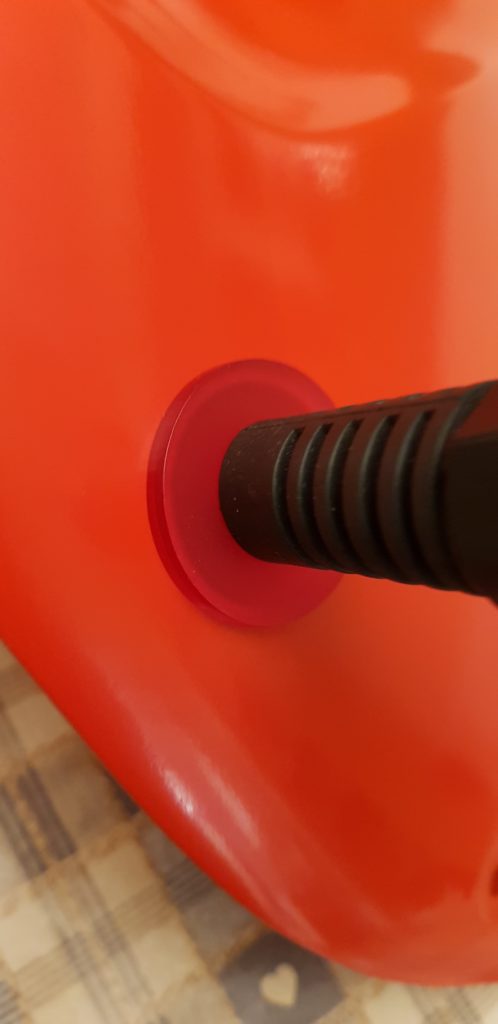
Once back in home I finally got my roundtoit and looked at cutting the bits for mounting the indicators.
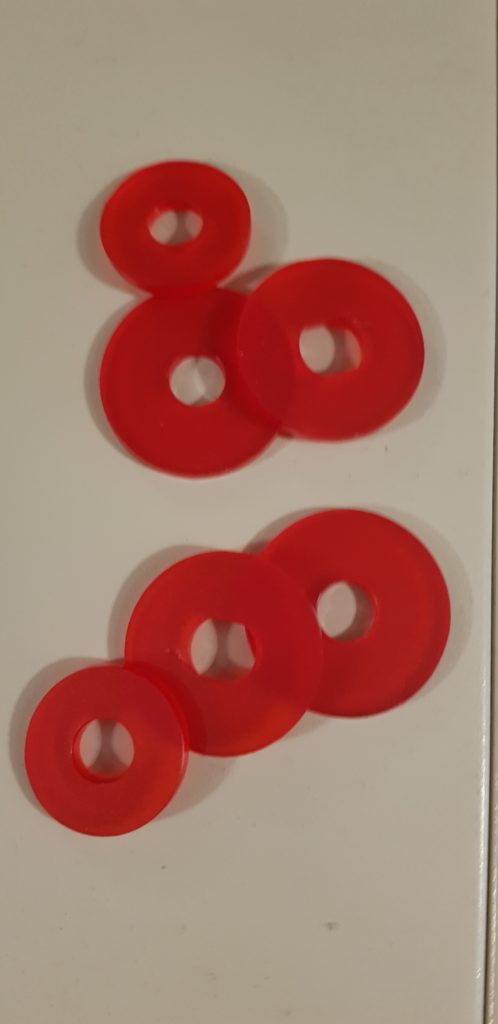
It took a bit of trial and error getting them to be just big enough to cover the outer hole diameter. Then the cutting was a bit of a pain as the bed on the laser isn’t quite aligned and therefore it has areas that cut better than others. But I got it in the end. Tomorrow evenings task is to fit them back on the bike.
Hopefully the bank holiday weekend is nice and I can try and get the tank and side panels painted.
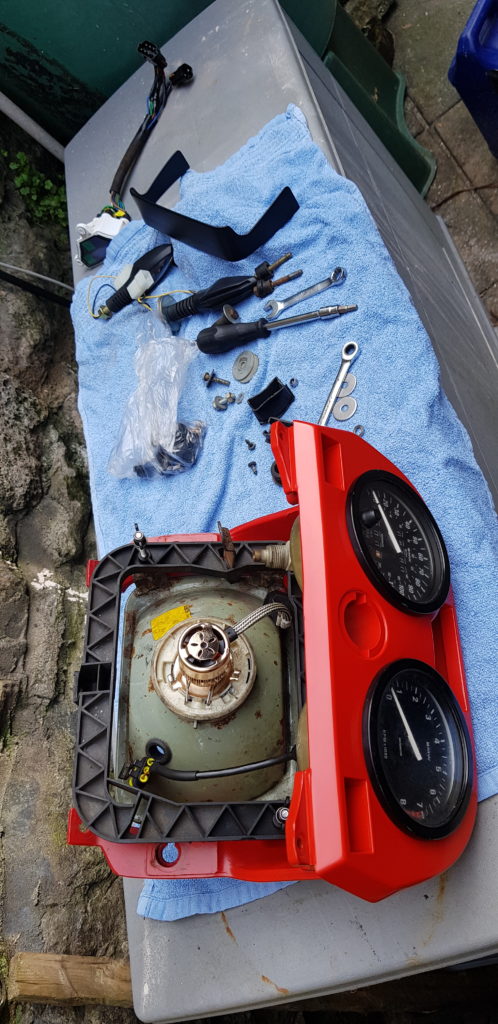
I have ordered parts to put the dash back together but after 2 firms failed to have them in stock even though the listed them as in stock on their websites I have ended up ordering some of the bits from America so it may take some time.
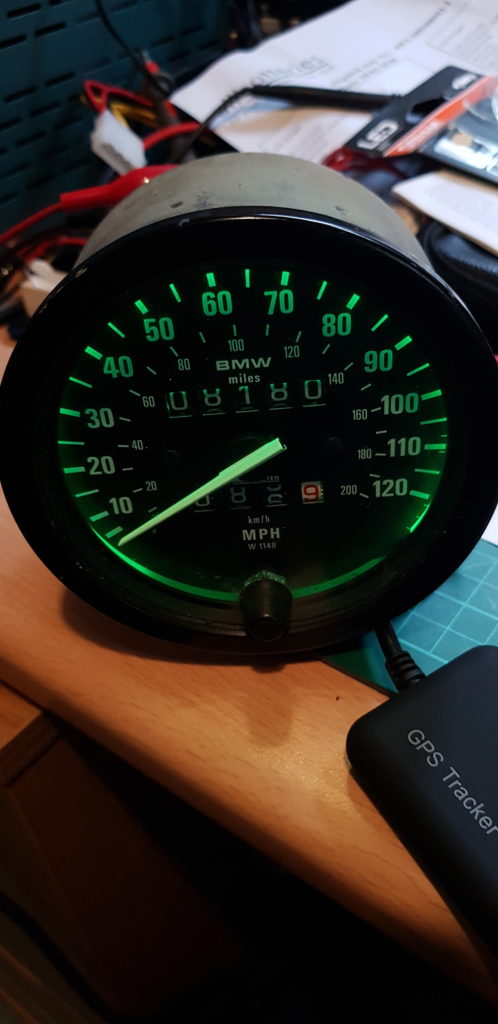
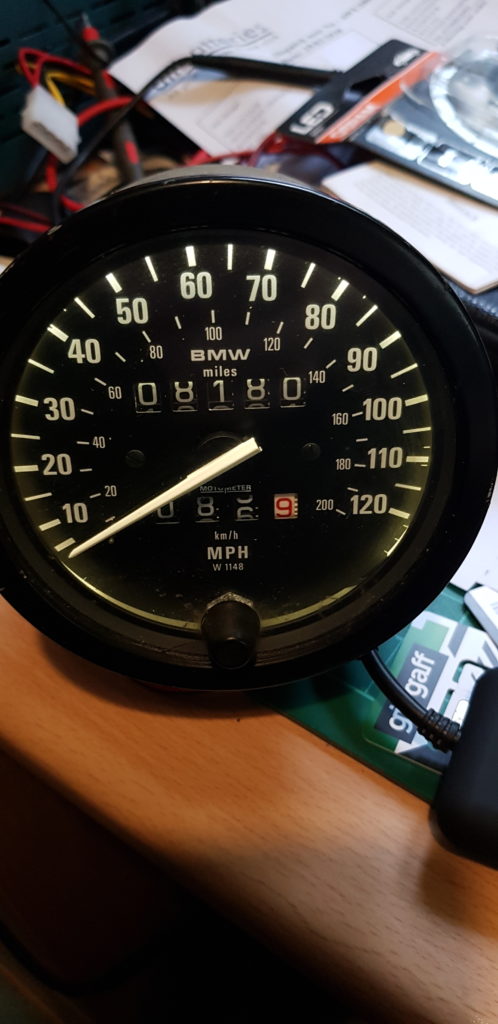
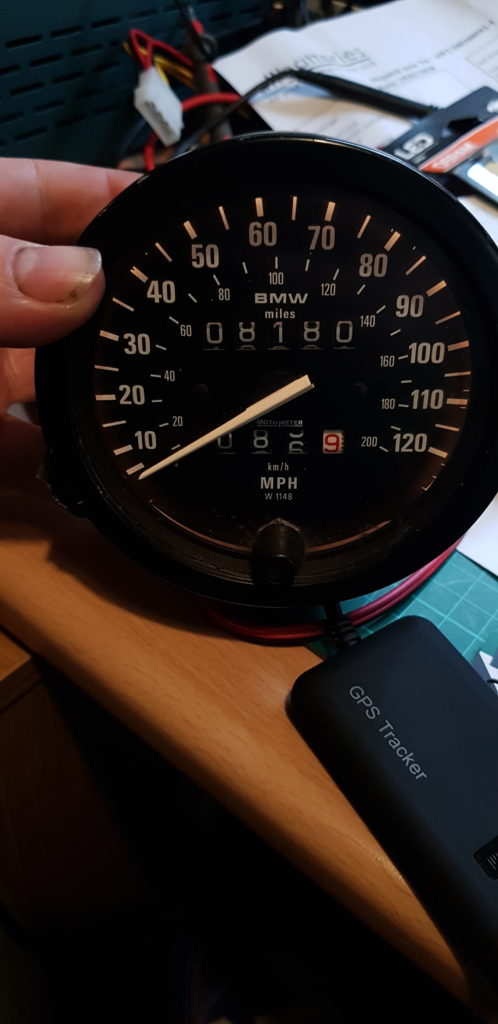
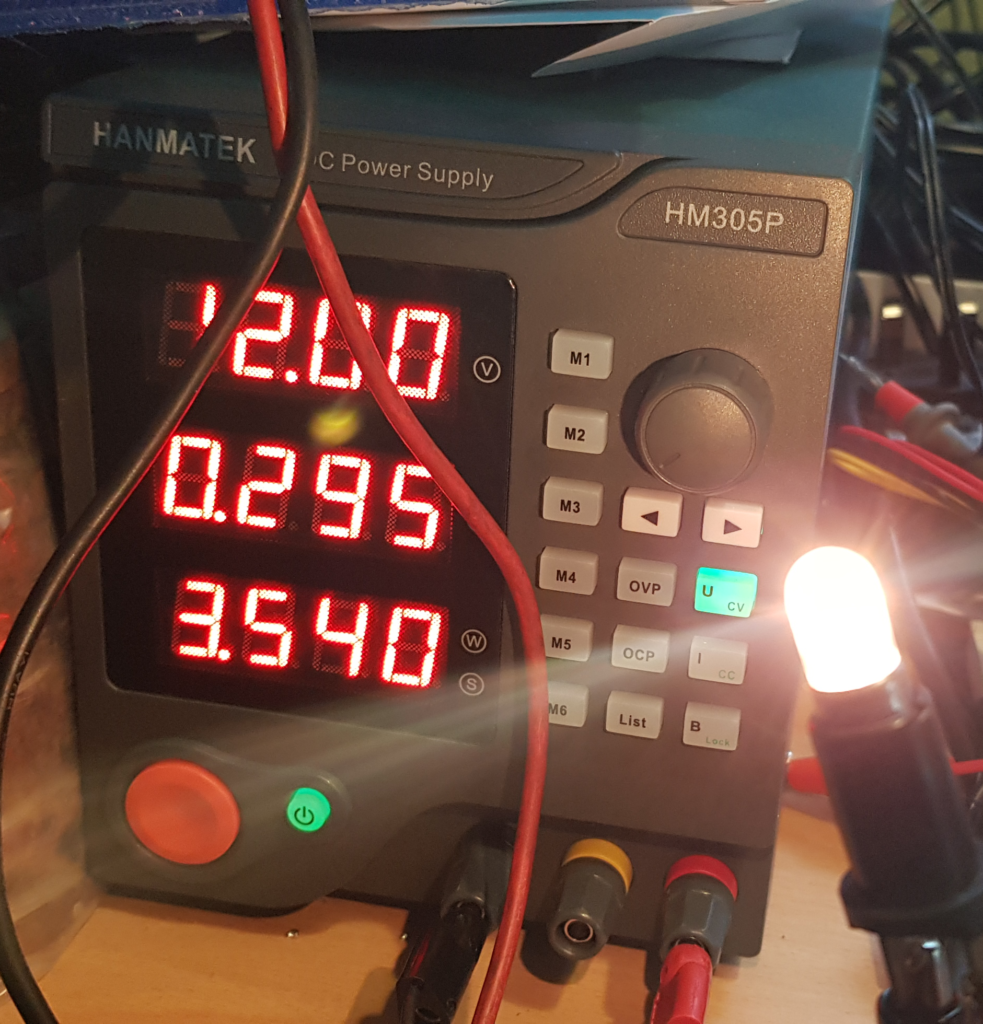
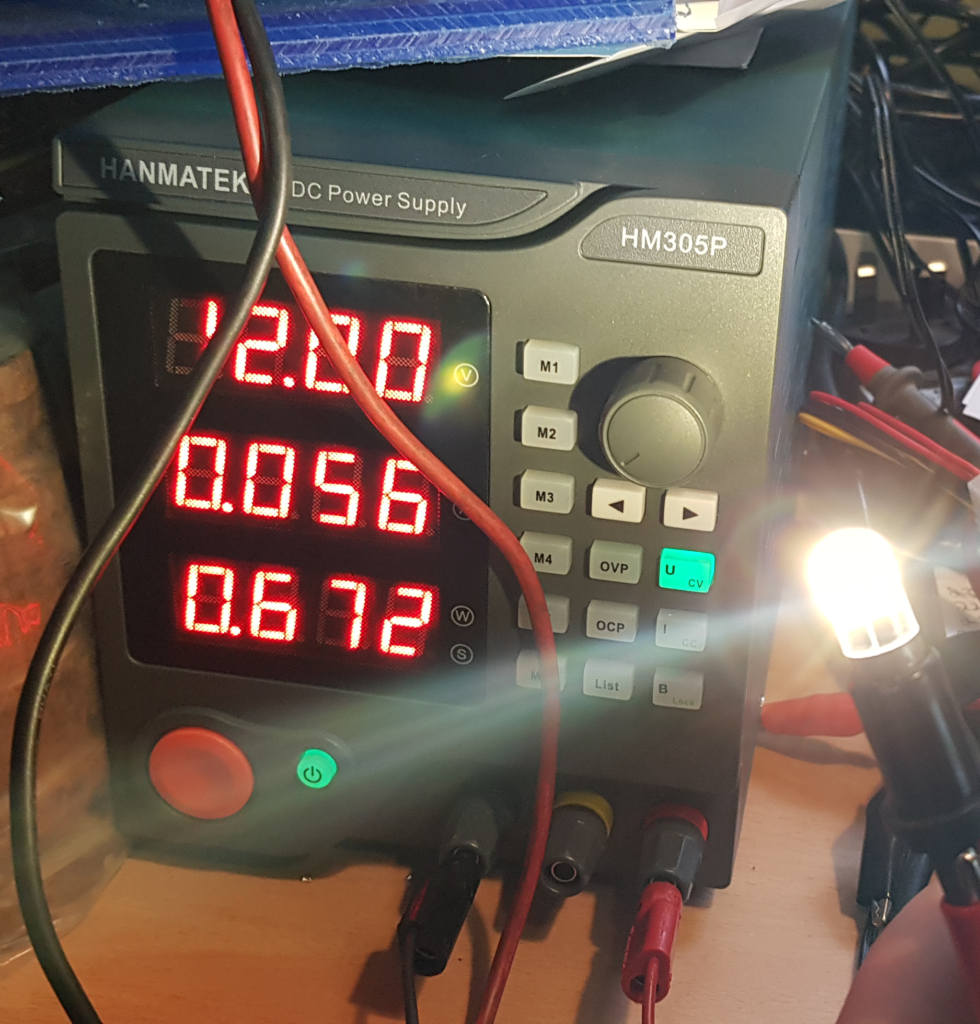
In the meantime, I am mostly plodding along with bits to do. One of which was to swap out the bulbs in the clocks to LED. Its a theme with me. The pictures where taken with fixed exposure mode so they should so comparable brightness.
Green LED
Osram LED
Filiment Bulb
Now I had ordered Green LED bulbs as that is quite good for your night vision but being a dumbass I ordered 1 rather than 2, it took over a month to arrive so I wasn’t too worried about ordering another. I then bought some Osram LED ones in white and they do look nice. The power-saving is again quite a bit, yes my Desk is a mess.
Btw in case you didn’t see it, I managed to find the original grill for the headlight for the bike at the Classic Bike Autojumble near home for £3.
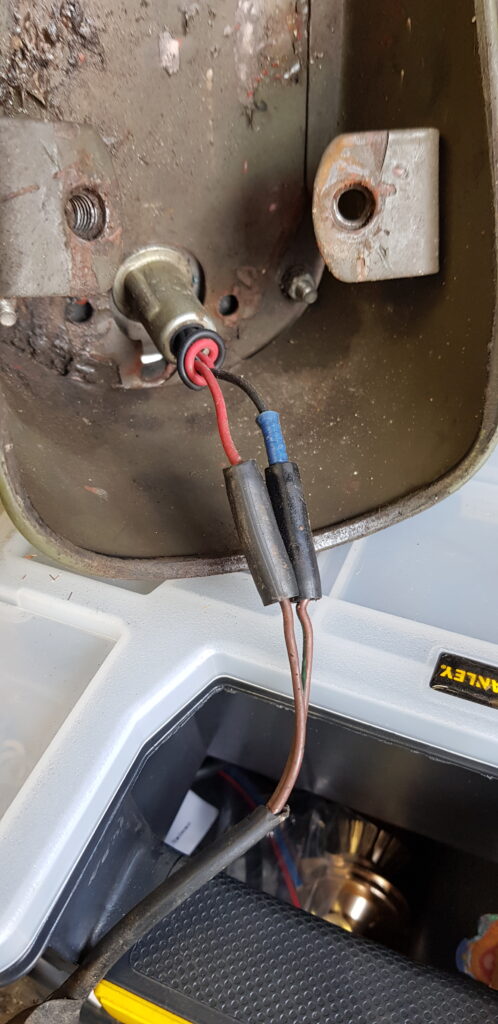
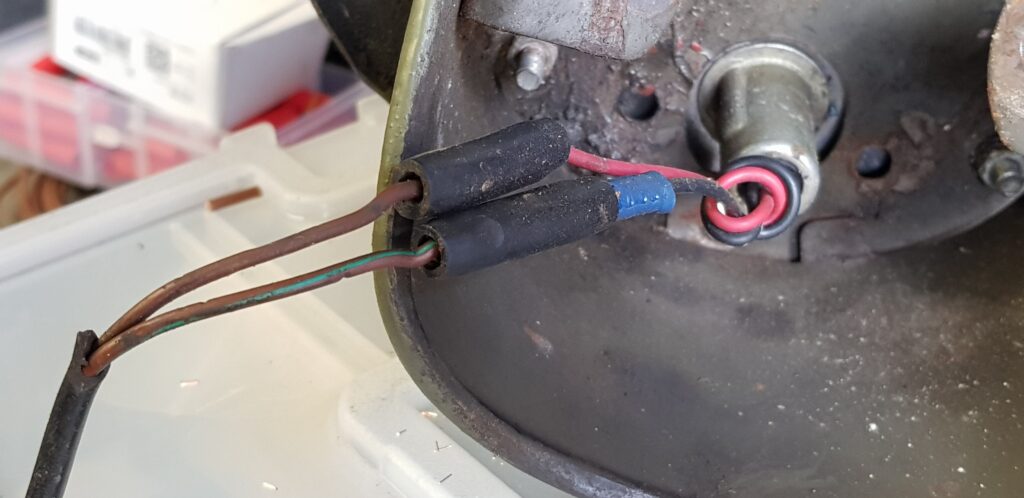
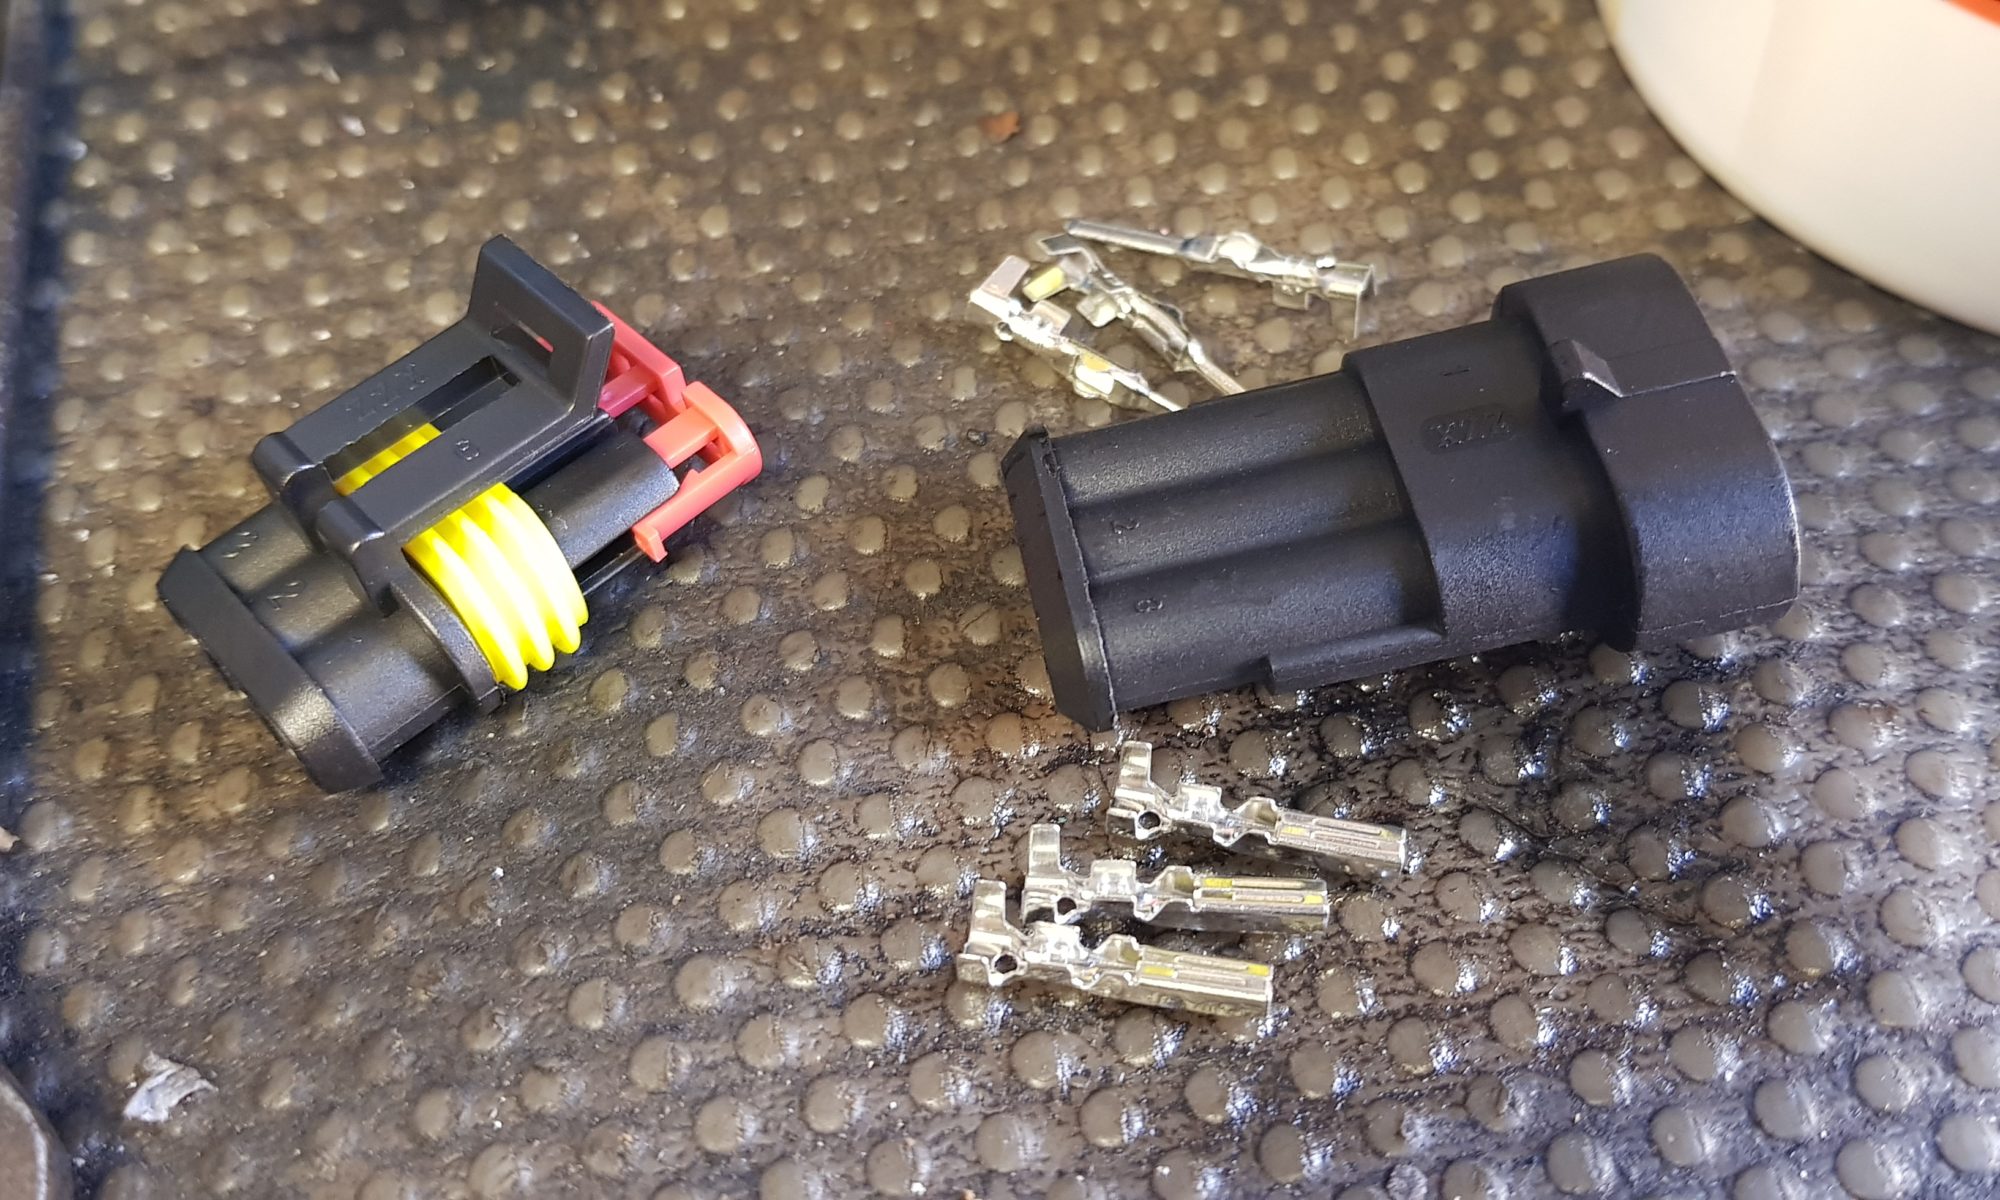
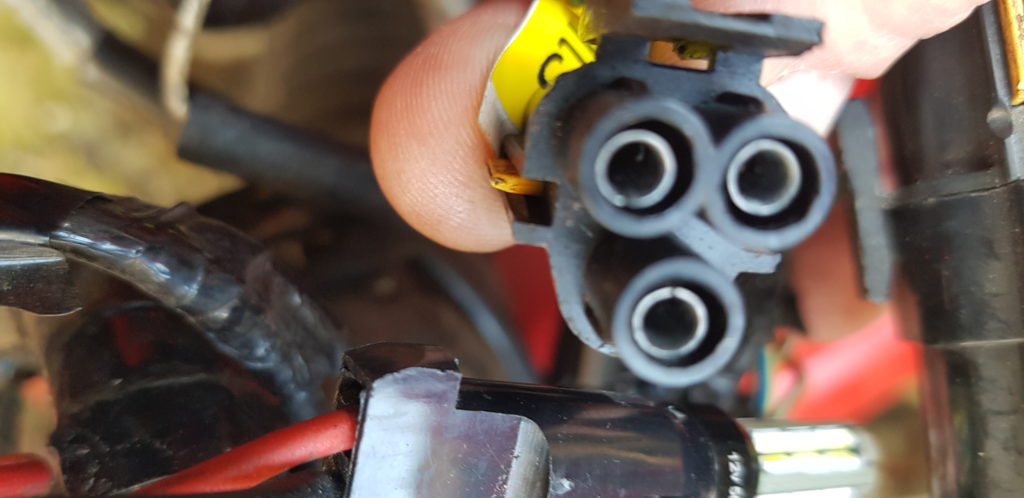
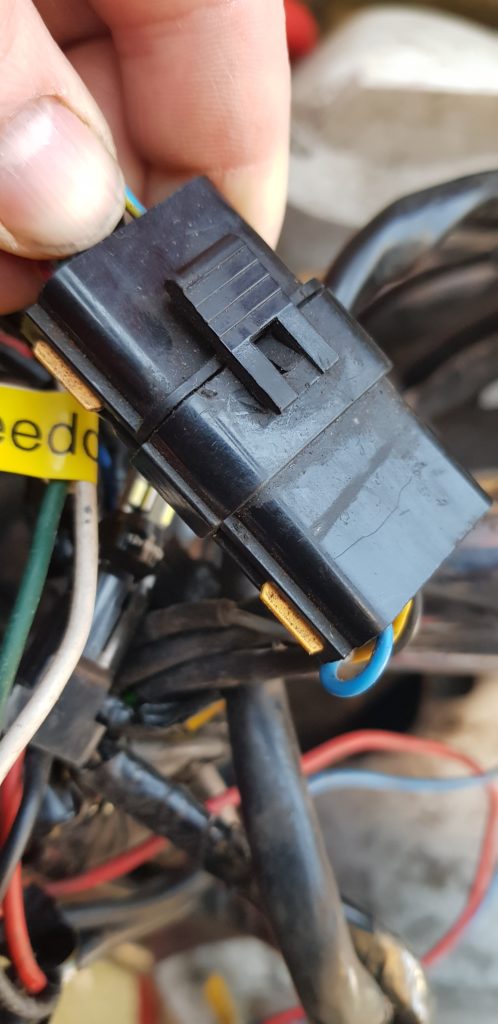
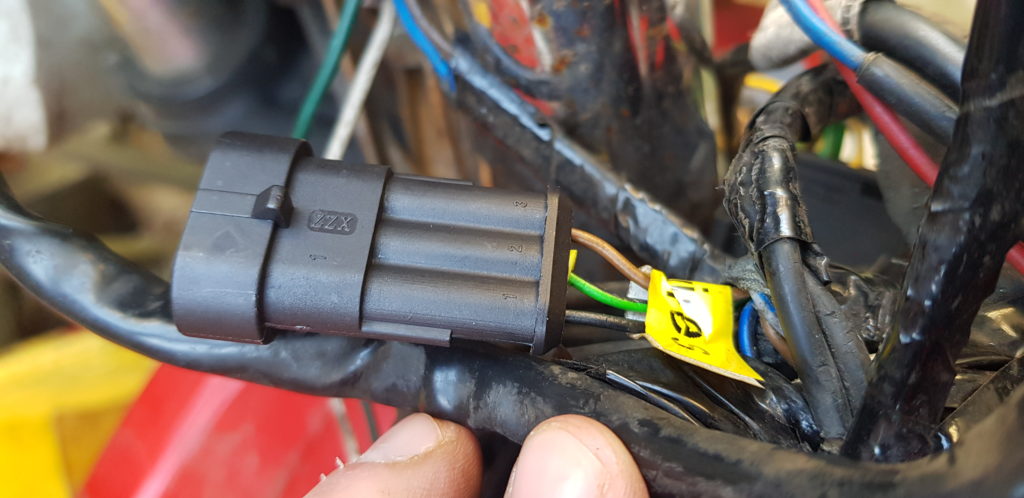
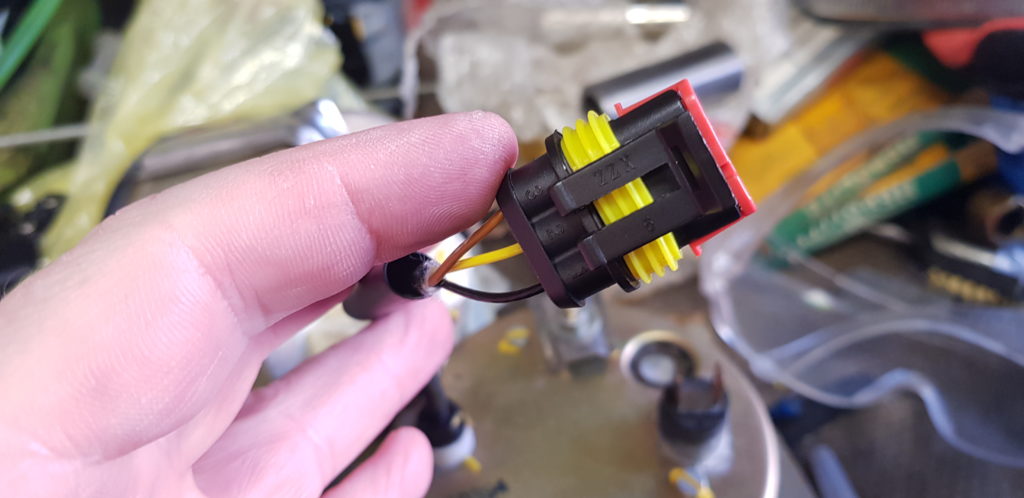
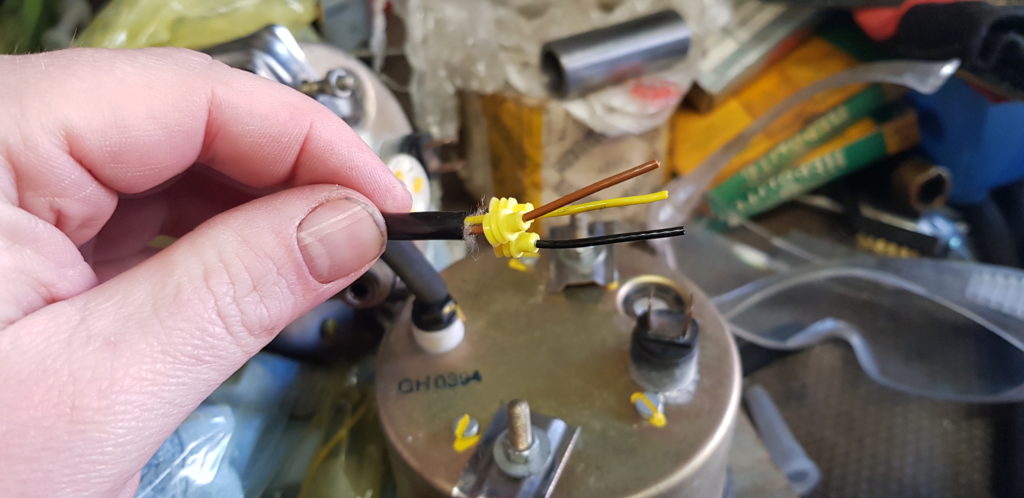
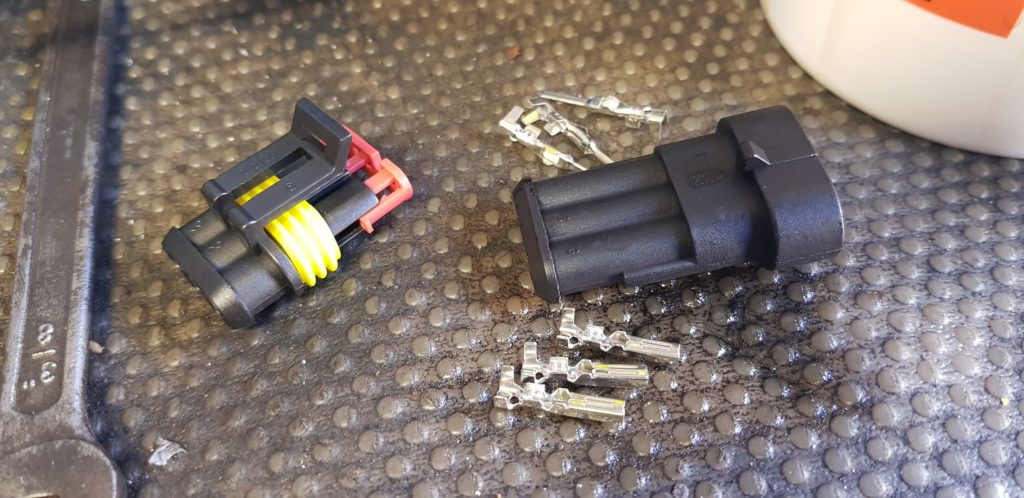
Back to fettling, on removing the clocks some of the wires for the Rev Counter got damaged and until I figure out the connectors BMW used back then I just went for the cheap option of a 3 way Delphi Superseal Connector, they are cheap and fairly waterproof.
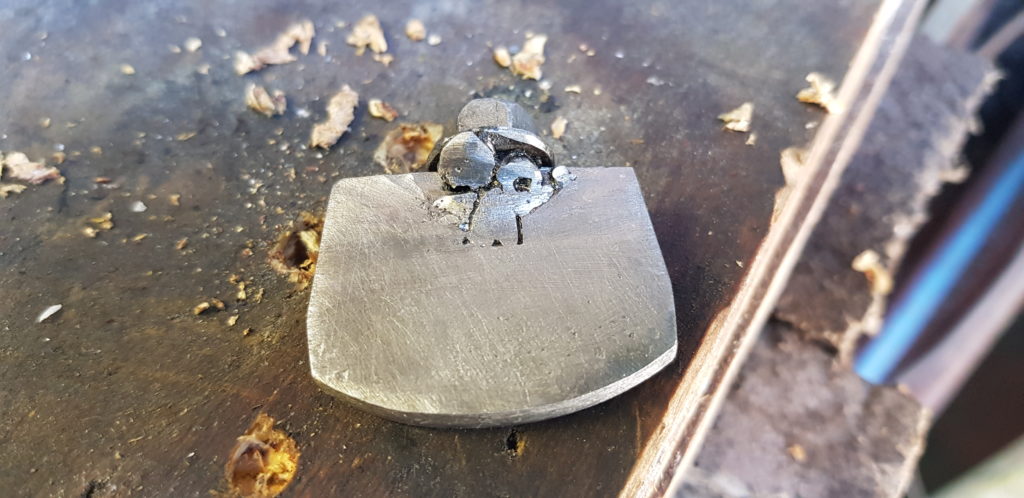
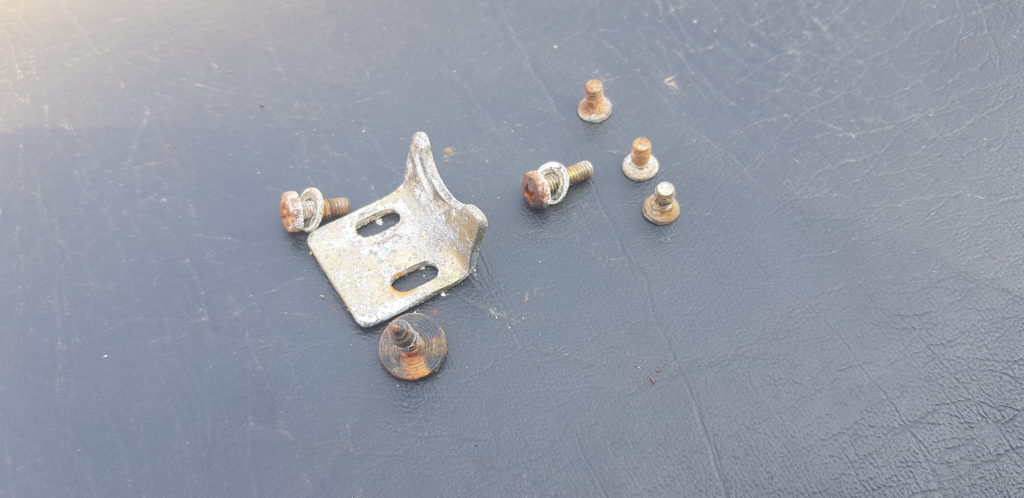
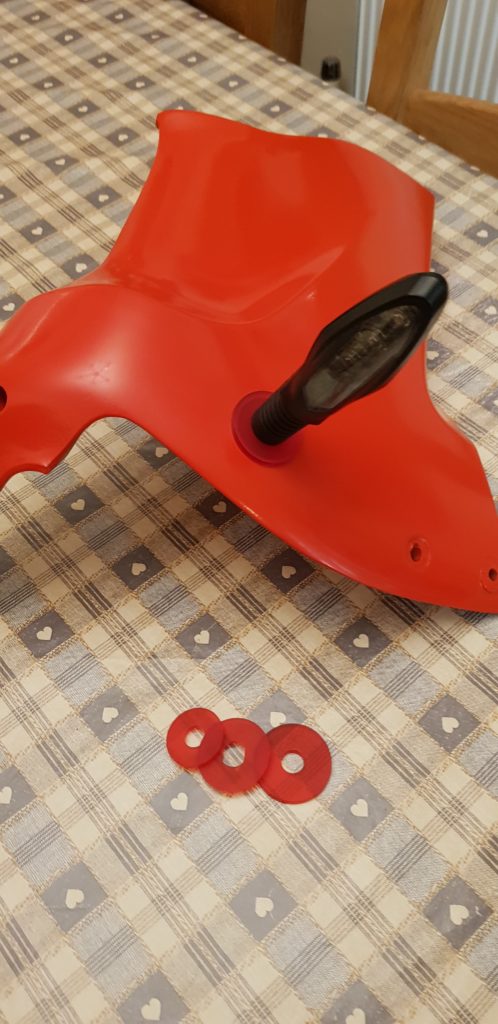
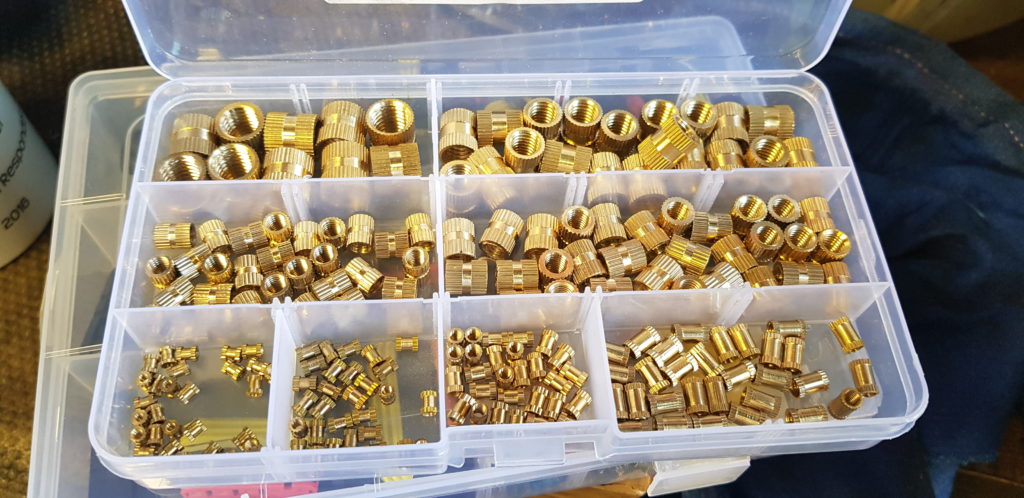
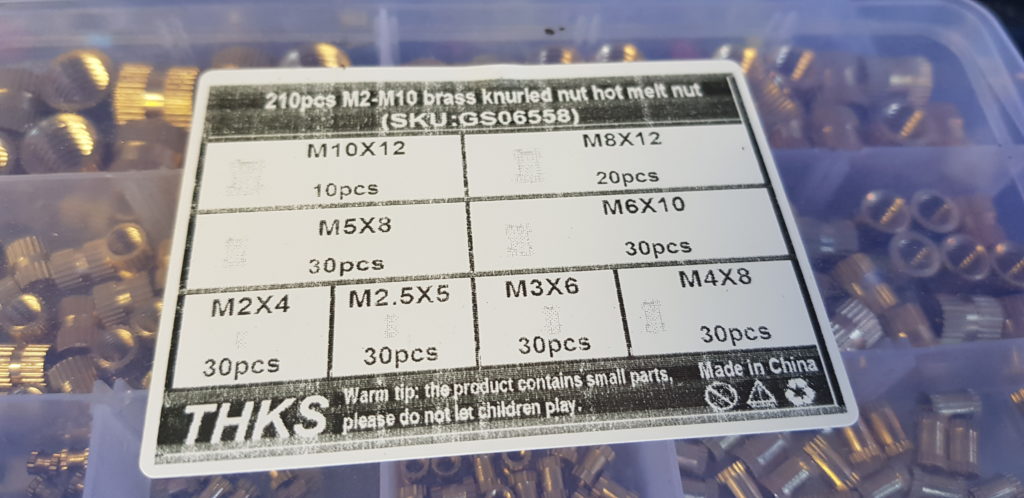
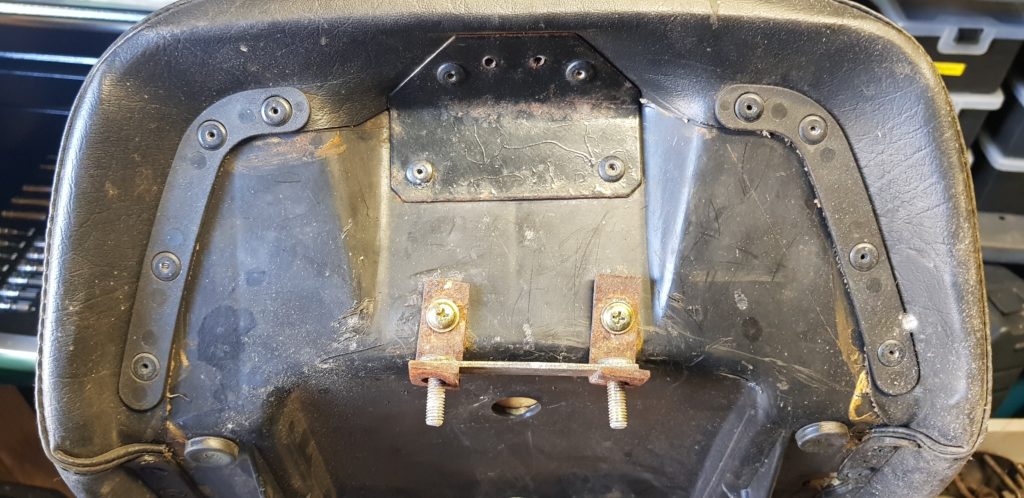
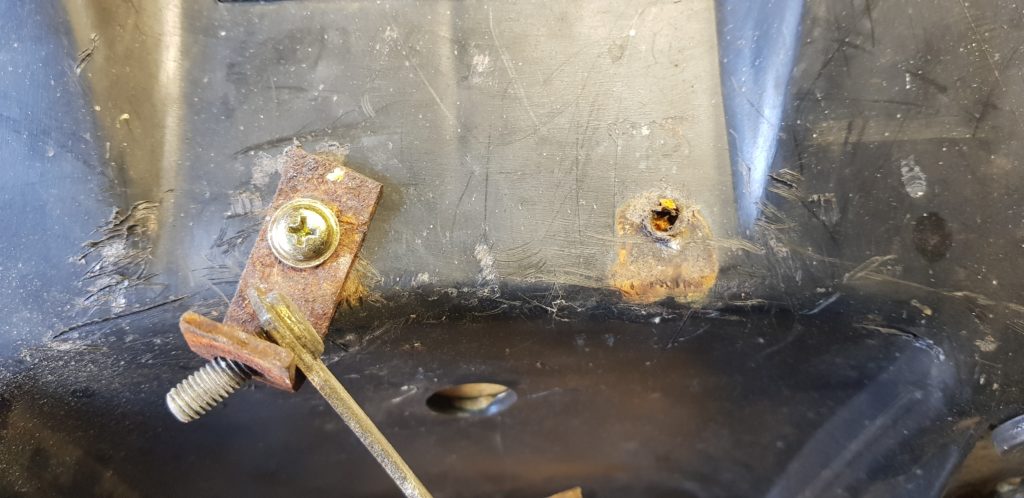
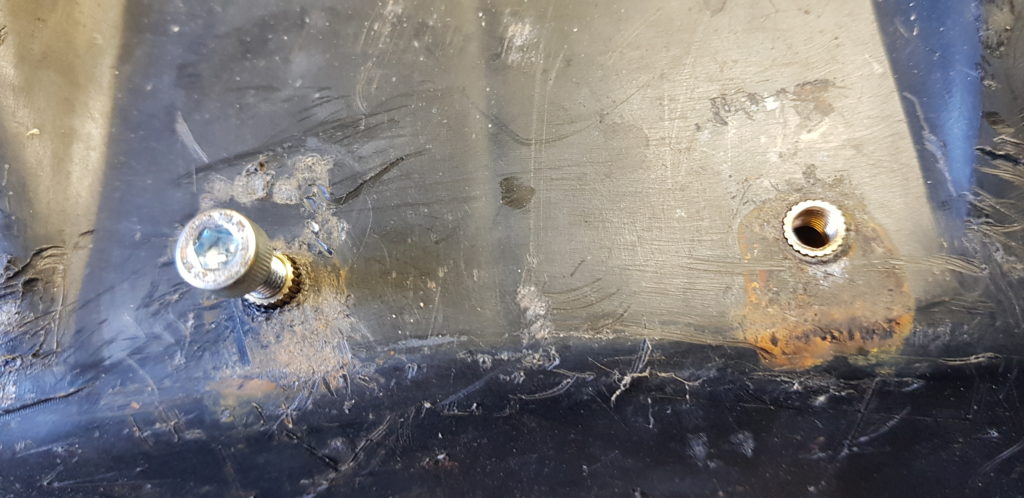
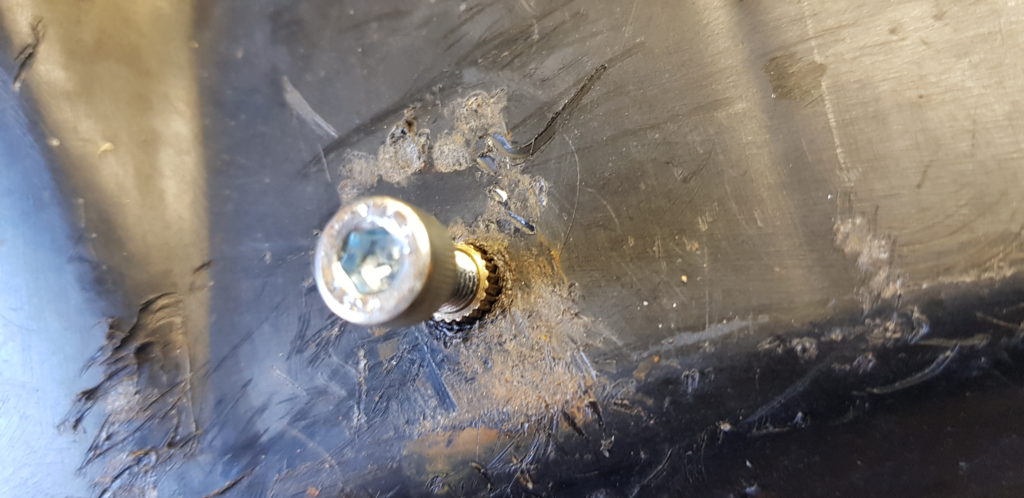
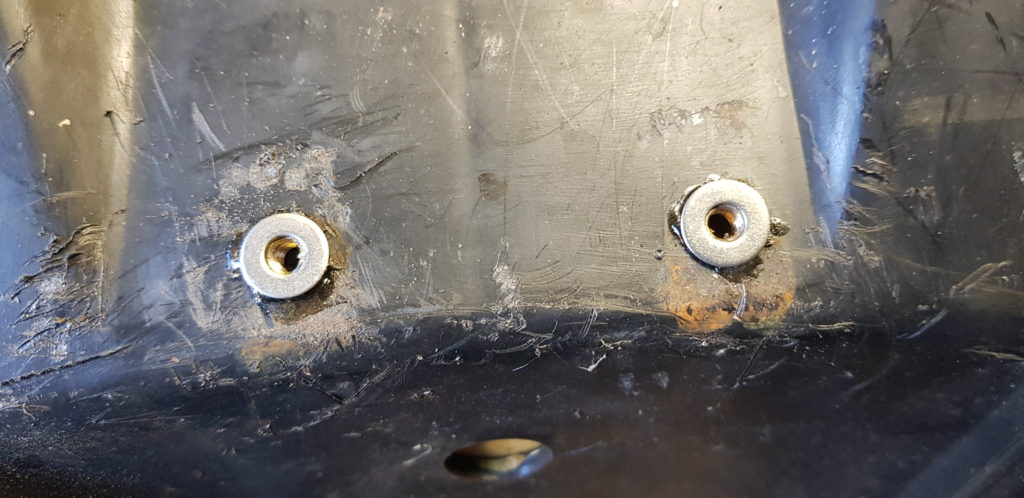
With that done I turned my eyes to an irritation I have had for a while. namely the seat bracket. When I got the bike the seat was loose but there was a bracket there. I looked to see if I could buy the genuine BMW parts but it seems I am missing bits from the seat so therefore no locking seat for me. The bracket on there annoys me as the two screws don’t actually bite into the plastic so are going to fall out at some point. I, therefore, ordered some of these,
I do like to collect lots of random stuff, as my boss says “you are a magpie”. These are more for the 3D printing fans but I thought I could press them into the plastic and then use the thread as a way to prevent it from getting chewed up by self-tapping screws.
The Bracket I inherited
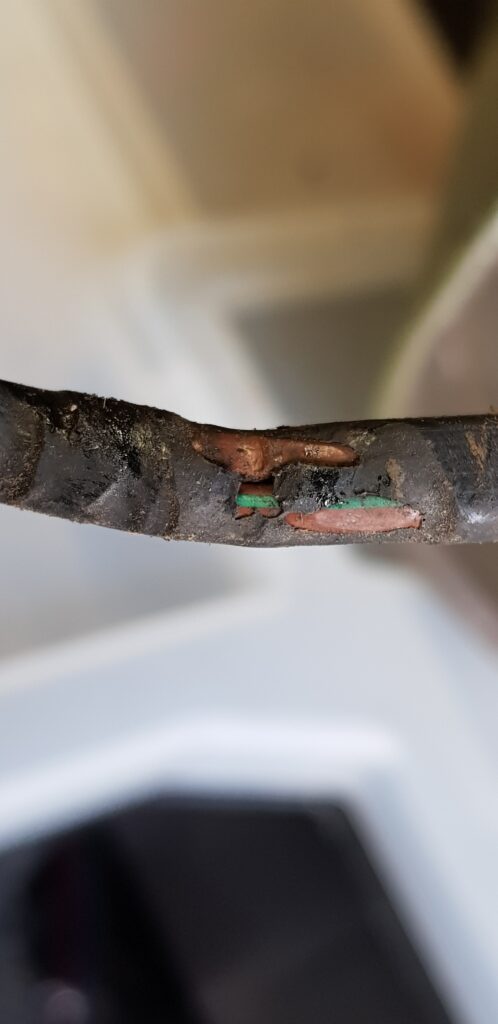
The screws don’t very well.
Tapped in with a hammer, and a bolt.
It was a simple task of cleaning the hole up with a drill, then tapping in with a hammer, using the bolt to make it a little easier. I did try to heat the insert up with a solder gun but that didn’t work. But the hammer them in trick did ok. I then tried to use an old cable tie and the solder gun to weld it in, didn’t do much other than move plastic about. So I used some glue to give some strength and some washers to help spread the load. Some M5 bolts were then used to hold it in place, I took a few extra mins to give it a quick dusting with paint to finish it off. It isn’t a stressed part of the bike but I would like to stay in place. Time will tell if my bodge of a bodge will hold.