The Prince of Darkness Delivery

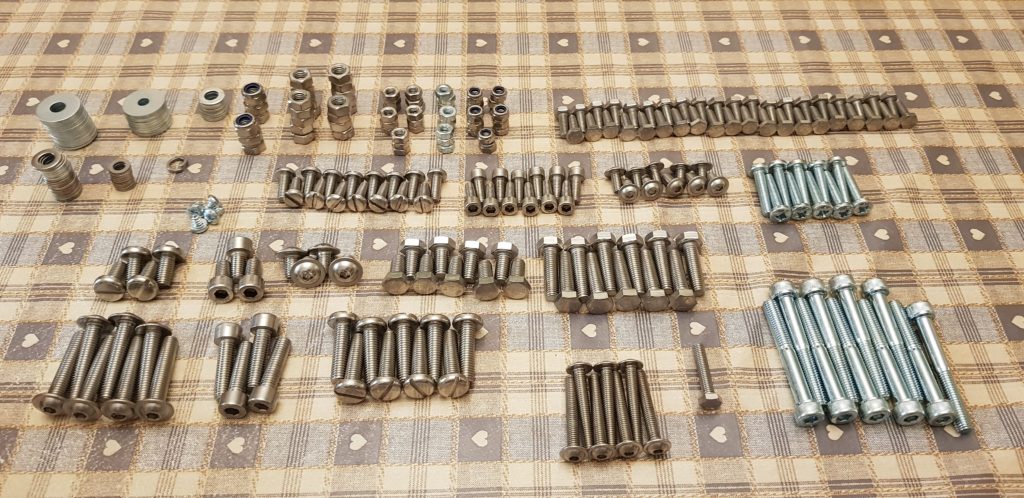
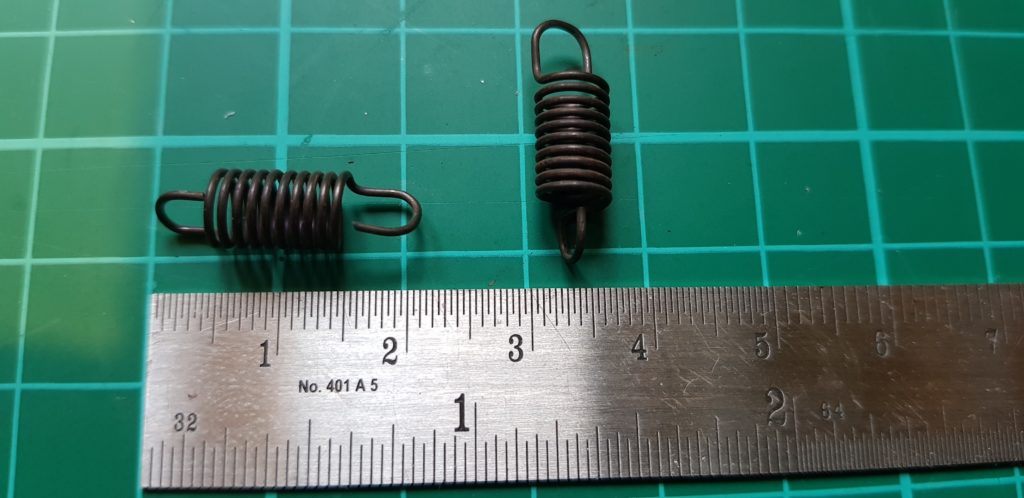
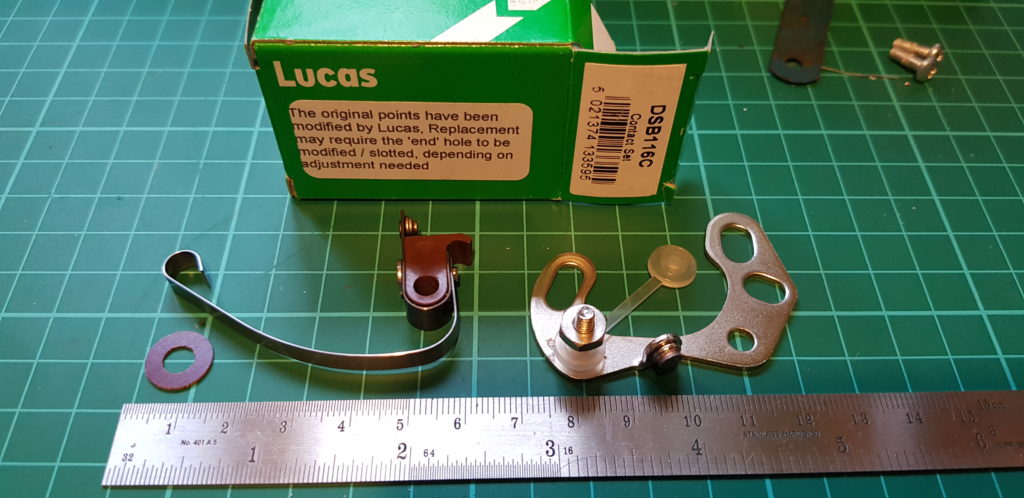
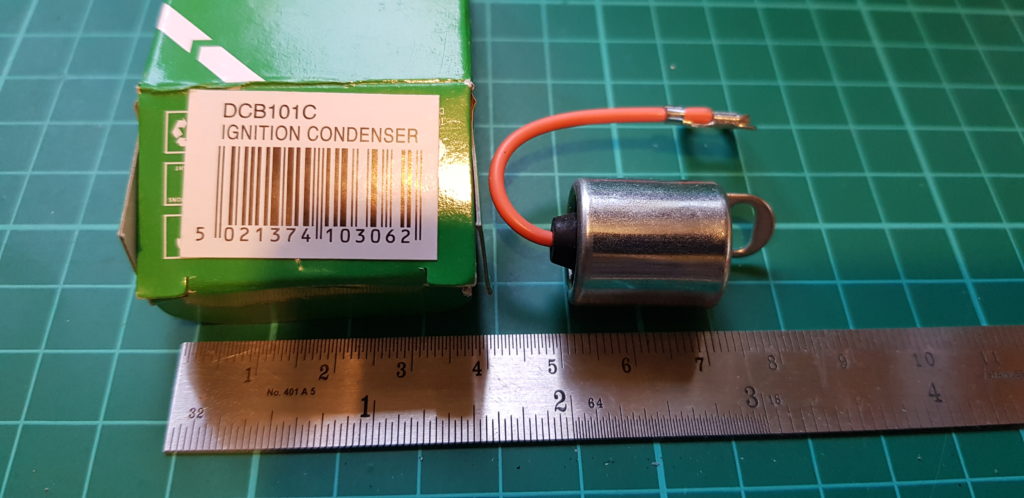
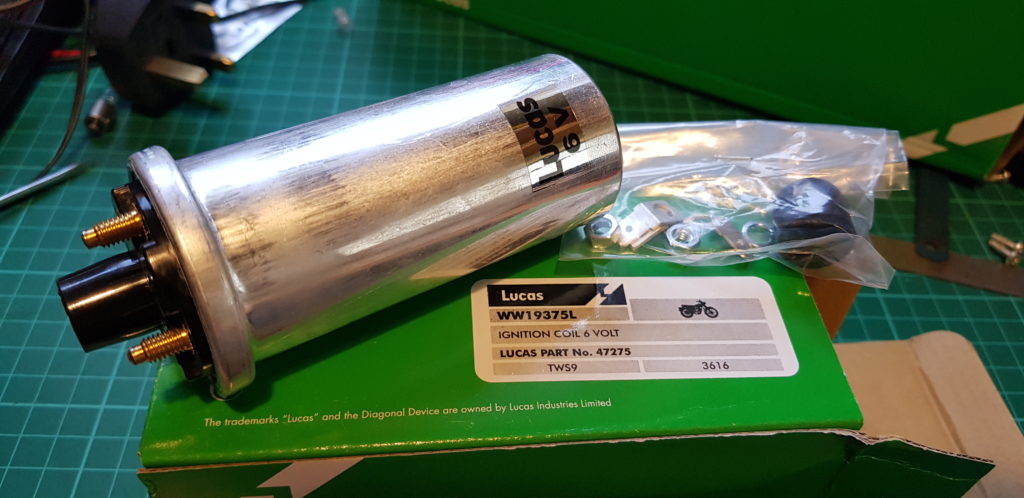
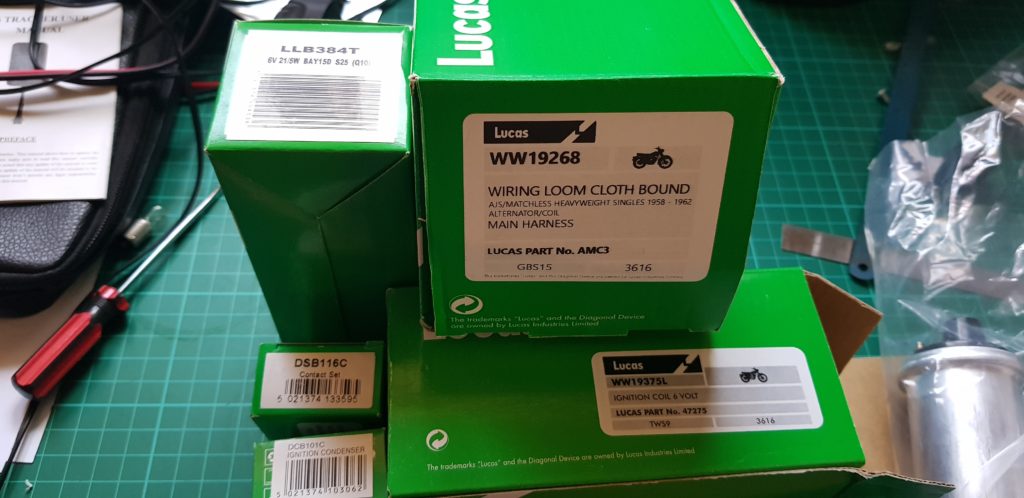
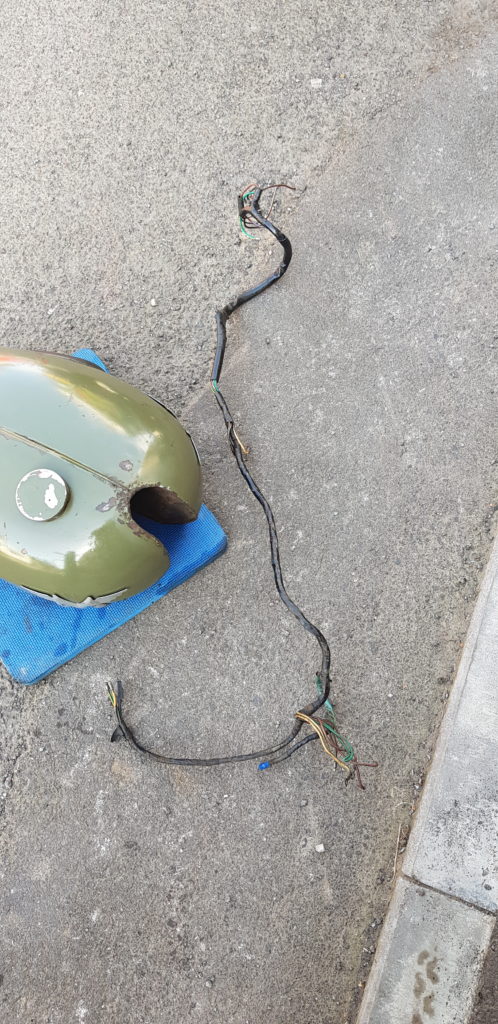
Well, Lucas didn’t deliver the parts but I did end up with quite a few of them from a few firms. With the search to solve the issue of the bike stopping after a few miles, I wanted to get a new coil, points and a new condenser (spring for the auto-advance/retard just because). While I was ordering this I had planned on making a new wiring loom but by the time you take in for the connects and wire the project was going to be rather costly, I had got a quote of ~£80 for a new loom but while I was looking for the coil I spotted I could buy a genuine loom from Lucas for £35 so I did.

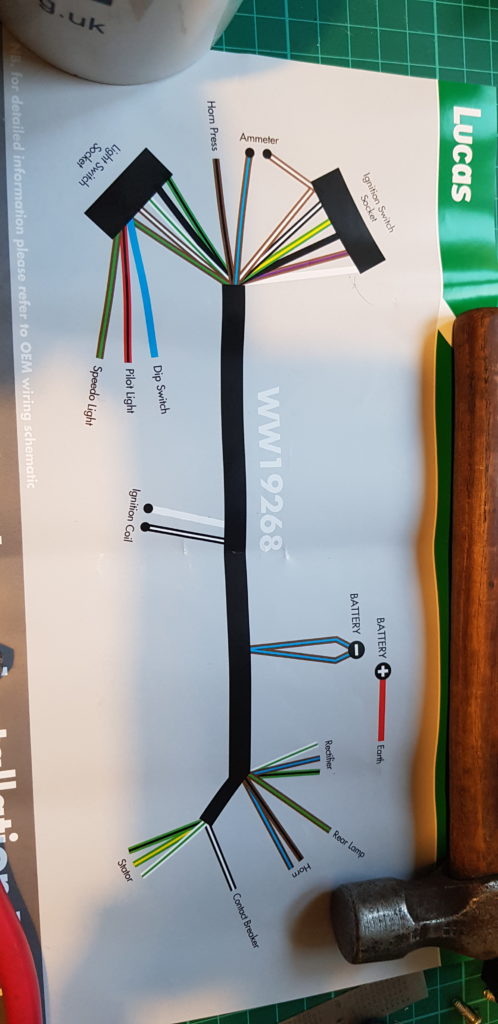
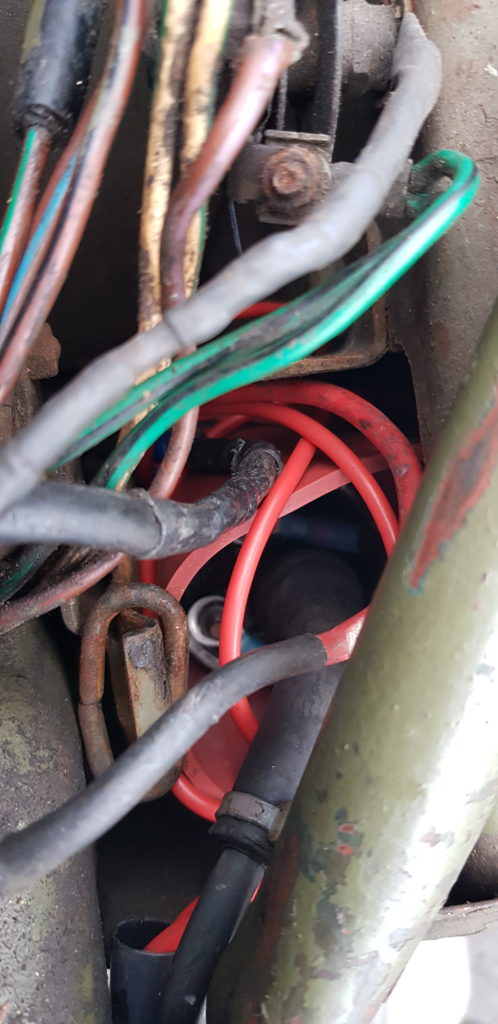
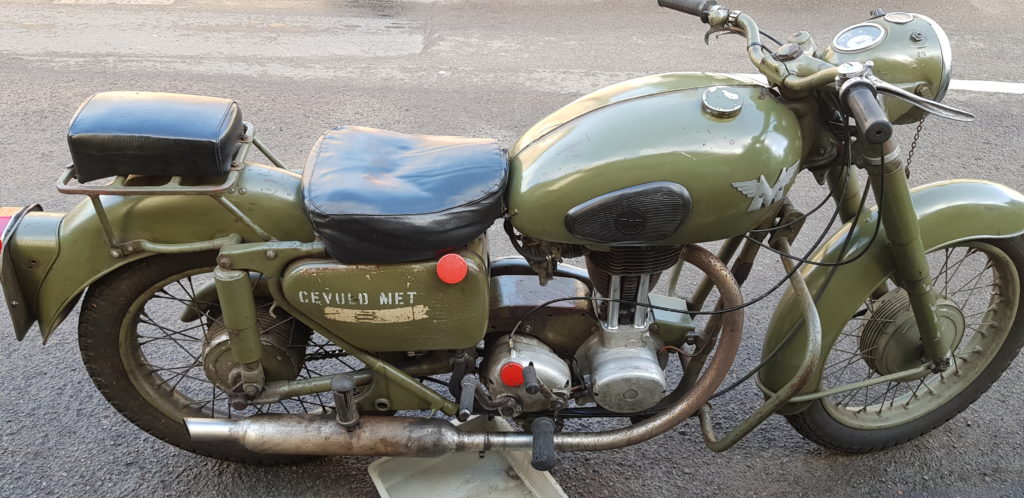
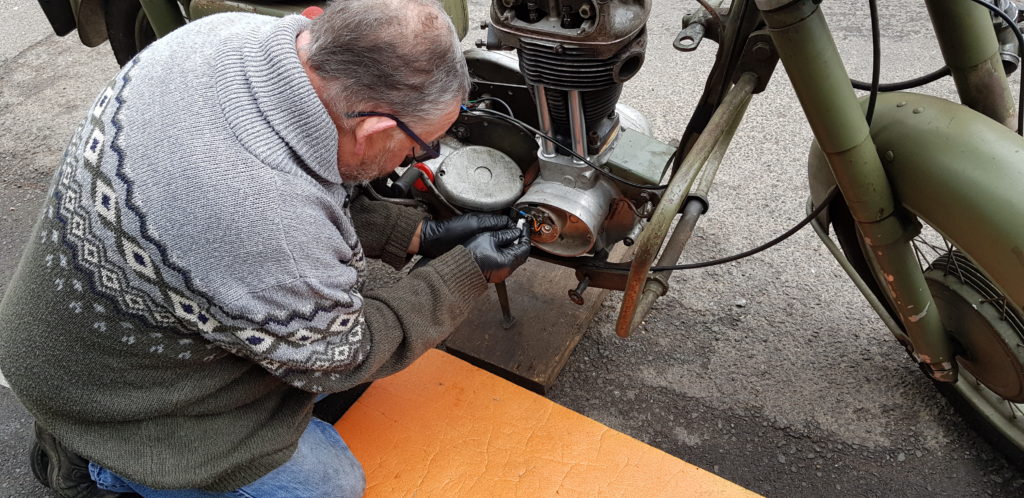
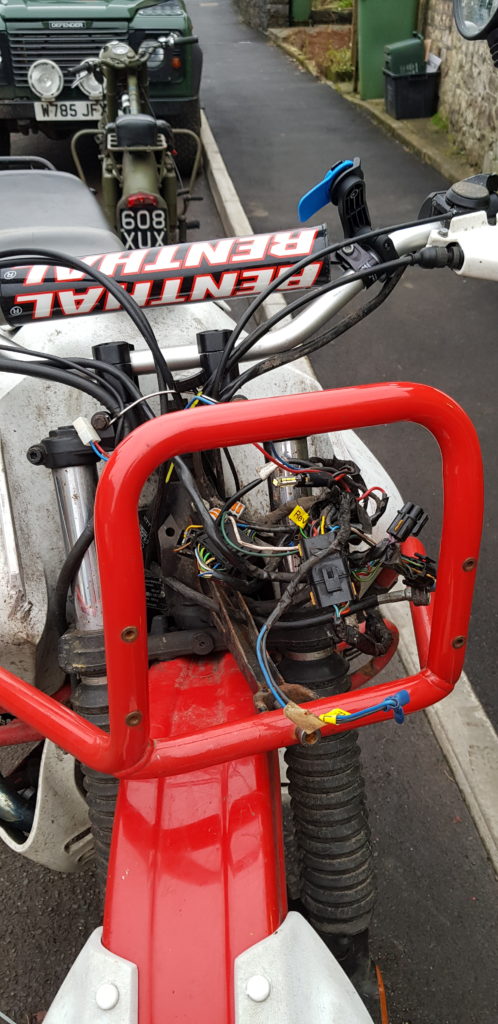
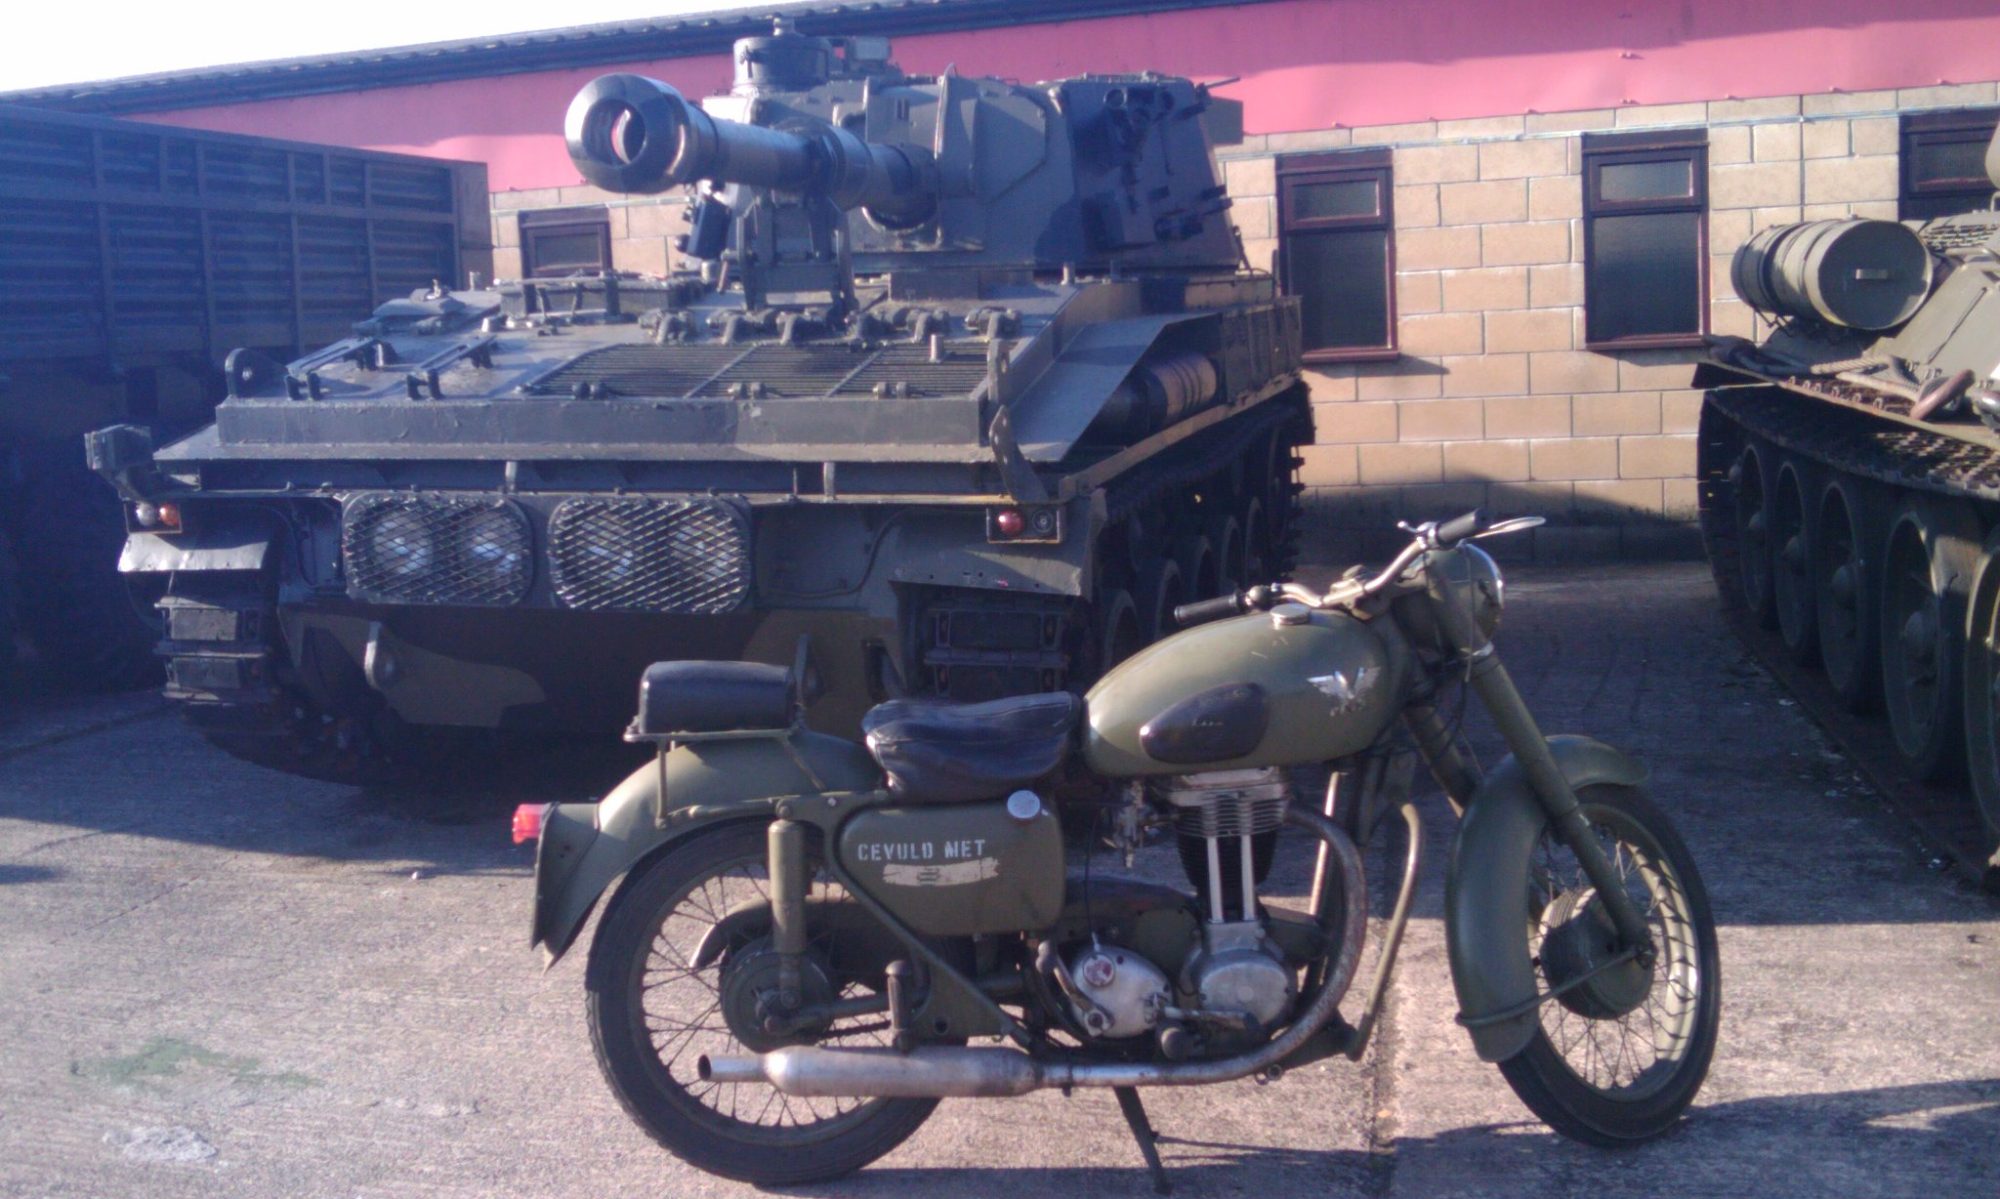
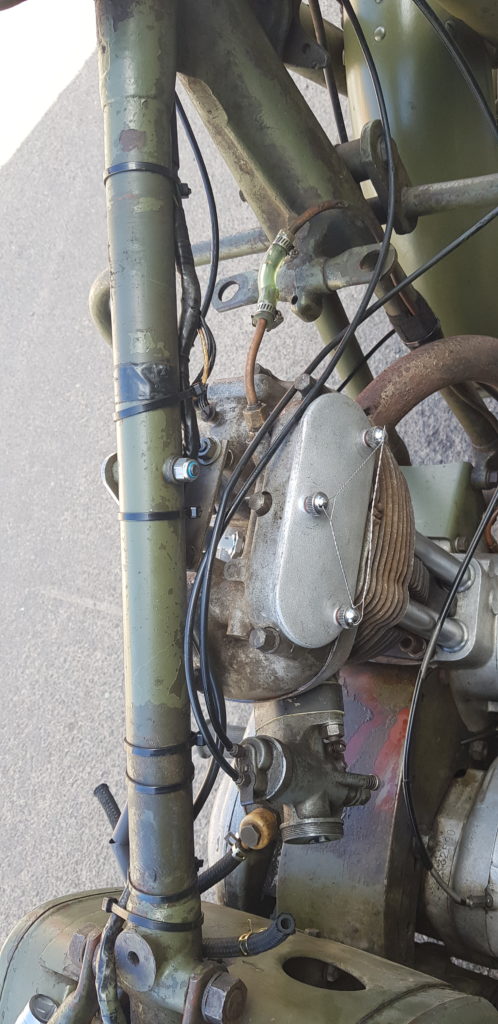
I still plan to make my own loom just because I can but I now have the old loom to go on as a basis for the new one. It isn’t a very complicated bike so I set to dismantling the bike. The weather is sunny but its cold and that wind is even colder but I still set about it, working from the front to back. I did like things like an extra red wire in the loom which I have taken to mean it is there is an extra earth wire from the headlight area to the battery. Remember it is Positive earth on this bike.

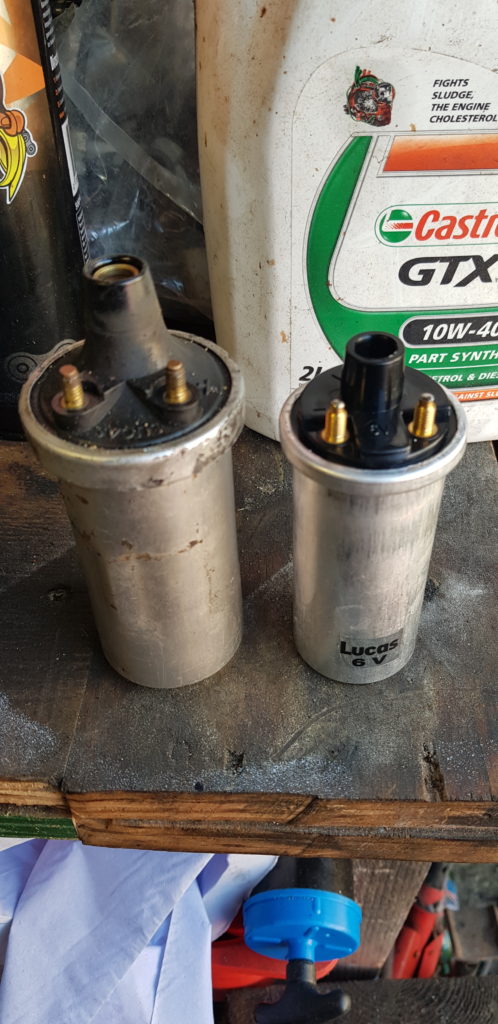
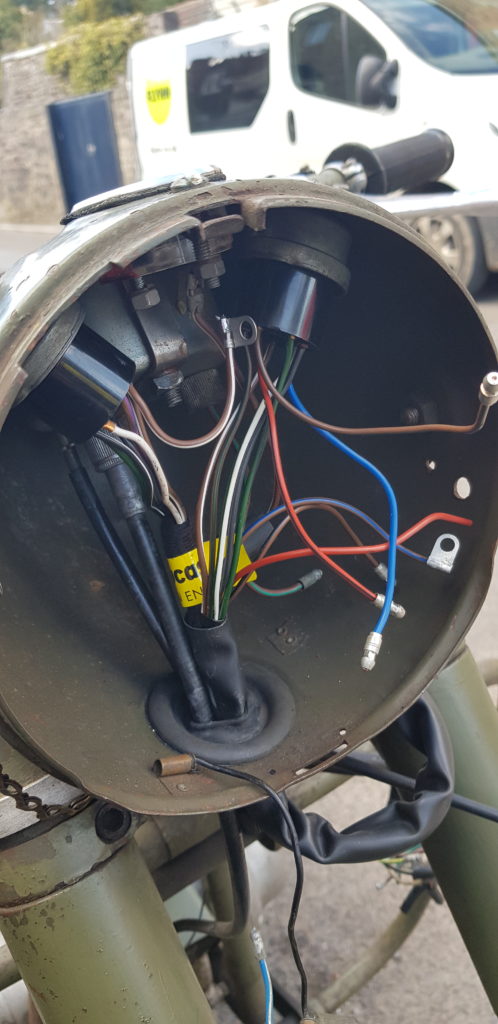
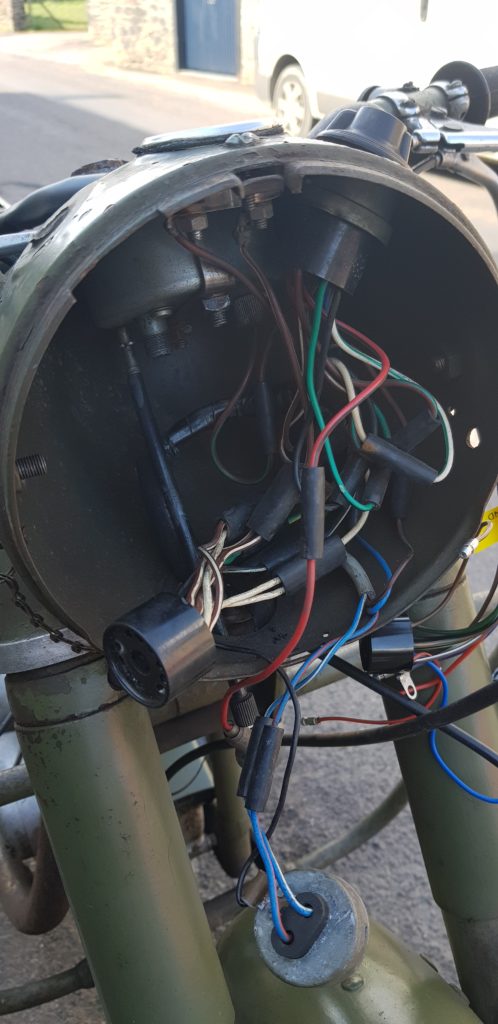
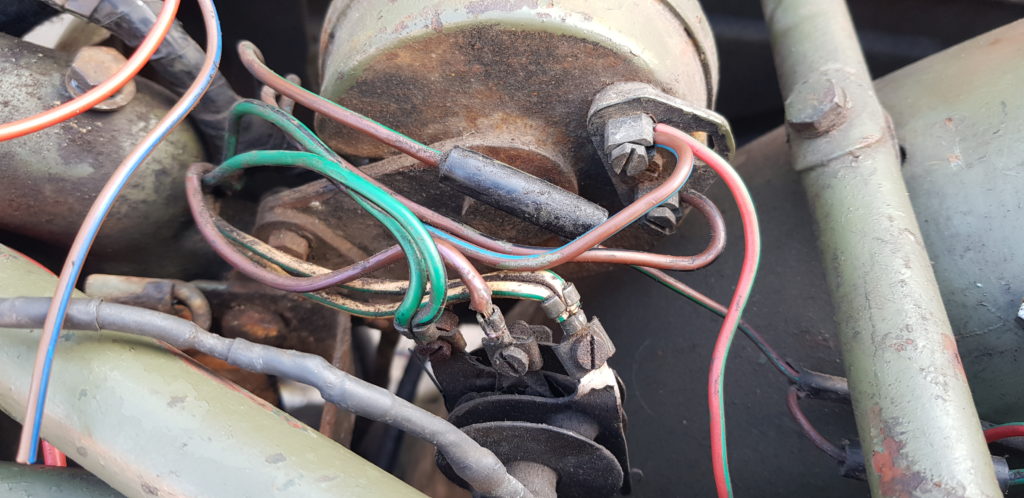
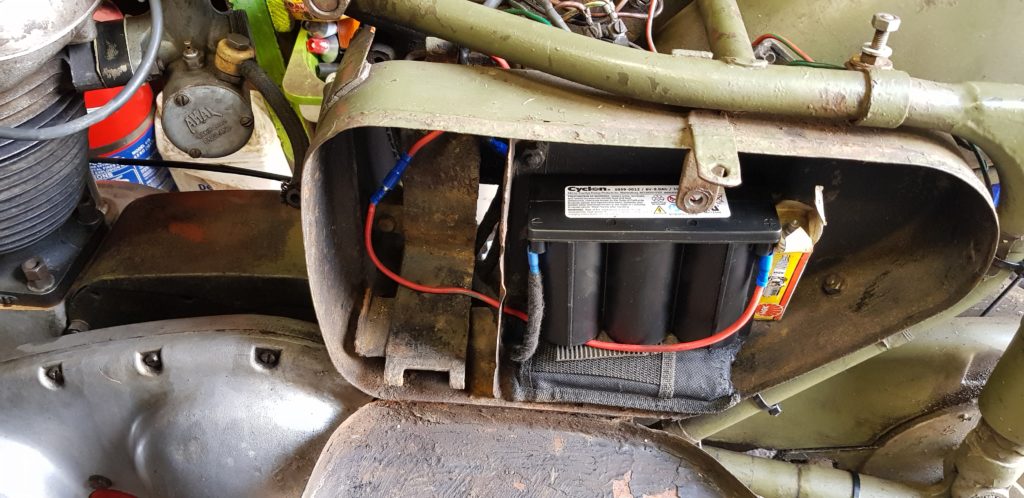
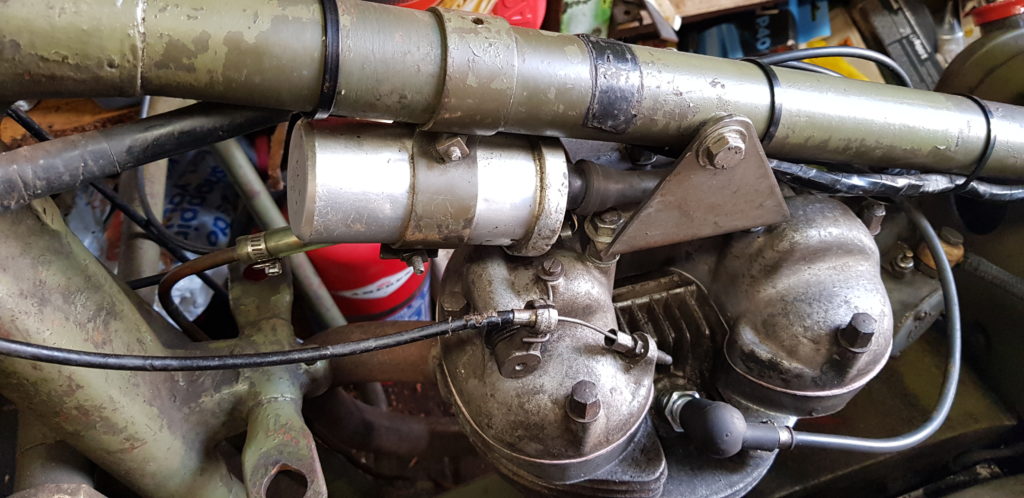
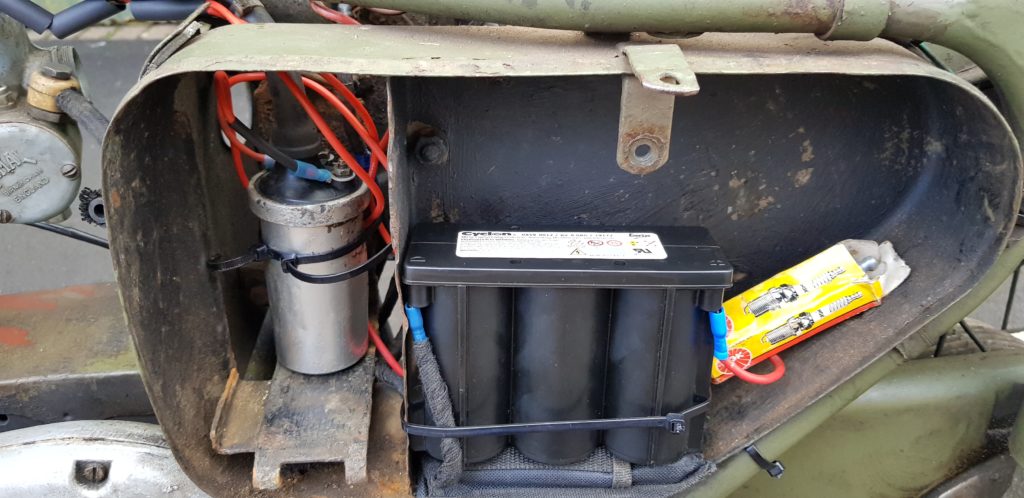
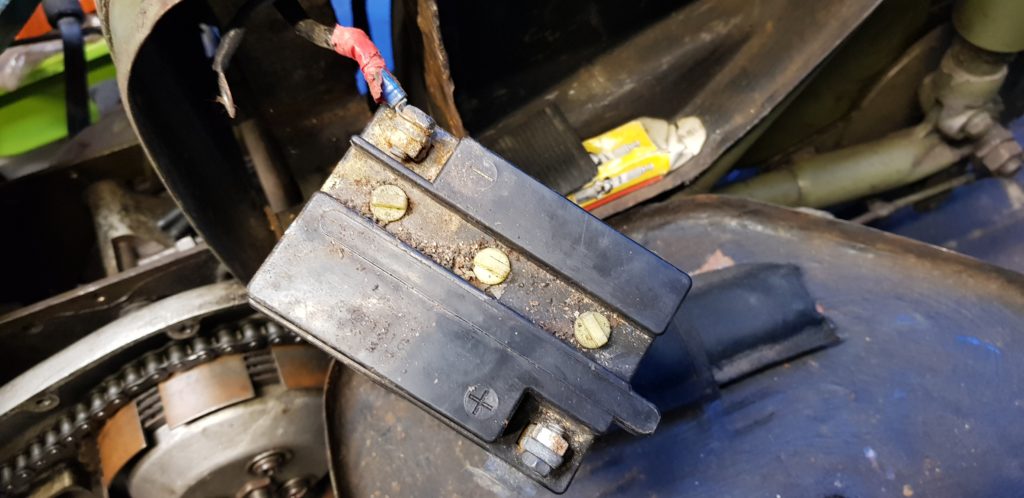
I will keep the coil in the battery box area and I extended the wires for that. I am looking to fit a modern regulator/rectifier and that meant chopping the new loom to fit different connectors. I got most of the way but I was finding the wind was getting me rather cold and I was starting to drop bits and get grouchy. So I stopped, it is not like I will be going very far on the bike for a bit due to the COVID-19 restrictions.

This pause in work will allow me to think about how I plan to wire the battery into the bike. Plus anything else that pops into my head in the meantime.

Starting to go a bit further

I have been doing a few local short trips to build confidence with the bike and to run it in. If it was to break down it would be near to home and save me being stuck out in the sticks miles from home. These rides have gone well and I have enjoyed getting to ride the bike again. My friends have already started to queue up to take a ride on it and my usual rule of you need to be able to start it before you can ride it.

But while I wait for them to get their kickstart skills in place I had the opportunity to be able to ride it to work. The ride isn’t far but should only take 20mins, I gave myself 30mins. I needed all 30 of those minutes to get there. There I was happily riding along and then it started to slow, I was taking it steady as its still a new piston etc. Then fear came in and I pulled the clutch in, the bike came to slow and steady rest near a driveway and it isn’t easy to put your left arm out when you have your left hand holding the clutch in. I was a little upset with myself for this but at looking at the ammeter I noted it was way over into the negative side. I turned the lights off and wandered around the bike and tried to start it again, it started easily and I did notice the engine wasn’t super hot just nice and warm. I got my kit on and made it another 2 or 3 miles before it packed in again, pull over wait a few mins, start and continue. I would like to say I took photographs of this but I wasn’t really in the mood for it just then. I got to work with moments to spare. The ride home had another 2 enforced stops. This meant I was a little grumpy on Friday evening. The thought was I had seized it a few times or I had Electrical Pixies leaking somewhere.

Saturday morning dawns and I head off to the VMCC Autojumble at the Bath & West Showground armed with a mental list of things to buy. Also, strict instructions not to panic-buy any more motorcycles. For this was the show where I ended up buying the BMW R100GS PD.

While at the show I did come away with a new rectifier & fuel taps for the Matchless (or AJS). I didn’t find a Valve Spring Compressor for the AMC heads, it looks like I will have to make my own. Though the find of the day came on the last few stalls, out of the corner of my eye I spotted some very distinctive paint, could it be, yes it was.

Headlight Grill for a BMW R100GS Paris-Dakar.

This is just a light grill and I was planning of making one with the laser. But at £2 for what the breakers want to charge £40 for I was rather happy that I spent the £3 getting into the autojumble.

After my excitement of the Autojumble I went out to inspect the bike and upon inspecting the bike I remembered one of the issues being the bike doesn’t seem to be charging, hence my purchase of a reg/rec for the bike so I guess it might be a pixie leak. Plus brake light doesn’t seem to work now, but headlights and rear light do. I took off the seat and looked around for any issues, I had found a wire loose from the horn and thought I might test that, oddly both connectors on the horn have power when I ground the chassis (positive earth) and disconnecting the wire I had fitted there caused the horn to fail so I put that back together. Now it was time to probe the rectifier, I start the bike and probe away, No voltage except for the 6V from the battery. No power is getting there. I check the leads out of the alternator and they are fine. Then I happened on a chance sighting of a bit of light, a spark! Hmm, and I looked in and saw.

Its a crap video I know. This is the coil, I had moved it because my Dad didn’t like it under the tank as it makes it a pain to get the tank on. Well, it was shorting to the chassis. I wrapped some nice thick rubber around it.

I started it again and now I get 4V AC on either side of the rectifier and 7 DC on the output. Problem solved, I hope. I didn’t fit the fuel taps as the petrol leak as stopped for now, but I have the taps ready just in case it gets worse.

Finally Back on the Road

After far too long the bike is now back on the road. Saturday was spent doing a few things to the bike such as not fitting a regulator/rectifier as I bought one with a Dynamo bike and I have an Alternator bike. Not to worry as that part will get used on the AJS once I get around to getting that to work.

One of the jobs was to finish off the failed attempt at drilling and tapping a nut, I visited my Uncle who is a dab hand at welding etc with some replacement nuts and the tank. Just ran a tap down the thread which has seemed to have done the task of taking it to a 5/16″ x 22tpi BSF thread even though it was 5/16″ x 26tpi Bicycle thread that has had an M8 bolt stuffed into it at some point. I may have to revisit this one day but I think that will be once I have learnt to weld.

Matchless G3LS Tank Mounting

The above picture shows the correct setup for the mounting of the tank. Since I have had the bike we have never managed this due to various bodges that others had done to this bike before we got it and the lack of correctly sized bolts. Now thanks to an AJS/Matchless owners club in Denmark all the manuals and data for the bikes are in an archive online, http://archives.jampot.dk/. I was able to find out the correct mounting solution, order the bits. Though I did have to ask another person on the owners club about what size bolt it was. 1.1/4″ Long 5/16″ x 26tpi Cycle Thread, I have cheated a little and gone for BSF just to make getting bolts a tag bit easier. But I am keen to remove any Metric stuff from the bike, its an old bike and should have the correct bolts for it. Anyway, I digress. The tank took a bit of fiddle and levering to fit and now it is on and good.

Tank bolts in place.

With the fuel tank on I needed to get the fuel pips back on, a good part of the time was spent looking for the 3 way adapter we had for the bike and was put away in a safe place for when we got to working again.

Fuel Pipes warming up before fitting.

Posh clips used because I could, the pip is in hot water to help get it onto things.

Then it was time for the important things, such as improving aerodynamics. So this item was removed to give me extra HP.

Oh and this fell out of the exhaust pipe,

Honest guv, it just fell out.

By the time I had done all this, it was dark and cold. So I had to wait until Sunday to go for a ride. You may also notice a new Genuine Lucas rear brake light lens.

As you can see the gear lever is set to trials mode and will need adjustment.

Sunday and I robbed some fuel out of the BMW and put a litre or two into the Matchless. I started it fairly easily and warmed it up and took it for a quick ride around the block. Where it coughed and spluttered along until I pulled over and remembered this bike never liked the choke. Then I rode home and waited for it to cool down. Took this time to give the bike some extra air in the tyres and also a Polish using a Dirty Oily Rag.

Standard Drip tray in place, it is a Classic Bike.

This amused some on the Social Media saying aren’t you worried about Oil getting on your clothes or damaging the paint.

The original paint can be seen.

Nope, not worried about damaging the paint in the slightest. As for getting oil onto your kit, well its a classic bike it is bound to leak some fluids. Currently, it seems happy to leak fuel from the taps on the tank. These have cork in them and that has a habit of going dry so needs a bit of time to soak and swell with some fuel, I hope.

Oiling the tank does make the water bead up.

It then rained and prevented any more rides for a bit. I am trying to do short rides to bed in the new piston and to check everything is on where it should be and I won’t have it blow up miles from home. Thankfully it dried out enough I could go for another ride. So I went and visited my Gran and stopped for a picture on the way home.

Top of Stockhill in Chilcompton.

Next weekend is the classic bike show where I bought the BMW. Let us hope I don’t panic buy myself another motorbike while there.

Adjustment for the Headlight

The BMW headlight I found is at a strange angle and it needs adjustment. I suspect in a previous life it is been crashed. Now as I have the head in bits this a good time to try and fix a few things. Now I did try and order replacement parts online but a company offering the parts and having them available on their website for ordering turned around and said sorry we don’t have the bits. The left me the option of refit and ignore the headlight that is pointing the wrong way or try and fix it myself.

Headlight removed after a bit of hacksawing and you can see the two bolts, they are meant to rotate, but they don’t. Placing the bolt in the vice and twisting just twisted the bolts. This meant I had to drill them out, I tried the pillar drill but drill bit would wander so I got the hand drill out and did it myself.

It is not pretty but I meant it could rotate the bolt out. To prevent this happening again I decided that I could use an M5 wire insert (yeah I like them) with a A2 stainless bolt.

Then I turned to the headlight and the plastic cups at that end, it was a pain to get out but good use of pliers and it worked.

Only for me to see the next problem, the bolt heads,

Yup they are rounded, grr. A quick measure suggested about 7mm. This meant I had to take off quite a bit of material from A2 Stainless.

With the aid of the bench grinder, I started to do it by hand, that was too slow so I fitted the bolt to the drill and set to it. The first bolt was nice and easy.

Did the second, and got overexcited,

But I tried another bolt, I had spares. Got it to work fine. Though I suspect I will be in trouble with the proper engineers at my abuse to the stone on the grinder.

With a bit of faffing, I soon refitted the bolts. The BMW used a thumbwheel that sat on two flats ground into the bolt. This often means the thumbwheel falls off. I had purchased some nylon wing nuts as at the time of buying bits I wasn’t sure how the headlight adjustment worked as everything was rusted in place. With the extra know-how after taking it apart, I need to find a way to lock the wing nut in place so I can use it to adjust the light. So a Flange Nut (with serrated edge) and a nylock nut have been used to lock it into place.

Another small task that kept my happy in the shed for a few hours.

A little more tinker time

The Matchless now runs but as with all things, there is always more to do. I wanted to get the bike on the road and take it for a ride but there was a few things annoying me. The worse being the fuel tank mounting.

Since I got the bike all those years ago the removal and refitting of the tank have always been a task. I even bought the correct bits for it which just didn’t come close. A few questions asked on the owners club forum and I was informed the correct bolt is a 5/16″ x 26tpi Cycle Thread bolt of 1.1/4″ in length.

The threads into the tank mounting have been damaged and other bolts have been forced in. I plan to drill, tap and use a wire insert (aka Helicoil) a 5/16″ x 22tpi BSF because I have some inserts leftover from the cylinder head work I did a few weeks ago.

I managed to tap the top nut with ease and that made me feel good, even if the swarf from the drilling did cut up my hands a bit. As I found out the next morning when I did the washing up in rather hot water. But back to it, the lower nut for some reason would not drill, I have tried sharpening drill bits, using other ones etc but no luck. Rather than get overly annoyed I have decided to order some 5/16″ nuts with the mindset of just griding these off and then visiting my Uncle Jamie to see if he will weld new nuts on for me (c’mon I have only just upgraded to an Angry Grinder – They are Always ANGRY).

To fill my Shed time with something productive and because the Stormy weather was actually Sunshine (in Somerset) I felt I had to carry on. I decided to fit a new battery as the Battery I recently bought for the bike has a fault and is only giving me 4 of the needed 6V. I did some googling and found this interesting article from a fellow Matchless owner which talks about fitting 2x Hawker Cyclon 0809-0012 6V 5Ah batteries to the bike and wiring them either in series (12V) or parallel (6V) and that would give you 10Ah and fit in the Lucas battery box. Well, I don’t have a Lucas box so not much use to be so I opted for the 6V 8Ah version going on the assumption that I don’t really use the bike a lot and that battery would still fit and is quite compact.

There isn’t a fuse there at the moment and I think one of the next jobs will be to fit one. I am not worried about it taking up space there in the box because unless you carry a screwdriver in your pocket it isn’t easy to open.

The bikes Coil sits under the tank and often is in the way when we try to refit the tank so as I had the electrical bits out I thought I would see if I could move it to the airbox area or some other convenient spot.

Not too bad and it may change but just for now it works.

I told you it works. Some of you observant people will spot another little job, I used some lock wire and special lockwire pliers to lock the rocker cover nuts in place, they have a habit of vibrating loose. This will have to come off to adjust the pushrods at a later date. For now, it is just, starts it, warm up and let cool. The clear bit of pipe near the head of the engine is on an oil feed pipe and there so that we can keep an eye on the oil, which is fun as its a light green at the moment.

I haven’t done it to book as there is a technique which means that you tighten rather than loosen the bolts thanks to the tension applied by the wire.

Now to wait for the bits I ordered, including a posh Reg/Rectifier as I suspect the original device isn’t working as it should be.

We had a Phut

Today work continued on the Matchless, the head went on, the rocker is on, the alternator and chain case went back on. Then it was some faffing to fit new oil pipes etc.

The worse bit, timing, we have never had much luck in finding and easy way to get this right, not helped by a piston that is domed and lots of books with differing ideas on what to set it to. But recently I found a wonderful archive of manuals for the old Matchless etc online. http://archives.jampot.dk

Well we think we got it right but the spark is a bit rubbish and not as consistent as I would like. We took to adding some petrol and giving it a damned good kicking. But that is where we found out the decompression lever needed more adjustment.

We gave it some more kicks but no luck, we both were getting cold as the wind was being lazy and there was the hint of rain in the air. Though I did get a phut out out of the carb once so we know she will fire. If the weather isn’t crap I might try again tomorrow. Tonight I shall mostly be reading up on stuff.

Watts Down with you

With the wet weather at the weekends making it less enjoyable to be outside in the shed working I haven’t done much.

But Saturday morning some T5 LED bulbs I ordered from China turned up. The idea is to replace the 12V 3W filament bulbs with LED in the instrument panels of the bike. They are brighter and require less power to light up the dash, but I wanted to do some tests to prove this.

DescriptionVoltsAmpsWatts
12V 1.5W LED120.0280.336
LED in Holder120.0290.348
12V 5W Filament120.2002.400
Filament in Holder120.1982.376
% Of power15%15%
Power Saving0.1692.088
If all 6 illuminate1.20014.400
in LED0.1742.088
Saving1.02612.310

This was gathered with my benchtop power supply, which I checked against my multimeter. I know I ought to do some proper calibration stuff on my kit. I found it interesting that The Amps went up with the LED in the holder vs the Filament in Holder going down. I Suspect a bit of resistance along the wires and connector giving me a slight voltage drop etc. I could go into this deeper and do some actual measurements but not really worth it.

This then starts on the next issue, brightness. The LEDs are rated at 100 lumens and that should be bright enough but the risk is that its too bright.

LED to the Left, Filament to the Right.

The camera lies a little as the left icon actually displays quite nicely. But the issue is will it be too bright at night, well indicators I don’t really worry about but the High Beam, well that is another issue. For this test, I locked the camera down to 2000ths of a sec and an iso of 80.

Filament on the left and LED on the right.

A fix was needed, thankfully I have a pen, a marker pen.

So I test again, LED vs LED with some maker, oh and the Filament bulb just for comparison.

LED, LED with Marker, Filament.

I have never been a fan of really bright main beam indication lights, it kind of ruins the night vision. I will test it to see how it fairs once on the bike. The AMPS/WATTS (75%) saved isn’t suddenly going to transform the bike but I would like to save as many WATTS of power I can so the can be used for other things, like the phone charger and more power to the headlights. Reducing those moments where the bulbs dim as the revs drop especially when you get near a junction. Don’t know what I mean, well lucky you.

EDIT: I still have the B9ES bulbs in the speedo and rev counter to replace and now I can’t remember what colour I ordered. I might do the same experiments with those just as a guide.

The stuff I painted last week are nice and dry but still hanging up as the weather is crap and only a small sighting of blue sky just before darkness descended has left me little enthusiasm to get the next bit done. Though I have had a shipment of Raptor Paint and Tint of red which I plan to use on the crash bars, more on that later.

The Painting Begins

Since buying the BMW the paint finish has annoyed me. There are patches where the primer can be seen, cracks where the parts have flexed and the paint hasn’t, and a horrible mark left on it when someone removed the cover off the front brake and promptly let brake fluid drip down the paint.

Last weekend I started to take the front end apart and have spent the week teaching myself FreeCAD so that I could design some spacers to fill the hole where the indicators go as I have been using large washers for now.

Outer, Middle and Inner spacers. To be cut from Perspex using my 40W Chinese Laser Cutter
Parts ready for sending to my Laser Cutter.

There is a storm planned for the weekend so today seemed like a good time to get a few bits done outside leaving me tomorrow as to play with the Laser etc.

A bit of wet and dry and some scotch bright to flatted the surfaces down, I have tried to remove some of the marks from the old paint job and the runs.

I am using the rattle spray cans of “Plastics in One” from Buzzweld that I picked up at the end of the summer.

I will inspect the parts once they are dry and I hope that they flatten off as currently its a bit orange peel in texture. I suspect that was because I wasn’t waiting long enough between coats.

I am not an expert painter, but the only way to learn a skill is to try it. I still have side panels, fuel tank and now I have seen the red, a front mudguard as well.

More light Igor

This weekend I visited the local bike show where I bought this BMW but this year it was more of a club event rather than autojumble etc. So disappointed that I didn’t buy another bike (part of me was a reasonable sized 2 stroke) I returned home and thought of what else to do.

I have been thinking about the lighting or lack of lighting on the bike for some time. So recently I purchased a LED Driving/Fog 300mm Light Bar thing for not a lot thinking it would mount to the tabs that the oil cooler mounted on but are free now I have moved the cooler. Well, I test fitted it to the bike.

Test Fitting of a cheap LED driving/fog lamp.

But that looks just silly. Therefore my plans are to mount some round lights up on the crash bars around the headlight. I have some LED work lights that I think should do the job.

The other part of the problem is the headlight I have on the bike. It looks to be out of position by a fair amount, and I have been testing a LED headlight bulb that has the same issue I had with HID, nice and bright but once the light starts to drop off it almost feels like it has gone over a cliff edge. I ordered some Osram Nighbreakers as I have them fitted to the Land Rover and are rather nice so I began the task of getting to the bulb, then I thought I better look at the adjustment screws for the lights and the next thing I know.

Part of the reason behind removing it all was the panels needs to come off before I paint them. The crash bars could also do with a bit of paint. The headlight screws are rotten and don’t adjust. Also in the process or taking bits off I noticed some more bodges by the previous owners and I would like to fix them.

While I also have the clocks off I am going to look into replacing the dash lights with some LED stuff. Not for brightness but because every amp I can save gives me more amps for other things.

Two Steps forward, one step back.

Over the weekend I ventured into the shed, admired the offerings to the Geds that hang on the garage door. But I had to stop as I was getting cold and I wanted to do a bit of work on the Matchless.

First, the battery came out, and that proved that after 5 years that the battery is ducked, well its showing 1V, I will give it a go on the charger but holding my breath.

Then it was time to have a look at the task I was in there for. Recently my Dad has restarted working on the bike again, but after breaking a piston ring we had to wait until I could track down some replacements. As he was getting ready to do that he then mentioned that some of the threads holding the rocker cover down are the best part stripped,

Now I made the mistake of going onto the forum for the Matchless owners club and looking up the parts diagram and finding the bolts stated “Rocker Box Cover Bolts” and that part number relates to a list of bolts. The mistake was assuming that the data was correct, and it is if you own a twin. So I ordered the wrong thread inserts. That meant I had to measure them at which point I got the right ones. Remember the Matchless is pre Unified so you have BSW, BSF & BSC all on one bike, thankfully these days I am a bit more clued up on threads so it doesn’t daunt me as much now. Armed with more info I ordered the correct inserts, and some extras as well.

Cycle Thread 26tpi

and more. Some of you will notice there are two taps in the case, that is something I have now learnt, you have the tapered tap and a second tap that is for finishing the thread off.

BSF Thread

But back to the Matchless, after attacking it with a drill I had a clean hole.

Then some tapping,

Then a quick insert,

I even used cutting oil which does half make it easier,

Need to think about getting or making some more bolts like this as these do look a little second hand, I have found stainless ones but that isn’t wise with an Ally Engine.

After all that I wanted to rest for a bit so I found a bag of random bolts we picked up at an event and I took to sorting them.

Yes, I am a sad person, I have all of them sorted by size and length this is supposedly called Knolling. They go into neat storage boxes so I can find them when I need them. But these are Metric so not much use of the Matchless.

But back to the Matchless, we removed the valve springs etc so I could clean the head and so that we could re-lap the valves. Upon re-lapping it was noted there was a slight issue with the valves.

Yup, that’s right. They are bent. To give you an idea of the failure we are talking about here is some pictures of the state of the piston.

So this week I have been awaiting new valves, which turned up tonight with a tool for fitting the springs as the special G-clamp we have died.

The tools use is still to be tested but the manual does show how to use it.

That is it for now, this weekend is the Classic Bike show in Shepton Mallet and I am trying to avoid buying another basket case bike, last year a BMW R100GS PD followed me home.